HP xp7030 User Guide - Page 34
Using the on-screen menu
 |
View all HP xp7030 manuals
Add to My Manuals
Save this manual to your list of manuals |
Page 34 highlights
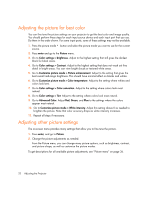
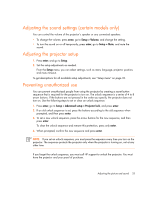
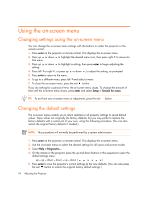
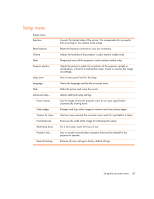
Using the on-screen menu Changing settings using the on-screen menu You can change the on-screen menu settings with the buttons on either the projector or the remote control. 1. Press enter on the projector or remote control. This displays the on-screen menu. 2. Press up or down to highlight the desired menu icon, then press right to move into that menu. 3. Press up or down to highlight a setting, then press enter to begin adjusting the setting. 4. Press left or right , or press up or down , to adjust the setting, as prompted. 5. Press enter to return to the menu. 6. To go to a different menu, press left and select a menu. 7. To close the on-screen menu, press the exit button. If you do nothing for a period of time, the on-screen menu closes. To change the amount of time until the on-screen menu closes, press enter and select Setup > Timeout for menu. TIP: To exit from any on-screen menu or adjustment, press the exit button. Changing the default settings The on-screen menus enable you to return selected or all projector settings to saved default values. These values are originally the factory defaults, but you may prefer to replace the factory defaults with a custom set of your own, using the following procedure. (You can also restore the original factory defaults if needed.) NOTE: This procedure will normally be performed by a system administrator. 1. Press enter on the projector or remote control. This displays the on-screen menu. 2. Use the on-screen menus to select the desired settings for all inputs and picture modes. 3. Select Help > Diagnostics.... 4. On the remote or the projector, press the up and down buttons in this sequence to open the default settings menu: up - up - down - down - up - down ( ) 5. Press enter to save the projector's current settings as the new defaults. (You can also press the exit button to restore the original factory default settings.) 34 Adjusting the Projector
-
 1
1 -
2
-
3
-
4
-
5
-
6
-
7
-
8
-
9
-
10
-
11
-
12
-
13
-
14
-
15
-
16
-
17
-
18
-
19
-
20
-
21
-
22
-
23
-
24
-
25
-
26
-
27
-
28
-
 29
29 -
 30
30 -
 31
31 -
 32
32 -
 33
33 -
 34
34 -
 35
35 -
 36
36 -
 37
37 -
 38
38 -
 39
39 -
40
-
41
-
42
-
43
-
44
-
45
-
46
-
47
-
48
-
49
-
50
-
51
-
52
-
53
-
54
-
55
-
56
-
57
-
58
-
59
-
60
-
61
-
62
-
63
-
64
-
65
-
66
-
67
-
68
-
69
-
70
-
71
-
72
 |
 |