Husqvarna AUTOMOWER SOLAR HYBRID Operation Manual - Page 16
Installation
 |
View all Husqvarna AUTOMOWER SOLAR HYBRID manuals
Add to My Manuals
Save this manual to your list of manuals |
Page 16 highlights
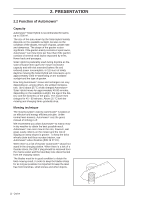
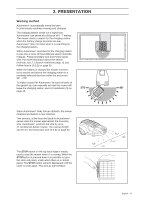
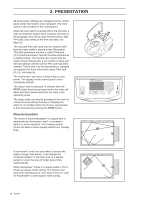
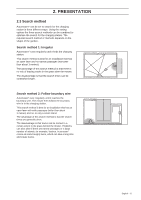
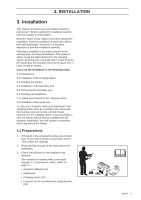
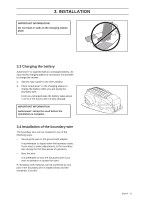
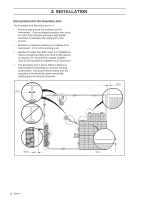
3. INSTALLATION 3. Installation This chapter describes how you install Husqvarna Automower®. Before starting the installation read the previous chapter 2. Presentation. Read the whole of this chapter too before starting the installation. How the installation is made also affects how well Automower® will work. It is therefore important to plan the installation carefully. Planning is simplified if you make a sketch of the working area, including all obstacles. This makes it easier to see the ideal positions for the charging station, boundary wire and guide wire, if used. Draw on the sketch how the boundary wire and the guide wire, if used, should be routed. Carry out the installation in the following steps: 3.1 Preparations. 3.2 Installation of the charging station. 3.3 Charging the battery. 3.4 Installation of the boundary wire. 3.5 Connecting the boundary wire. 3.6 Checking the installation. 3.7 Linking Automower® to the charging station. 3.8 Installation of the guide wire. To carry out a complete start-up of Automower® the charging station must be in position and connected, the boundary wire connected, and the mower connected to the charging station. If you would like to start the mower without having completed the full boundary installation, you can connect a temporary short loop around the mower. 3.1 Preparations 1. If the lawn in the proposed working area is taller than 10 cm, mow it using a normal lawn mower. Then collect the clippings. 2. Read carefully through all the steps before the installation. 3. Check that all parts for the installation are included: The numbers in brackets refer to the detail diagram 2.1 Automower®, what's what? on page 11. • Operator's Manual (26) • Automower® • Charging station (15) • Loop wire for the boundary wire and guide wire (18) English - 17
-
 1
1 -
2
-
3
-
4
-
5
-
6
-
7
-
8
-
9
-
10
-
 11
11 -
 12
12 -
 13
13 -
 14
14 -
 15
15 -
 16
16 -
 17
17 -
 18
18 -
 19
19 -
 20
20 -
 21
21 -
22
-
23
-
24
-
25
-
26
-
27
-
28
-
29
-
30
-
31
-
32
-
33
-
34
-
35
-
36
-
37
-
38
-
39
-
40
-
41
-
42
-
43
-
44
-
45
-
46
-
47
-
48
-
49
-
50
-
51
-
52
-
53
-
54
-
55
-
56
-
57
-
58
-
59
-
60
-
61
-
62
-
63
-
64
-
65
-
66
-
67
-
68
-
69
-
70
-
71
-
72
-
73
-
74
 |
 |