Husqvarna AUTOMOWER SOLAR HYBRID Operation Manual - Page 51
working area appears. You should perform
 |
View all Husqvarna AUTOMOWER SOLAR HYBRID manuals
Add to My Manuals
Save this manual to your list of manuals |
Page 51 highlights
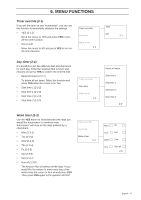
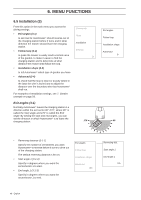
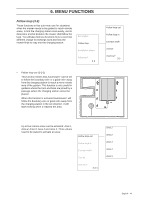
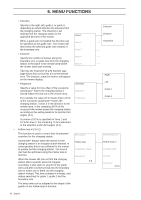
6. MENU FUNCTIONS Different corridor widths can be set for the boundary wire, guide 1 and on guide 2. The default setting on Automower® is set to a value of 10 for both the boundary wire and guide wires. The higher the stated Corridor width value, the less risk there is of tracks forming. However, a high corridor value means that Automower® may find it difficult to enter passages. A garden with large open areas should have a wide Corridor, i.e. a high Corridor width value. A garden with passages should have a narrow Corridor, i.e. a low value for the Corridor width. When the value is set to 0 for the Corridor width, Automower® will run along the boundary wire, which means it will run with half the mower inside the loop and half the mower outside. As there are often flower beds, hedges and walls along with the boundary wire Corridor width 0 is not normally recommended. Should you still like to state this value, the boundary wire must lay 40 cm from solid objects instead of the normal 35 cm. Follow loop out Follow loop in Corridor width Test IN Test OUT 3-2-3 IMPORTANT INFORMATION The distance at which the mower follows the boundary wire varies depending on how the working area appears. You should perform some tests to find the highest possible Corridor width. Use the Test IN (3-2-4) function to try different values. • Test IN (3-2-4) The Test IN (3-2-4) function is used to test how Automower® finds its way into the charging station. Follow loop out Follow loop in Corridor width Test IN Test OUT 3-2-4 Boundary corridor Guide 1 corridor Guide 2 corridor 52 - English
-
 1
1 -
2
-
3
-
4
-
5
-
6
-
7
-
8
-
9
-
10
-
11
-
12
-
13
-
14
-
15
-
16
-
17
-
18
-
19
-
20
-
21
-
22
-
23
-
24
-
25
-
26
-
27
-
28
-
29
-
30
-
31
-
32
-
33
-
34
-
35
-
36
-
37
-
38
-
39
-
40
-
41
-
42
-
43
-
44
-
45
-
 46
46 -
 47
47 -
 48
48 -
 49
49 -
 50
50 -
 51
51 -
 52
52 -
 53
53 -
 54
54 -
 55
55 -
 56
56 -
57
-
58
-
59
-
60
-
61
-
62
-
63
-
64
-
65
-
66
-
67
-
68
-
69
-
70
-
71
-
72
-
73
-
74
 |
 |
