Husqvarna AUTOMOWER SOLAR HYBRID Operation Manual - Page 19
Installation and connecting the charging, station
 |
View all Husqvarna AUTOMOWER SOLAR HYBRID manuals
Add to My Manuals
Save this manual to your list of manuals |
Page 19 highlights
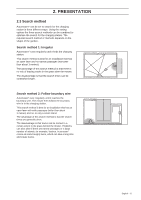
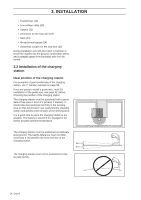
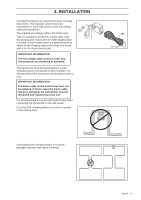
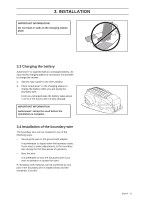
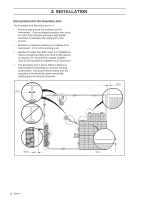
3. INSTALLATION Do not position the charging station so that the mower can come closer than 3 metres behind the charging station (for example on a narrow point). It will then be harder for the mower to find the charging station. Installation and connecting the charging station 1. Position the charging station in a suitable spot. 2. Secure the charging station to the ground using the supplied nails. IMPORTANT INFORMATION It is not permitted to make new holes in the plate. Only the existing holes may be used to secure the plate to the ground. 3. Connect the low voltage cable to the charging station. Only use original cable and transformer. 4. Connect the low voltage cable to the transformer. The connectors may be slightly difficult to connect, as they are moisture-proof. 5. Connect the transformer's power cord to a 230V wall socket. It is preferable to use an earth-fault breaker as recommended. 20 - English
-
 1
1 -
2
-
3
-
4
-
5
-
6
-
7
-
8
-
9
-
10
-
11
-
12
-
13
-
 14
14 -
 15
15 -
 16
16 -
 17
17 -
 18
18 -
 19
19 -
 20
20 -
 21
21 -
 22
22 -
 23
23 -
 24
24 -
25
-
26
-
27
-
28
-
29
-
30
-
31
-
32
-
33
-
34
-
35
-
36
-
37
-
38
-
39
-
40
-
41
-
42
-
43
-
44
-
45
-
46
-
47
-
48
-
49
-
50
-
51
-
52
-
53
-
54
-
55
-
56
-
57
-
58
-
59
-
60
-
61
-
62
-
63
-
64
-
65
-
66
-
67
-
68
-
69
-
70
-
71
-
72
-
73
-
74
 |
 |
