IBM 306m User Guide - Page 31
Installing, adapter - cms
 |
UPC - 000435867605
View all IBM 306m manuals
Add to My Manuals
Save this manual to your list of manuals |
Page 31 highlights
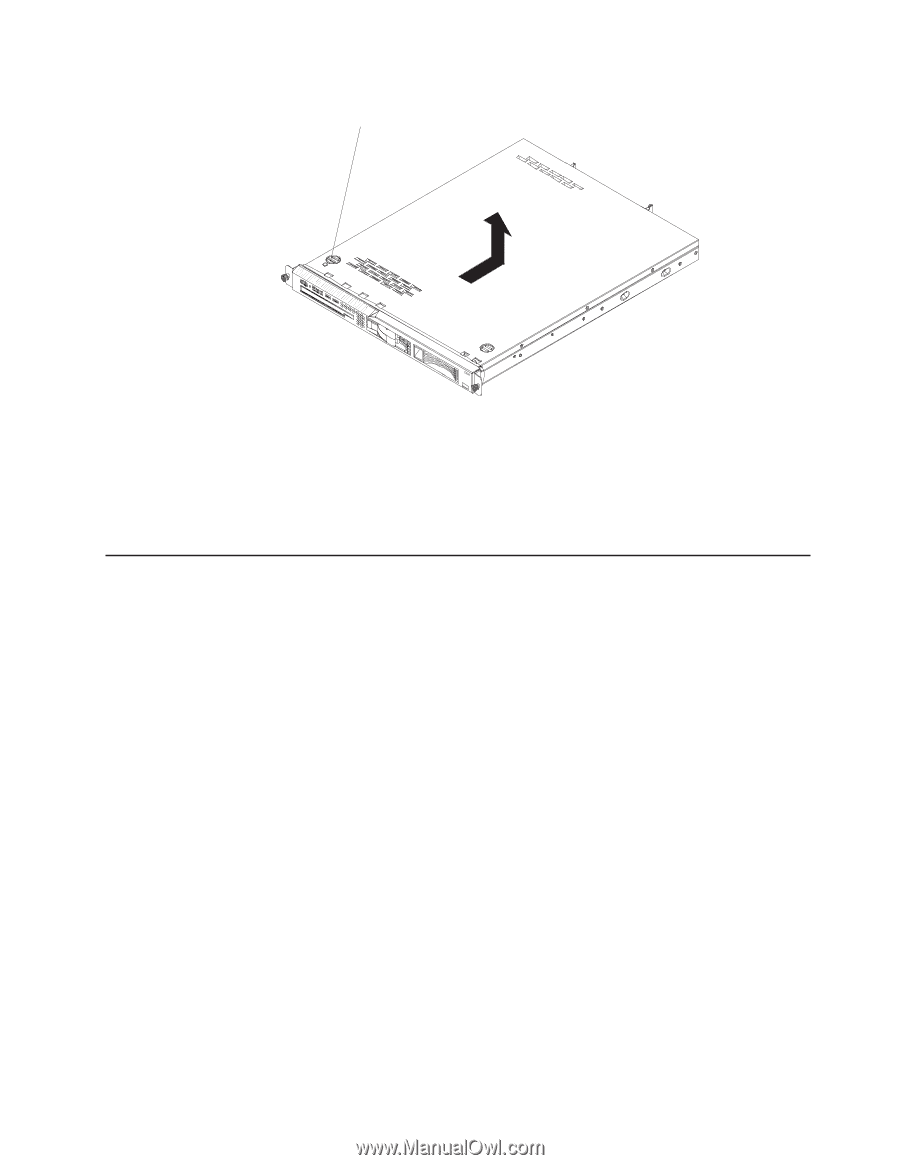
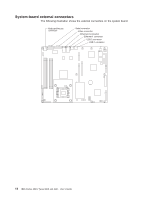
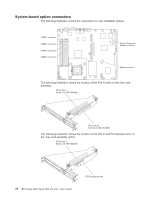
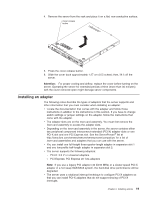
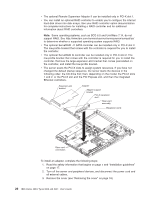
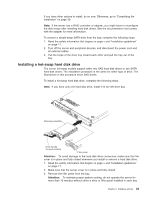
4. Remove the server from the rack and place it on a flat, non-conductive surface. Cover-release button 5. Press the cover-release button. 6. Slide the cover back approximately 1.27 cm (0.5 inches); then, lift it off the server. Attention: For proper cooling and airflow, replace the cover before turning on the server. Operating the server for extended periods of time (more than 30 minutes) with the cover removed open might damage server components. Installing an adapter The following notes describe the types of adapters that the server supports and other information that you must consider when installing an adapter: v Locate the documentation that comes with the adapter and follow those instructions in addition to the instructions in this section. If you have to change switch settings or jumper settings on the adapter, follow the instructions that come with the adapter. v The adapter slots are on the riser-card assembly. You must first remove the riser-card assembly to access the adapter slots. v Depending on the riser-card assembly in the server, the server contains either two peripheral component interconnect-extended (PCI-X) adapter slots or one PCI-X slot and one PCI Express slot. See the ServerProven® list at http://www.ibm.com/servers/eserver/serverproven/compat/us/ for a list of riser-card assemblies and adapters that you can use with the server. v You can install one full-height three-quarter-length adapter in expansion slot 1 and one low-profile half-length adapter in expansion slot 2. v The server supports the following adapters: - PCI-X: 3.3 V or universal adapters - PCI Express: PCI Express x8 1.0a adapters Note: If you use a legacy PCI adapter (32 bit/33 MHz) or a slower-speed PCI-X adapter in a hot-swap SAS/SATA system, the hard-disk drive performance will be degraded. v The server uses a rotational interrupt technique to configure PCI-X adapters so that you can install PCI-X adapters that do not support sharing of PCI-X interrupts. Chapter 2. Installing options 19
-
 1
1 -
2
-
3
-
4
-
5
-
6
-
7
-
8
-
9
-
10
-
11
-
12
-
13
-
14
-
15
-
16
-
17
-
18
-
19
-
20
-
21
-
22
-
23
-
24
-
25
-
 26
26 -
 27
27 -
 28
28 -
 29
29 -
 30
30 -
 31
31 -
 32
32 -
 33
33 -
 34
34 -
 35
35 -
 36
36 -
37
-
38
-
39
-
40
-
41
-
42
-
43
-
44
-
45
-
46
-
47
-
48
-
49
-
50
-
51
-
52
-
53
-
54
-
55
-
56
-
57
-
58
-
59
-
60
-
61
-
62
-
63
-
64
-
65
-
66
-
67
-
68
-
69
-
70
-
71
-
72
-
73
-
74
 |
 |