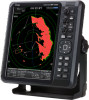
Icom MR-1220 Instruction Manual - Page 34
The Simplified Arpa Operation, Arpa Operation
 |
View all Icom MR-1220 manuals
Add to My Manuals
Save this manual to your list of manuals |
Page 34 highlights
6 THE SIMPLIFIED ARPA OPERATION The Simplified ARPA function The simplified Automatic Radar Plotting Aids (ARPA) function is designed to help prevent a collision with other vessels or landmasses. The radar automatically acquires and plots other vessels and landmasses that are in the set watch area. It automatically calculates the closest point of approach (CPA), and the time to closest point of approach (TCPA) limit of your vessel and the targets, and alerts you if there is a danger of colliding with them. ARPA Features •• Only targets in the 0.25 to 16 NM range that are displayed with a high luminosity (strong return signal) can be selected as ARPA targets. •• Up to 30 targets can be acquired and plotted on the screen, including up to 20 automatically acquired targets (when the Auto Acquire Function is turned ON in the Menu screen). •• Plot positions are identified by an approved symbol mark (p. 31) and associated plot number. •• The target and vector line will move across the screen at the rate and direction defined by the calculated true or relative course and speed. •• The vector line is displayed on the target. ARPA operation DDTurning the simplified ARPA function ON or OFF You can set about the simplified APRA function ON or OFF in the ARPA menu. [MENU]/[ ] > ARPA > ARPA Function DDAcquiring a target 1. Move the cross-line cursor onto a target. 2. Push [ACQ]/[ ] to set the target for tracking. •• A dotted circle symbol is displayed on the cursor. •• After 20 seconds progressing time has passed, a dotted vector line, the target number is displayed beside the icon, depending on the "Display Target Number" setting (p. 32). Then more 40 seconds has passed, the circle changes to a solid circle and tracking starts. •• When the target disappears, a cross mark blinks on the target, and then the mark disappears after 1 minute. •• When a target advances within the CPA and TCPA limits, the mark changes its color to red, blinks, and sounds an alarm. Push [CLEAR]/[ ] to cancel the alarm. DDReleasing the acquired target To release the target, move the cursor onto the target, then hold down [CLEAR]/[ ] for 1 second. 29
-
 1
1 -
2
-
3
-
4
-
5
-
6
-
7
-
8
-
9
-
10
-
11
-
12
-
13
-
14
-
15
-
16
-
17
-
18
-
19
-
20
-
21
-
22
-
23
-
24
-
25
-
26
-
27
-
28
-
 29
29 -
 30
30 -
 31
31 -
 32
32 -
 33
33 -
 34
34 -
 35
35 -
 36
36 -
 37
37 -
 38
38 -
 39
39 -
40
-
41
-
42
-
43
-
44
-
45
-
46
-
47
-
48
-
49
-
50
-
51
-
52
-
53
-
54
-
55
-
56
-
57
-
58
-
59
-
60
-
61
-
62
-
63
-
64
-
65
-
66
-
67
-
68
-
69
-
70
-
71
-
72
-
73
-
74
-
75
-
76
-
77
-
78
-
79
-
80
 |
 |
