Insignia NS-H3005 User Manual (English) - Page 22
Memory/enter
 |
View all Insignia NS-H3005 manuals
Add to My Manuals
Save this manual to your list of manuals |
Page 22 highlights
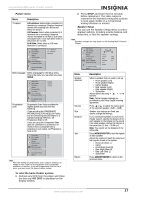
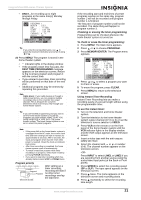
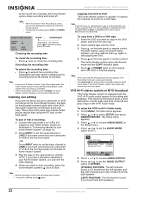
8 Press once. Recording starts and the REC indicator lights in the display window. Note • • REC indicator appears only when the Output Source is set to VCR. If a tape with no anti-erasure safety tab is loaded, the tape is automatically ejected. 9 Press twice to stop recording. Note If the tape reaches the end before is pressed, the home theater system automatically stops, rewinds and ejects the tape, then turns itself off. Pausing the recording To pause while recording: 1 Press to pause the tape during recording. The REC indicator flashes in the display window. 2 When you want to continue recording, press or . Note • • After five minutes in Pause mode, the tape stops automatically to protect the tape and the video heads. Always use for best results when making changes while recording. For example: To change channels while recording, first press to put the VCR in Pause mode. Select the channel on the home theater system, then press again to resume recording. Recording a program while watching another To record one television program while watching another: 1 Press TV/VCR to select the TV mode while recording. The TV indicator appears. 2 Select the channel to be viewed using the tuner on your television. Timer Recording You can program your VCR to record up to eight different recordings. You can program these recordings up to one year in advance. For unattended recording, the timer needs to know the channels to be recorded and the starting and ending times. Note If you try to set the program timer before setting the clock, PLEASE SET THE CLOCK appears for a moment and then the Clock menu appears on the television screen. Set the time and date before proceeding. To program the VCR to record a future program: 1 Turn on the television and home theater system. 2 Tune the television to the home theater system output channel (CH 3 or 4) or set the television's source selector to VIDEO. 3 Press VCR on the remote or on the front panel of the home theater system until the VCR indicator lights in the display window and VCR appears on the television screen. Insignia NS-H3005 Home Theater System 4 Insert a video tape with the anti-erasure safety tab intact. Note If the anti-erasure safety tab has been removed the tape is automatically ejected. 5 Press MENU. The Main menu appears. 6 Press or to choose PROGRAM, then press MEMORY/ENTER. The Program menu appears. Note If all eight programs have been entered, FULLY PROGRAMMED appears for a moment and then PROGRAM 1 appears on the television screen. 7 Press or to choose the program number (1-8). 8 Press to choose MONTH. 9 Press or to choose the month. 10 Press to choose DAY. 11 Press or to choose the day. 12 Press to choose START. 13 Press or to choose the start time. 14 Press to choose STOP. 15 Press or to choose the stop time. 16 Press to choose CHANNEL. 17 Press or to choose the channel (Channel, LINE1, or LINE2). Note Cable Users: If you have cable TV and use a cable box converter (see"Connecting antenna or cable TV to the home theater system" on page 7), you must set the channel in this step to match the cable box output channel (usually CH 3 or 4). Set the channel on the cable box instead of with the home theater system. 18 Press to choose SPEED. 19 Press or to choose the recording speed (AUTO, SP, or SLP). Auto mode determines how much tape is left and switches speed from SP to SLP, if necessary, to complete recording the program. There will be some picture and sound distortion at the point of the speed change. 20 Press to choose REPEAT. 21 Press or to choose how often to repeat (ONCE, WEEKLY, or DAILY). • ONCE-for recording up to eight programs on a single day or over the days within a period of one year. • WEEKLY-for recording up to eight programs on a certain day of every week. 20 www.insignia-products.com
-
 1
1 -
2
-
3
-
4
-
5
-
6
-
7
-
8
-
9
-
10
-
11
-
12
-
13
-
14
-
15
-
16
-
 17
17 -
 18
18 -
 19
19 -
 20
20 -
 21
21 -
 22
22 -
 23
23 -
 24
24 -
 25
25 -
 26
26 -
 27
27 -
28
-
29
-
30
-
31
-
32
-
33
-
34
-
35
-
36
-
37
-
38
-
39
-
40
-
41
-
42
-
43
-
44
-
45
-
46
-
47
-
48
-
49
-
50
-
51
-
52
-
53
-
54
-
55
-
56
-
57
-
58
-
59
-
60
-
61
-
62
-
63
-
64
-
65
-
66
-
67
-
68
-
69
-
70
-
71
-
72
-
73
-
74
-
75
-
76
-
77
-
78
-
79
-
80
-
81
-
82
-
83
-
84
-
85
-
86
-
87
-
88
-
89
-
90
-
91
-
92
-
93
-
94
-
95
-
96
-
97
-
98
-
99
-
100
-
101
-
102
-
103
-
104
-
105
-
106
-
107
-
108
-
109
-
110
-
111
-
112
-
113
-
114
-
115
-
116
 |
 |