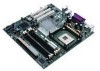
Intel D865GLC Manual - Page 60
Setting the Processor Speed - motherboard jumper settings
 |
UPC - 683728198374
View all Intel D865GLC manuals
Add to My Manuals
Save this manual to your list of manuals |
Page 60 highlights
Setting the Processor Speed Set the processor speed after you have installed or upgraded the processor. This procedure assumes that the motherboard is installed in the computer and the configuration header (J9J4) has the jumper set on pins 1-2 for normal mode. 1. Observe the precautions in "Before You Begin". 2. Turn off all peripheral devices connected to the computer. Turn off the computer. 3. Remove the computer cover. 4. Locate the configuration header (Figure 12, J9J4 on the motherboard). 5. On the header, move the jumper to pins 2-3 as shown below to set configure mode. 1 2 3 Configuration Jumper J9J4 6. Replace the cover, turn on the computer, and allow it to boot. 7. The computer starts the Setup program. Setup displays the Maintenance menu. 8. Use the arrow keys to select the Processor Speed feature and press . Setup displays a popup screen with the available processor speeds. 9. Use the arrow keys to select the processor speed. Press to confirm the speed. This Maintenance menu reappears again. 10. Press to save the current values and exit Setup. 11. Turn off the computer. 12. Remove the computer cover. 13. On the header (J9J4), move the jumper back to pins 1-2 to restore normal operation as shown below. 1 2 3 Configuration Jumper J9J4 14. Replace the cover and turn on the computer. 15. Verify the processor speed in the start-up information the BIOS displays. D865GLC Motherboard Manual 59
-
 1
1 -
2
-
3
-
4
-
5
-
6
-
7
-
8
-
9
-
10
-
11
-
12
-
13
-
14
-
15
-
16
-
17
-
18
-
19
-
20
-
21
-
22
-
23
-
24
-
25
-
26
-
27
-
28
-
29
-
30
-
31
-
32
-
33
-
34
-
35
-
36
-
37
-
38
-
39
-
40
-
41
-
42
-
43
-
44
-
45
-
46
-
47
-
48
-
49
-
50
-
51
-
52
-
53
-
54
-
 55
55 -
 56
56 -
 57
57 -
 58
58 -
 59
59 -
 60
60 -
 61
61 -
 62
62 -
 63
63 -
 64
64 -
 65
65 -
66
-
67
-
68
-
69
-
70
-
71
-
72
-
73
-
74
-
75
-
76
-
77
-
78
-
79
-
80
-
81
-
82
-
83
-
84
-
85
-
86
-
87
-
88
-
89
-
90
-
91
-
92
-
93
-
94
-
95
-
96
-
97
-
98
-
99
-
100
-
101
-
102
-
103
-
104
-
105
-
106
-
107
-
108
-
109
 |
 |
