Konica Minolta C83hc High Chroma GBC PUNCH G2 User Manual - Page 5
Quick Start Guide
 |
View all Konica Minolta C83hc High Chroma manuals
Add to My Manuals
Save this manual to your list of manuals |
Page 5 highlights
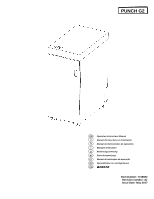
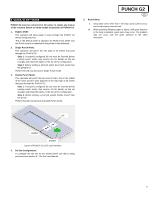
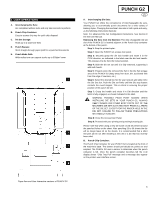
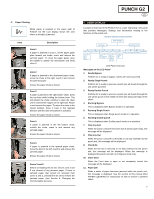
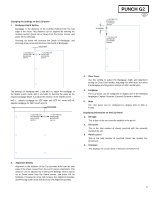
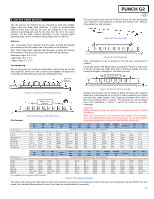
3. QUICK START GUIDE PUNCH G2 must be connected to AC power to enable any feature of the machine. Below are three modes of operation of PUNCH G2. 1. Bypass Mode: This operation will allow paper to pass through the PUNCH G2 without being punched. This is the default mode of operation for PUNCH G2. Make sure the Punch Icon is not selected in the printer's User Interface. 2. Single Punch Mode: This operation will punch the trail edge of all sheets that pass through the PUNCH G2. Step 1: A properly configured die set must be inserted before running punch mode. See section 4.A for details on Die set changes and follow the labels on the die set for configuration. Step 2: Before starting a print job select the Punch mode from the printer's UI. PUNCH G2 will now function in Single Punch mode. 3. Double Punch Mode: This operation will punch the two rows of holes- One in the middle of the sheet and the other adjacent to the trail edge of all sheets that pass through the PUNCH G2. Step 1: A properly configured die set must be inserted before running punch mode. See section 4.A for details on Die set changes and follow the labels on the die set for configuration. Step 2: Before starting a print job enable Double Punch from the printer. PUNCH G2 will now function in Double Punch mode. PUNCH G2 EN 5. Restrictions: I. Using clear cover other than 7 mil may cause a jam to occur and could require a service call. II. When punching 300gsm paper or above, with grain direction in the long orientation, paper jams may occur. The problem may not occur with the grain direction in the short orientation. UP DOWN ENTER Layout of PUNCH G2 LCD User Interface 4. Die Set Configuration: To configure the Die Set for the desired sheet size that is being processed see section 8 - Die Set User Manual. 5
-
 1
1 -
 2
2 -
 3
3 -
 4
4 -
 5
5 -
 6
6 -
 7
7 -
 8
8 -
 9
9 -
 10
10 -
 11
11 -
12
-
13
-
14
-
15
-
16
-
17
-
18
-
19
-
20
-
21
-
22
-
23
-
24
-
25
-
26
-
27
-
28
-
29
-
30
-
31
-
32
-
33
-
34
-
35
-
36
-
37
-
38
-
39
-
40
-
41
-
42
-
43
-
44
-
45
-
46
-
47
-
48
-
49
-
50
-
51
-
52
-
53
-
54
-
55
-
56
-
57
-
58
-
59
-
60
-
61
-
62
-
63
-
64
-
65
-
66
-
67
-
68
-
69
-
70
-
71
-
72
-
73
-
74
-
75
-
76
-
77
-
78
-
79
-
80
-
81
-
82
-
83
-
84
-
85
-
86
-
87
-
88
-
89
-
90
-
91
-
92
 |
 |
