Konica Minolta C83hc High Chroma GBC PUNCH G2 User Manual - Page 8
Changing the Settings on the LCD panel, Displaying Information on the LCD Panel
 |
View all Konica Minolta C83hc High Chroma manuals
Add to My Manuals
Save this manual to your list of manuals |
Page 8 highlights
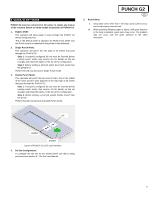
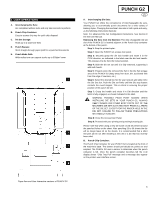
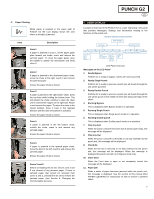
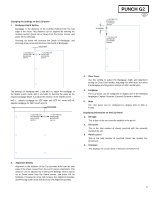
Changing the Settings on the LCD panel 1. Backgage Depth Setting Backgage is the distance of the punched hole(s) from the trail edge of the sheet. This distance can be adjusted by entering the Settings section (press Up or Down from the Home screen, and press OK for Settings). Pressing Up arrow will increase the Depth of Backgage, and Pressing Down arrow will decrease the Depth of Backgage. BACKGAGE "-" ON THE LCD DECREASES BACKGAGE DEPTH "+" ON THE LCD INCREASES BACKGAGE DEPTH PUNCH G2 EN "+" ON THE LCD INCREASES ALIGNMENT OFFSET ALIGNMENT "-" ON THE LCD DECREASES ALIGNMENT OFFSET The settings for backgage MID L and MID XL adjust the backgage of the double punch mode. MID L and MID XL function the same as the regular backgage depth, but adjust the position of the middle punch. MID L adjusts backgage for SEF letter and SEF A4, while MID XL adjusts backgage for SEF 11x17 and A3 BACKGAGE "-" ON THE LCD DECREASES BACKGAGE DEPTH "+" ON THE LCD INCREASES BACKGAGE DEPTH 3. Clear Cover Use this setting to adjust the Backgage depth and Alignment setting for Clear Cover media. Adjusting this offset does not affect the Backgage and Alignment settings of other media types. 4. Language The LCD panel can be configured to display one of the following languages: English; Francais; Espanol; Deutsch or Italiano. 5. Units The LCD panel can be configured to display units in MM or Inches. Displaying Information on the LCD Panel 1. Die type This is type of die-set currently installed in the punch. 2. Die cycles This is the total number of sheets punched with the currently installed die-set. 3. Punch cycles This is the total number of punched sheets the system has processed. 4. Firmware This displays the current level of firmware of PUNCH G2. 2. Alignment Setting Alignment is the distance of the Top punched hole from the side edge of the sheet (viewed from the punch output orientation). This distance can be adjusted by entering the Settings section (press Up or Down arrow from the Home screen, and press OK for Settings). Pressing Up arrow will increase the Alignment position, and Pressing Down arrow will decrease the Alignment position. 8
-
 1
1 -
2
-
 3
3 -
 4
4 -
 5
5 -
 6
6 -
 7
7 -
 8
8 -
 9
9 -
 10
10 -
 11
11 -
 12
12 -
 13
13 -
14
-
15
-
16
-
17
-
18
-
19
-
20
-
21
-
22
-
23
-
24
-
25
-
26
-
27
-
28
-
29
-
30
-
31
-
32
-
33
-
34
-
35
-
36
-
37
-
38
-
39
-
40
-
41
-
42
-
43
-
44
-
45
-
46
-
47
-
48
-
49
-
50
-
51
-
52
-
53
-
54
-
55
-
56
-
57
-
58
-
59
-
60
-
61
-
62
-
63
-
64
-
65
-
66
-
67
-
68
-
69
-
70
-
71
-
72
-
73
-
74
-
75
-
76
-
77
-
78
-
79
-
80
-
81
-
82
-
83
-
84
-
85
-
86
-
87
-
88
-
89
-
90
-
91
-
92
 |
 |
