Kyocera ECOSYS M5526cdw Kyocera NET ADMIN Operation Guide for Ver 3.2.2016.3 - Page 30
Add Tab, Creating a Tab, Import Default Tab, Edit Tab, Manage tabs, Tab Name, Tab Position
 |
View all Kyocera ECOSYS M5526cdw manuals
Add to My Manuals
Save this manual to your list of manuals |
Page 30 highlights
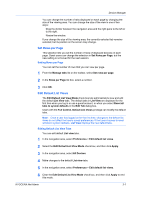
Device Manager Add Tab In the Add Tab dialog box, you can create a new tab, or import and edit one of the system default tabs. There is a maximum of 32 tabs. Creating a Tab You can create a new tab. 1 Select Add tab from the Manage tabs list on the toolbar. 2 In the Add Tab dialog box, select the Tab Name text box and type a name for your tab. Do not use invisible Unicode or extended ASCII characters. 3 Click the up and down arrows to the right of the Tab Position table to position the new tab. 4 Under Available Columns, select the items you want to include in the tab and click the right arrow. 5 To remove a column from the tab, select it under Selected Columns, and click the left arrow. 6 Click the up and down arrows to the right of Selected Columns to change the order of the columns in your tab. 7 Click OK or Apply to add the tab. Import Default Tab Each user has a personal list of tabs and tab properties that are not affected by changes to the default list view. If an administrator creates a new tab in the default list view mode, it will become immediately available to all new users. However, existing users must import the new tab. Importing a Default Tab You can import a system default tab. 1 Select Add tab from the Manage tabs list on the toolbar. 2 In the Add Tab dialog box, click Import. 3 Select one of the default tabs from the list. 4 Click OK to return to the Add Tab dialog box. You can edit the name, position, and contents of the imported tab. 5 Click OK or Apply. Edit Tab You can rename, position or delete tabs, and select column content and order using the selections in Manage tabs > Edit tab. 3-8 User Guide
-
 1
1 -
2
-
3
-
4
-
5
-
6
-
7
-
8
-
9
-
10
-
11
-
12
-
13
-
14
-
15
-
16
-
17
-
18
-
19
-
20
-
21
-
22
-
23
-
24
-
 25
25 -
 26
26 -
 27
27 -
 28
28 -
 29
29 -
 30
30 -
 31
31 -
 32
32 -
 33
33 -
 34
34 -
 35
35 -
36
-
37
-
38
-
39
-
40
-
41
-
42
-
43
-
44
-
45
-
46
-
47
-
48
-
49
-
50
-
51
-
52
-
53
-
54
-
55
-
56
-
57
-
58
-
59
-
60
-
61
 |
 |
