Lenovo E200 Hardware Maintenance Manual (HMM) - 3000 E200 (type 7848) - Page 50
Creating, diagnostic, CD/DVD, image, Running, diagnostics, Navigating, through, programs, tests
 |
View all Lenovo E200 manuals
Add to My Manuals
Save this manual to your list of manuals |
Page 50 highlights
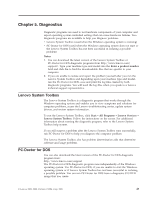
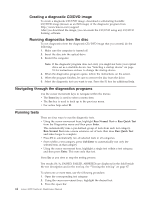
Creating a diagnostic CD/DVD image To create a diagnostic CD/DVD image, download a self-starting bootable CD/DVD image (known as an ISO image) of the diagnostic program from http://www.lenovo.com/support After you download the image, you can create the CD/DVD using any CD/DVD burning software. Running diagnostics from the disc To run diagnostics from the diagnostic CD/DVD image that you created, do the following: 1. Make sure the computer is turned off. 2. Insert the disc into the optical drive. 3. Restart the computer. Note: If the diagnostic program does not start, you might not have your optical drive set as a startable device. See "Selecting a startup device" on page 51 for instructions on how to change the startup device. 4. When the diagnostics program opens, follow the instructions on the screen. 5. When the program finishes, be sure to remove the disc from the drive. 6. Select the diagnostic test you want to run. Press the F1 key for additional help. Navigating through the diagnostics programs Use the cursor movement keys to navigate within the menus. v The Enter key is used to select a menu item. v The Esc key is used to back up to the previous menu. v For online help select F1. Running tests There are four ways to run the diagnostic tests. v Using the cursor movement keys, highlight Run Normal Test or Run Quick Test from the Diagnostics menu and then press Enter. This automatically runs a pre-defined group of tests from each test category. Run Normal Test runs a more extensive set of tests than does Run Quick Test and takes longer to complete. v Press F5 to automatically run all selected tests in all categories. v From within a test category, press Ctrl-Enter to automatically run only the selected tests in that category. v Using the cursor movement keys, highlight a single test within a test category, and then press Enter. This runs only that test. Press Esc at any time to stop the testing process. Test results (N/A, PASSED, FAILED, ABORTED) are displayed in the field beside the test description and in the test log. See "Viewing the test log" on page 47. To select one or more tests, use the following procedure. 1. Open the corresponding test category. 2. Using the cursor movement keys, highlight the desired test. 3. Press the space bar. 44 Lenovo E200 Hardware Maintenance Manual
-
 1
1 -
2
-
3
-
4
-
5
-
6
-
7
-
8
-
9
-
10
-
11
-
12
-
13
-
14
-
15
-
16
-
17
-
18
-
19
-
20
-
21
-
22
-
23
-
24
-
25
-
26
-
27
-
28
-
29
-
30
-
31
-
32
-
33
-
34
-
35
-
36
-
37
-
38
-
39
-
40
-
41
-
42
-
43
-
44
-
 45
45 -
 46
46 -
 47
47 -
 48
48 -
 49
49 -
 50
50 -
 51
51 -
 52
52 -
 53
53 -
 54
54 -
 55
55 -
56
-
57
-
58
-
59
-
60
-
61
-
62
-
63
-
64
-
65
-
66
-
67
-
68
-
69
-
70
-
71
-
72
-
73
-
74
-
75
-
76
-
77
-
78
-
79
-
80
-
81
-
82
-
83
-
84
-
85
-
86
-
87
-
88
-
89
-
90
-
91
-
92
-
93
-
94
-
95
-
96
-
97
-
98
-
99
-
100
-
101
-
102
-
103
-
104
-
105
-
106
-
107
-
108
-
109
-
110
-
111
-
112
-
113
-
114
-
115
-
116
-
117
-
118
-
119
-
120
-
121
-
122
-
123
-
124
 |
 |
