Lenovo ThinkCentre M62z Hardware Maintenance Manual (HMM) (July 2012) - ThinkC - Page 111
Replacing the WIFI card, Removing the WIFI card
 |
View all Lenovo ThinkCentre M62z manuals
Add to My Manuals
Save this manual to your list of manuals |
Page 111 highlights
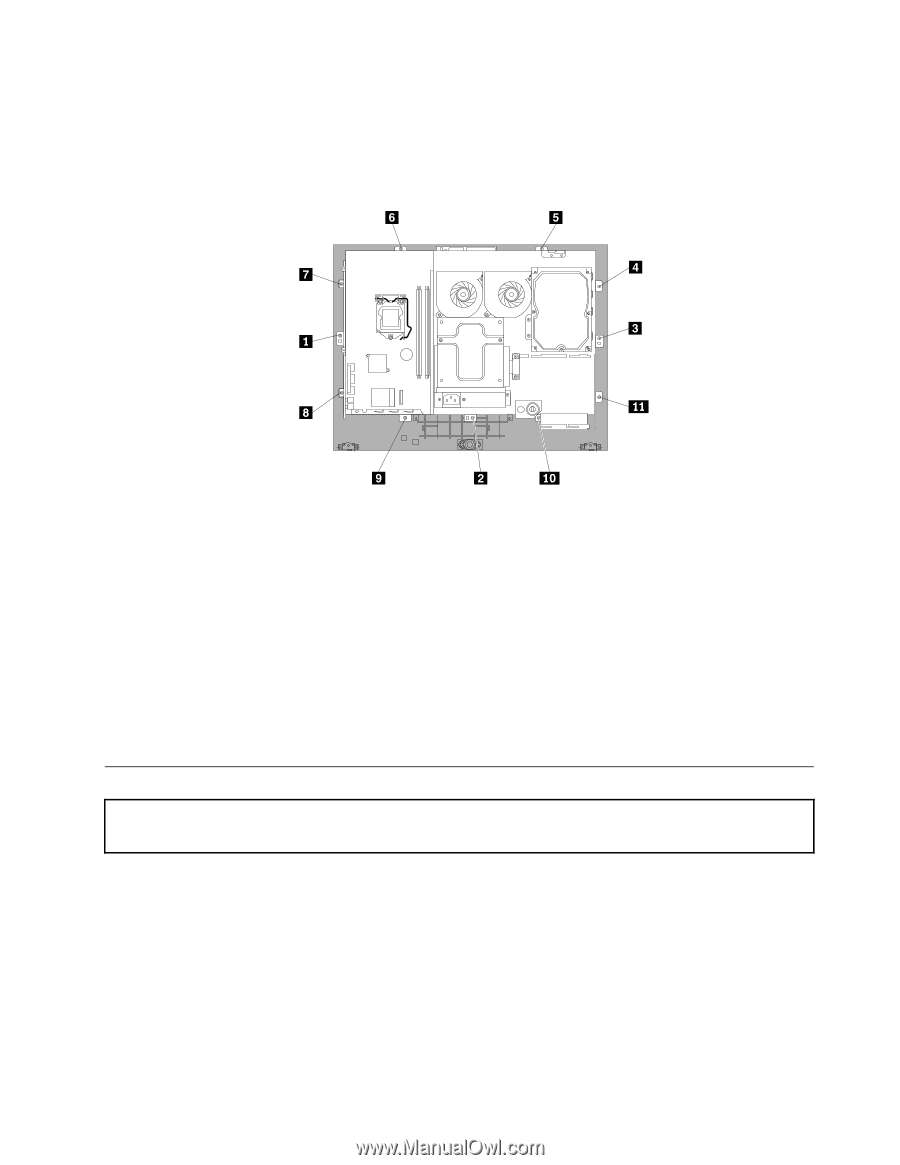
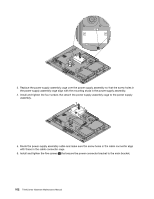
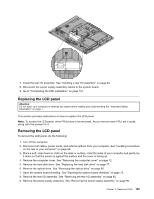
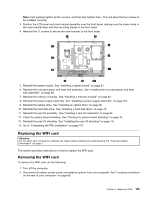
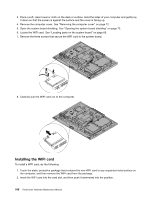
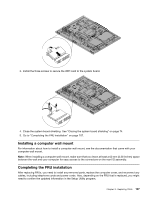
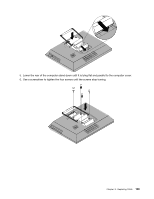
Note: First partially tighten all four screws, and then fully tighten them. This will allow the four screws to be installed correctly. 3. Position the LCD panel and main bracket assembly over the front bezel, making sure the screw holes in the main bracket align with the mounting stands in the front bezel. 4. Reinstall the 11 screws to secure the main bracket to the front bezel. 5. Reinstall the system board. See "Installing a system board" on page 91. 6. Reinstall the microprocessor and heat sink assembly. See "Installing the microprocessor and heat sink assembly" on page 88. 7. Reinstall the memory modules. See "Installing a memory module" on page 82. 8. Reinstall the power supply assembly. See "Installing a power supply assembly" on page 101. 9. Reinstall the optical drive. See "Installing an optical drive" on page 80. 10. Reinstall the hard disk drive. See "Installing a hard disk drive" on page 78. 11. Reinstall the rear I/O assembly. See "Installing a rear I/O assembly" on page 94. 12. Close the system board shielding. See "Closing the system board shielding" on page 74. 13. Reinstall the rear I/O shielding. See "Installing the rear I/O shielding" on page 76. 14. Go to "Completing the FRU installation" on page 107. Replacing the WIFI card Attention: Do not open your computer or attempt any repair before reading and understanding the "Important Safety Information" on page 1. This section provides instructions on how to replace the WIFI card. Removing the WIFI card To remove the WIFI card, do the following: 1. Turn off the computer. 2. Disconnect all cables, power cords, and external options from your computer. See "Locating connectors on the rear of your computer" on page 66. Chapter 9. Replacing FRUs 105
-
 1
1 -
2
-
3
-
4
-
5
-
6
-
7
-
8
-
9
-
10
-
11
-
12
-
13
-
14
-
15
-
16
-
17
-
18
-
19
-
20
-
21
-
22
-
23
-
24
-
25
-
26
-
27
-
28
-
29
-
30
-
31
-
32
-
33
-
34
-
35
-
36
-
37
-
38
-
39
-
40
-
41
-
42
-
43
-
44
-
45
-
46
-
47
-
48
-
49
-
50
-
51
-
52
-
53
-
54
-
55
-
56
-
57
-
58
-
59
-
60
-
61
-
62
-
63
-
64
-
65
-
66
-
67
-
68
-
69
-
70
-
71
-
72
-
73
-
74
-
75
-
76
-
77
-
78
-
79
-
80
-
81
-
82
-
83
-
84
-
85
-
86
-
87
-
88
-
89
-
90
-
91
-
92
-
93
-
94
-
95
-
96
-
97
-
98
-
99
-
100
-
101
-
102
-
103
-
104
-
105
-
 106
106 -
 107
107 -
 108
108 -
 109
109 -
 110
110 -
 111
111 -
 112
112 -
 113
113 -
 114
114 -
 115
115 -
 116
116 -
117
-
118
-
119
-
120
-
121
-
122
-
123
-
124
-
125
-
126
 |
 |