Lenovo ThinkCentre M62z Hardware Maintenance Manual (HMM) (July 2012) - ThinkC - Page 87
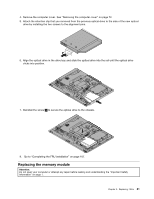
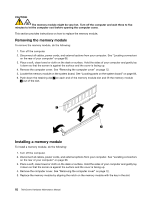
Replacing the memory module
 |
View all Lenovo ThinkCentre M62z manuals
Add to My Manuals
Save this manual to your list of manuals |
Page 87 highlights
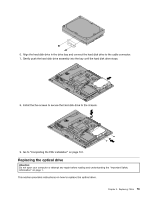
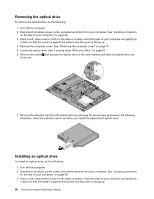
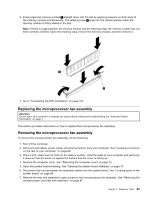
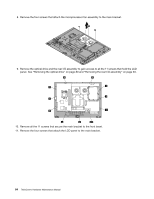
4. Remove the computer cover. See "Removing the computer cover" on page 72. 5. Attach the retention clip that you removed from the previous optical drive to the side of the new optical drive by installing the two screws to the alignment pins. 6. Align the optical drive in the drive bay and slide the optical drive into the rail until the optical drive clicks into position. 7. Reinstall the screw 1 to secure the optical drive to the chassis. 8. Go to "Completing the FRU installation" on page 107. Replacing the memory module Attention: Do not open your computer or attempt any repair before reading and understanding the "Important Safety Information" on page 1. Chapter 9. Replacing FRUs 81
-
 1
1 -
2
-
3
-
4
-
5
-
6
-
7
-
8
-
9
-
10
-
11
-
12
-
13
-
14
-
15
-
16
-
17
-
18
-
19
-
20
-
21
-
22
-
23
-
24
-
25
-
26
-
27
-
28
-
29
-
30
-
31
-
32
-
33
-
34
-
35
-
36
-
37
-
38
-
39
-
40
-
41
-
42
-
43
-
44
-
45
-
46
-
47
-
48
-
49
-
50
-
51
-
52
-
53
-
54
-
55
-
56
-
57
-
58
-
59
-
60
-
61
-
62
-
63
-
64
-
65
-
66
-
67
-
68
-
69
-
70
-
71
-
72
-
73
-
74
-
75
-
76
-
77
-
78
-
79
-
80
-
81
-
 82
82 -
 83
83 -
 84
84 -
 85
85 -
 86
86 -
 87
87 -
 88
88 -
 89
89 -
 90
90 -
 91
91 -
 92
92 -
93
-
94
-
95
-
96
-
97
-
98
-
99
-
100
-
101
-
102
-
103
-
104
-
105
-
106
-
107
-
108
-
109
-
110
-
111
-
112
-
113
-
114
-
115
-
116
-
117
-
118
-
119
-
120
-
121
-
122
-
123
-
124
-
125
-
126
 |
 |

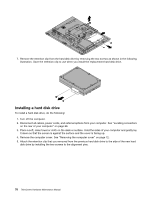
4. Remove the computer cover. See “Removing the computer cover” on page 72.
5. Attach the retention clip that you removed from the previous optical drive to the side of the new optical
drive by installing the two screws to the alignment pins.
6. Align the optical drive in the drive bay and slide the optical drive into the rail until the optical drive
clicks into position.
7. Reinstall the screw
1
to secure the optical drive to the chassis.
8.
Go to “Completing the FRU installation” on page 107.
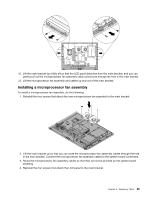
Replacing the memory module
Attention:
Do not open your computer or attempt any repair before reading and understanding the “Important Safety
Information” on page 1.
Chapter 9
.
Replacing FRUs
81