Lenovo ThinkCentre M62z Hardware Maintenance Manual (HMM) (July 2012) - ThinkC - Page 113
Installing a computer wall mount, Completing the FRU installation, After replacing FRUs
 |
View all Lenovo ThinkCentre M62z manuals
Add to My Manuals
Save this manual to your list of manuals |
Page 113 highlights
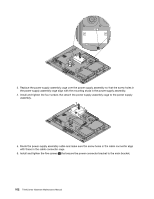
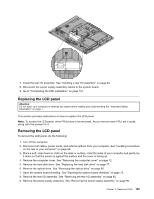
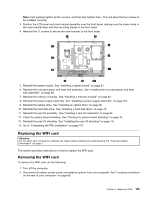
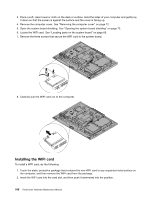
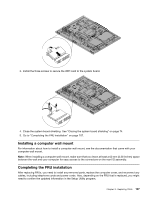
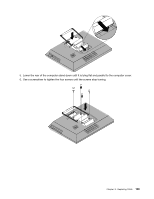
3. Install the three screws to secure the WIFI card to the system board. 4. Close the system board shielding. See "Closing the system board shielding" on page 74. 5. Go to "Completing the FRU installation" on page 107. Installing a computer wall mount For information about how to install a computer wall mount, see the documentation that came with your computer wall mount. Note: When installing a computer wall mount, make sure that you leave at least a 60 mm (2.36 inches) space between the wall and your computer for easy access to the connectors on the rear I/O assembly. Completing the FRU installation After replacing FRUs, you need to install any removed parts, replace the computer cover, and reconnect any cables, including telephone cords and power cords. Also, depending on the FRU that is replaced, you might need to confirm the updated information in the Setup Utility program. Chapter 9. Replacing FRUs 107
-
 1
1 -
2
-
3
-
4
-
5
-
6
-
7
-
8
-
9
-
10
-
11
-
12
-
13
-
14
-
15
-
16
-
17
-
18
-
19
-
20
-
21
-
22
-
23
-
24
-
25
-
26
-
27
-
28
-
29
-
30
-
31
-
32
-
33
-
34
-
35
-
36
-
37
-
38
-
39
-
40
-
41
-
42
-
43
-
44
-
45
-
46
-
47
-
48
-
49
-
50
-
51
-
52
-
53
-
54
-
55
-
56
-
57
-
58
-
59
-
60
-
61
-
62
-
63
-
64
-
65
-
66
-
67
-
68
-
69
-
70
-
71
-
72
-
73
-
74
-
75
-
76
-
77
-
78
-
79
-
80
-
81
-
82
-
83
-
84
-
85
-
86
-
87
-
88
-
89
-
90
-
91
-
92
-
93
-
94
-
95
-
96
-
97
-
98
-
99
-
100
-
101
-
102
-
103
-
104
-
105
-
106
-
107
-
 108
108 -
 109
109 -
 110
110 -
 111
111 -
 112
112 -
 113
113 -
 114
114 -
 115
115 -
 116
116 -
 117
117 -
 118
118 -
119
-
120
-
121
-
122
-
123
-
124
-
125
-
126
 |
 |
