Lenovo ThinkPad 560 TP 560Z On-line User's Guide that was provided with the sy - Page 65
Using the Auto Configurator Utility, Registering a PC Card in Auto Configurator
 |
View all Lenovo ThinkPad 560 manuals
Add to My Manuals
Save this manual to your list of manuals |
Page 65 highlights
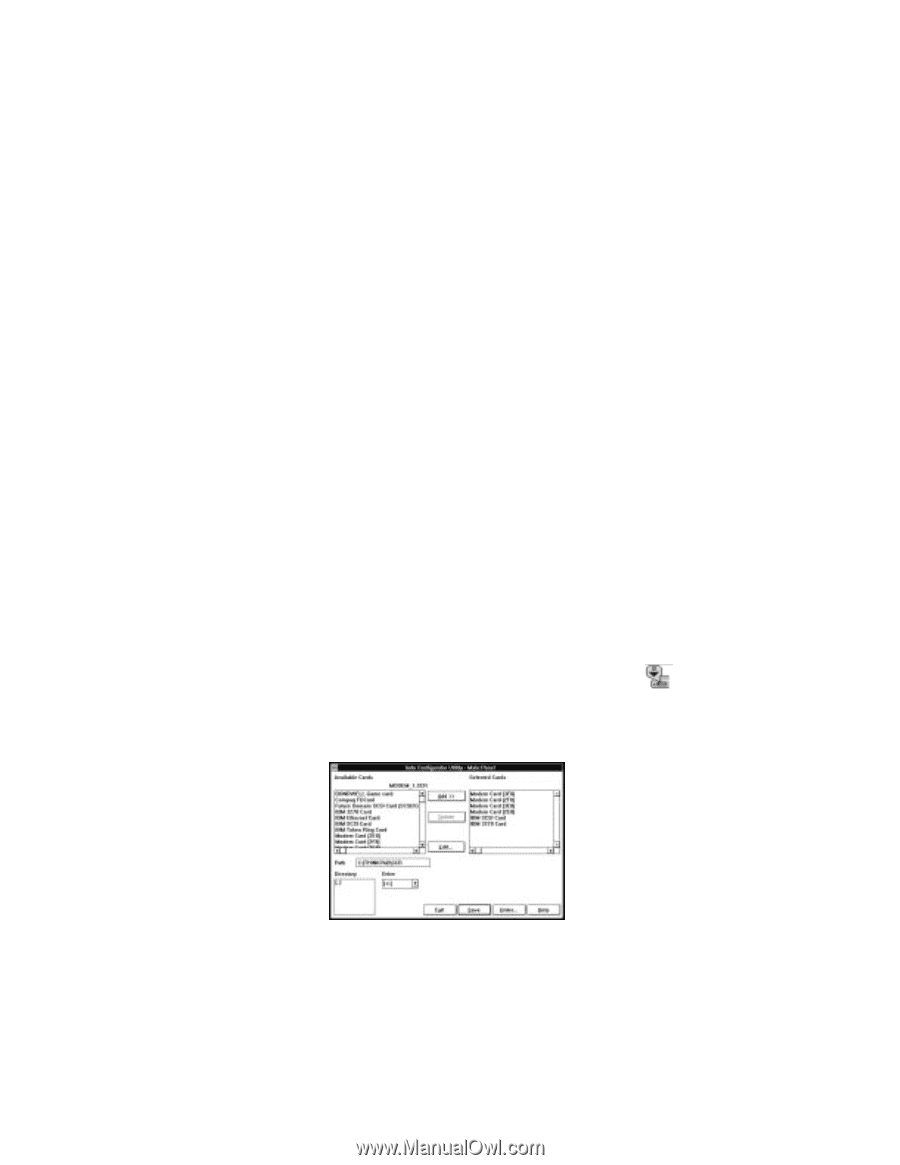
5 Make sure the card status is off; then remove the storage PC Card. Using the Auto Configurator Utility You can delete or change a registered PC Card with the Auto Configurator Utility. You can find the Auto Configurator Utility icon in the "PC Card Director" window. This section describes this utility. Note: PC Card Director provides the Auto Configurator, a program for some PC Cards, so that you do not have to install the device driver supplied with it. When you install PC Card Director, a BASEDEV= statement such as the following is added to the CONFIG.SYS file. BASEDEV=AUTODRV2.SYS Registering a PC Card in Auto Configurator 1 Double-click on the Auto Configurator Utility ( the "PC Card Director" window. ) icon from 2 Select a card from the Available Cards list in the "Auto Configurator Utility" window. Select the card for which you want to assign the resources first. For example, if you want to assign COM3 (rather than COM2) to a modem card, select the setting for COM3 first. The names in the left list box (Available Cards) can be registered. The names in the right list box (Selected Cards) are already registered in Auto Configurator. Chapter 5. Using Your Computer with a PC Card 59
-
 1
1 -
2
-
3
-
4
-
5
-
6
-
7
-
8
-
9
-
10
-
11
-
12
-
13
-
14
-
15
-
16
-
17
-
18
-
19
-
20
-
21
-
22
-
23
-
24
-
25
-
26
-
27
-
28
-
29
-
30
-
31
-
32
-
33
-
34
-
35
-
36
-
37
-
38
-
39
-
40
-
41
-
42
-
43
-
44
-
45
-
46
-
47
-
48
-
49
-
50
-
51
-
52
-
53
-
54
-
55
-
56
-
57
-
58
-
59
-
 60
60 -
 61
61 -
 62
62 -
 63
63 -
 64
64 -
 65
65 -
 66
66 -
 67
67 -
 68
68 -
 69
69 -
 70
70 -
71
-
72
-
73
-
74
-
75
-
76
-
77
-
78
-
79
-
80
-
81
-
82
-
83
-
84
-
85
-
86
-
87
-
88
-
89
-
90
-
91
-
92
-
93
-
94
-
95
-
96
-
97
-
98
-
99
-
100
-
101
-
102
-
103
-
104
-
105
-
106
-
107
-
108
-
109
-
110
-
111
-
112
-
113
-
114
-
115
-
116
-
117
-
118
-
119
-
120
-
121
-
122
-
123
-
124
-
125
-
126
-
127
-
128
-
129
-
130
-
131
-
132
-
133
-
134
-
135
-
136
-
137
-
138
-
139
-
140
-
141
-
142
-
143
-
144
-
145
-
146
-
147
-
148
-
149
-
150
-
151
-
152
-
153
-
154
-
155
-
156
-
157
-
158
-
159
-
160
-
161
-
162
-
163
-
164
 |
 |