Lexmark Z1300 User's Guide - Page 17
Using the Save Settings menu, Using the I Want To menu, Using the Options menu - windows 7
 |
UPC - 734646022743
View all Lexmark Z1300 manuals
Add to My Manuals
Save this manual to your list of manuals |
Page 17 highlights
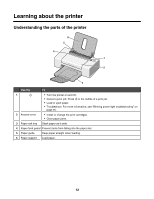
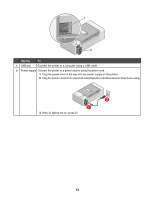
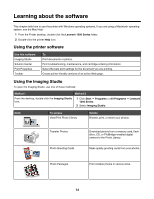
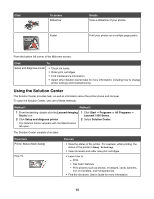
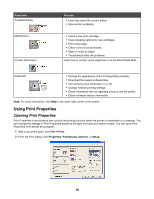
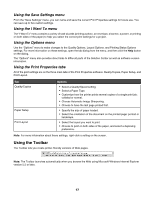
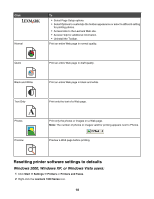
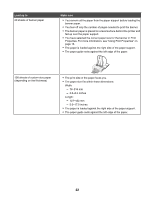
Using the Save Settings menu From the "Save Settings" menu, you can name and save the current Print Properties settings for future use. You can save up to five custom settings. Using the I Want To menu The "I Want To" menu contains a variety of task wizards (printing a photo, an envelope, a banner, a poster, or printing on both sides of the paper) to help you select the correct print settings for a project. Using the Options menu Use the "Options" menu to make changes to the Quality Options, Layout Options, and Printing Status Options settings. For more information on these settings, open the tab dialog from the menu, and then click the Help button on the dialog. The "Options" menu also provides direct links to different parts of the Solution Center as well as software version information. Using the Print Properties tabs All of the print settings are on the three main tabs of the Print Properties software: Quality/Copies, Paper Setup, and Print Layout. Tab Quality/Copies Paper Setup Print Layout Options • Select a Quality/Speed setting. • Select a Paper Type. • Customize how the printer prints several copies of a single print job: collated or normal. • Choose Automatic Image Sharpening. • Choose to have the last page printed first. • Specify the size of paper loaded. • Select the orientation of the document on the printed page: portrait or landscape. • Select the layout you want to print. • Choose to print on both sides of the paper, and select a duplexing preference. Note: For more information about these settings, right-click a setting on the screen. Using the Toolbar The Toolbar lets you create printer-friendly versions of Web pages. Note: The Toolbar launches automatically when you browse the Web using Microsoft Windows Internet Explorer version 5.5 or later. 17
-
 1
1 -
2
-
3
-
4
-
5
-
6
-
7
-
8
-
9
-
10
-
11
-
 12
12 -
 13
13 -
 14
14 -
 15
15 -
 16
16 -
 17
17 -
 18
18 -
 19
19 -
 20
20 -
 21
21 -
 22
22 -
23
-
24
-
25
-
26
-
27
-
28
-
29
-
30
-
31
-
32
-
33
-
34
-
35
-
36
-
37
-
38
-
39
-
40
-
41
-
42
-
43
-
44
-
45
-
46
-
47
-
48
-
49
-
50
-
51
-
52
-
53
 |
 |