NEC PX-50VP1A 42PD2/50PD1 - Page 22
Operation
 |
View all NEC PX-50VP1A manuals
Add to My Manuals
Save this manual to your list of manuals |
Page 22 highlights
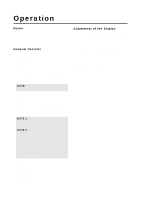
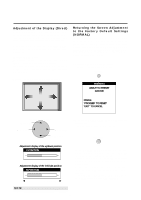
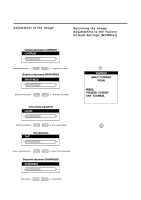
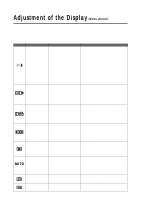
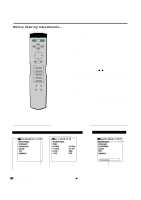
Operation Power The main unit enters the standby mode when the AC cable is plugged in. This section describes how to select a computer or video source and how to adjust the picture. General Controls Before you turn on your plasma monitor ensure that the computer or video source is turned on. 1)To adjust: 1. Turn On The Monitor The power button is on the front panel of the monitor. By turning this switch on, the POWER/STANDBY indicator will turn to green and the monitor will become ready to use. OSM is also usable from the front panel. After you press the POWER OFF button on the remote control, the monitor will go into its standby mode and the POWER/STANDBY indicator will glow orange. NOTE: The monitor is set to the standby mode when the power cord is plugged in. Adjustment of the Display There are two methods of adjusting the screen/image using the remote control. One way is direct adjustment by pressing the various buttons and displaying the desired adjustment screens. The other way is to select the menu and display the adjustment screen. This is the menu control adjustment. When Using the Power Management Function This unit is designed for use with power management function of the VESA DPMS and DVI DMPM system. When connected with a personal computer or other equipment incorporating the power management software, power consumption is reduced while the monitor is not being used. During power management operation, the STANDBY/POWER lamp changes color to orange or yellow. * The fan may stop during power management operation. This does not indicate a failure. 2. Select The Computer Or Video Source Press the "VIDEO" or "RGB 1" "RGB 2" or "RGB 3"(computer) button on the remote control to display the image. Or press the button on the front panel to select your video source: "VIDEO", "RGB 1", "RGB 2" or "RGB 3". NOTE 1: In the U.S.A. the standard video signal format is NTSC, therefore make sure that the AUTO or NTSC is selected on OSM system control menu. See page 41. NOTE 2: Select the over scan mode for VIDEO display. When the RGB input is used, the mode of the power management function can only be in the off state. In the absence of TMDS signal input, the unit will be in the off state. (The DVI standard DMPM Active-off power state is equivalent to this.) The picture will be projected about 4 seconds after the TMDS signal input returns. 3. Adjust The Raster or The Picture Control. You can adjust the raster such as the horizontal size, vertical size and the brightness and contrast of the image with the remote control. 4. Turning Off The monitor. Press the POWER OFF button on the remote control or press the POWER button on the front panel. 22
-
 1
1 -
2
-
3
-
4
-
5
-
6
-
7
-
8
-
9
-
10
-
11
-
12
-
13
-
14
-
15
-
16
-
 17
17 -
 18
18 -
 19
19 -
 20
20 -
 21
21 -
 22
22 -
 23
23 -
 24
24 -
 25
25 -
 26
26 -
 27
27 -
28
-
29
-
30
-
31
-
32
-
33
-
34
-
35
-
36
-
37
-
38
-
39
-
40
-
41
-
42
-
43
-
44
-
45
-
46
-
47
-
48
-
49
-
50
-
51
-
52
-
53
-
54
-
55
-
56
-
57
-
58
-
59
-
60
-
61
-
62
-
63
-
64
 |
 |