NEC PX-50VP1A 42PD2/50PD1 - Page 42
Program Menu, Oct30, Jan01, Video
 |
View all NEC PX-50VP1A manuals
Add to My Manuals
Save this manual to your list of manuals |
Page 42 highlights
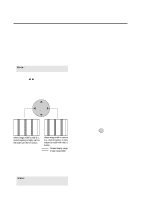
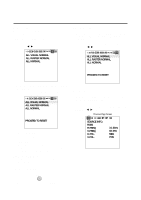
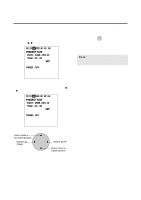
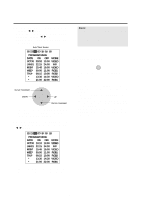
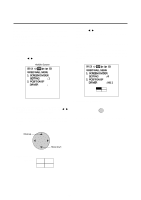
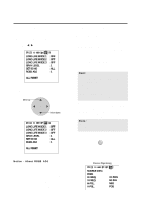
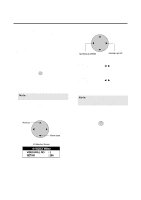
8. Use the v / w bottons select the ON timer hour and set with the ᮤ / ᮣ buttons. Next, use the v / w bottons to select the ON time minute and set with the ᮤ / ᮣ bottons. Move onto the OFF time and perform the functions as with the ON time. Auto Timer Screen Note: •INV provides an inverse image of the incoming signal to reduce burn-in. The INV will work for the last input selected. Selecting "WT" displays the all white pattern to reduce image burn-in. PROGRAM MENU DATE ON OFF MODE OCT30 10:10 13:00 VIDEO JAN01 22:15 24:00 INV MON* 15:45 19:00 VIDEO WED* 09:00 11:00 RGB1 THU* 08:15 10:00 RGB2 * 13:30 14:30 VIDEO * 21:00 22:00 RGB1 POSITION / CONTROL Cursor movement DOWN UP Cursor movement * The ON/OFF time is moved one digit at a time with the up and down cursors, and the left and right buttons change the number UP and DOWN. 9. Use the v / w bottons to select MODE and set to VIDEO, RGB1, RGB2, RGB3, INV or WT with the ᮤ / ᮣ buttons. 10. Return to the main menu EXIT * To delete the main menu, press the EXIT button once more. * When the cursor is in the DATE position, a press of the remote control CLEAR button will clear only that program. (The CLEAR button is valid only when the cursor is in the DATE position.) * The function can be used in up to 7 programs and the program contents of a program will be deleted after exiting the program. * When the Timer function is set, the POWER/ STANDBY indicator is blinking orange at intervals of 3 seconds. PROGRAM MENU DATE ON OFF MODE OCT30 10:10 13:00 VIDEO JAN01 22:15 24:00 INV MON* 15:45 19:00 VIDEO WED* 09:00 11:00 RGB1 THU* 08:15 10:00 RGB2 * 13:30 14:30 VIDEO * 21:00 22:00 RGB1 * The left and right buttons change the following input modes: VIDEO, RGB1 through RGB3, INV, WT. 42
-
 1
1 -
2
-
3
-
4
-
5
-
6
-
7
-
8
-
9
-
10
-
11
-
12
-
13
-
14
-
15
-
16
-
17
-
18
-
19
-
20
-
21
-
22
-
23
-
24
-
25
-
26
-
27
-
28
-
29
-
30
-
31
-
32
-
33
-
34
-
35
-
36
-
 37
37 -
 38
38 -
 39
39 -
 40
40 -
 41
41 -
 42
42 -
 43
43 -
 44
44 -
 45
45 -
 46
46 -
 47
47 -
48
-
49
-
50
-
51
-
52
-
53
-
54
-
55
-
56
-
57
-
58
-
59
-
60
-
61
-
62
-
63
-
64
 |
 |
