NEC PX-50VP1A 42PD2/50PD1 - Page 30
H-position 1, H-position 2, H-width
 |
View all NEC PX-50VP1A manuals
Add to My Manuals
Save this manual to your list of manuals |
Page 30 highlights
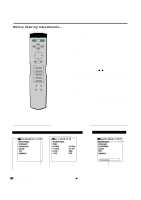
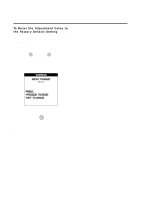
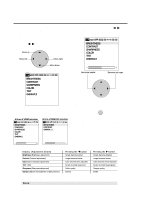
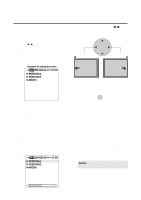
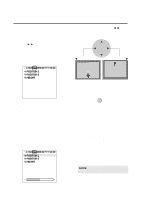
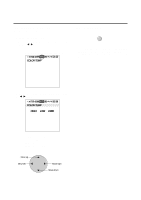
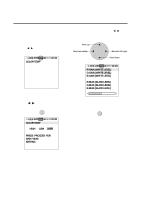
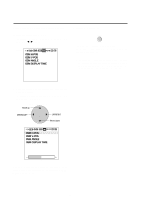
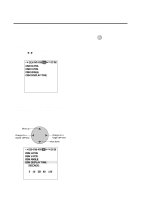
Adjustment of Screen Position (Horizontal) Horizontal (H) Adjustment Screen 1. Align the cursor with icon (2) The cursor is moved left and right with the POSITION CONTROLᮤ / ᮣ buttons. H-WIDTH: Horizontal enlargement ratio adjustment (Displayed only with Multiple Screens) Adjustment is possible only in multi mode. H-POSITION 2 cannot be adjusted at the time of VIDEO input. Icon (2) Horizontal (H) adjustment screen H-POSITION 1 H-POSITION 2 H-WIDTH 3. While watching the screen, press the ᮤ / ᮣ buttons and adjust POSITION / CONTROL ᮤ MOVE LEFT MOVE RIGHT ᮣ 4. Return to the main menu EXIT 2. Align the cursor with the desired item The cursor is moved up and down with the POSITION CONTROL v / w buttons. H-POSITION 1: Horizontal position 1 Used to align the raster on the PDP. H-POSITION 2: Horizontal position 2 Only needs to be adjusted when H-Position 1 does not allow the complete image to fill the screen. (Adjustment is not required with a standard signal.) H-WIDTH: Horizontal enlargement ratio adjustment (Displayed only with Multiple Screens) Adjustment is possible only in multi mode. H-POSITION 2 cannot be adjusted at the time of VIDEO input. H-POSITION 1 H-POSITION 2 H-WIDTH * To reset the adjustment value, press the RASTER NORMAL button before pressing the EXIT button. * To delete the main menu, press the EXIT button once more. * H-POSITION 1,2 and V-POSITION 1,2 are not available at the time of RGB input when AUTO PICTURE is turned on. To adjust H-POSITION 1,2 and V-POSITION 1,2 at the time of RGB input, turn off AUTO PICTURE. * Horizontal and Vertical Position Controls Both the horizontal and vertical position controls in the OSM include a POSITION 1 and a POSITION 2 adjustment when an RGB signal is selected for display. These two position controls provide access to the entire raster position (POSITION 1) and a fine adjustment within the raster (POSITION 2). First adjust POSITION 1 so that the raster fills the entire screen. After the raster position is set properly, then select POSITION 2 to make sure that the image fills the raster and all of the image is filling the screen. NOTE: Make sure that none of the actual image is missing, left to right or top to bottom. 30
-
 1
1 -
2
-
3
-
4
-
5
-
6
-
7
-
8
-
9
-
10
-
11
-
12
-
13
-
14
-
15
-
16
-
17
-
18
-
19
-
20
-
21
-
22
-
23
-
24
-
 25
25 -
 26
26 -
 27
27 -
 28
28 -
 29
29 -
 30
30 -
 31
31 -
 32
32 -
 33
33 -
 34
34 -
 35
35 -
36
-
37
-
38
-
39
-
40
-
41
-
42
-
43
-
44
-
45
-
46
-
47
-
48
-
49
-
50
-
51
-
52
-
53
-
54
-
55
-
56
-
57
-
58
-
59
-
60
-
61
-
62
-
63
-
64
 |
 |
