Netgear PTVU1000 PTVU1000 User Guide - Page 12
Connecting Audio, Using the HDMI Connector, Using the Optical S/PDIF Connector - universal push2tv
 |
View all Netgear PTVU1000 manuals
Add to My Manuals
Save this manual to your list of manuals |
Page 12 highlights
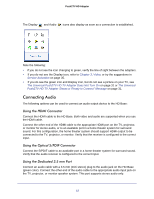
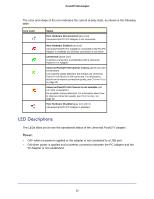
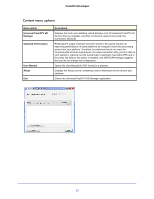
Push2TV HD Adapter The Display and Audio icons also display as soon as a connection is established. Note the following: • If you do not see the icon changing to green, verify the line of sight between the adapters. • If you do not see the Display icon, refer to Chapter 3, Video, or try the suggestions in Service Activation on page 35. • If you do see the green icon and Display icon, but do not see a picture on your TV, see The Universal Push2TV HD TV Adapter Does Not Turn On on page 31 or The Universal Push2TV HD TV Adapter Shows a "Ready to Connect" Message on page 31. Connecting Audio The following options can be used to connect an audio output device to the HD Base: Using the HDMI Connector Connect the HDMI cable to the HD Base. Both video and audio are supported when you use the HDMI cable. Connect the other end of the HDMI cable to the appropriate HDMI port on the TV, projector, or monitor for stereo audio, or to an available port in a home theater system for surround sound. For this configuration, the home theater system should support HDMI output to be connected to the TV, projector, or monitor. Verify that the receiver is configured to the correct input. Using the Optical S/PDIF Connector Connect the S/PDIF cable to an available port in a home theater system for surround sound. Verify that the audio receiver is configured to the correct input. Using the Dedicated 3.5 mm Port Connect an audio cable with a 3.5 mm (mini stereo) plug to the audio jack on the HD Base (green color). Connect the other end of the audio cable to the appropriate audio input jack on the TV, projector, or monitor speaker system. This port supports stereo audio only. 12
-
 1
1 -
2
-
3
-
4
-
5
-
6
-
 7
7 -
 8
8 -
 9
9 -
 10
10 -
 11
11 -
 12
12 -
 13
13 -
 14
14 -
 15
15 -
 16
16 -
 17
17 -
18
-
19
-
20
-
21
-
22
-
23
-
24
-
25
-
26
-
27
-
28
-
29
-
30
-
31
-
32
-
33
-
34
-
35
-
36
-
37
-
38
-
39
-
40
-
41
-
42
-
43
-
44
-
45
-
46
-
47
-
48
-
49
-
50
-
51
-
52
-
53
-
54
-
55
-
56
-
57
-
58
-
59
-
60
-
61
-
62
-
63
-
64
-
65
-
66
-
67
-
68
-
69
-
70
-
71
-
72
-
73
-
74
-
75
-
76
-
77
-
78
-
79
-
80
 |
 |
