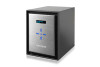
Netgear RN526X Software Manual - Page 15
Local Setup Wizard, To use ReadyCLOUD to discover and set up your storage system, Getting Started
 |
View all Netgear RN526X manuals
Add to My Manuals
Save this manual to your list of manuals |
Page 15 highlights
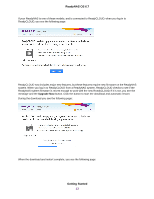
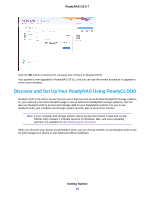
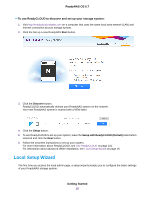
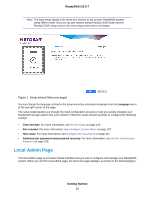
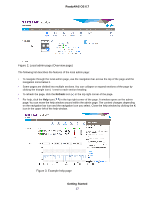
ReadyNAS OS 6.7 To use ReadyCLOUD to discover and set up your storage system: 1. Visit http://readycloud.netgear.com on a computer that uses the same local area network (LAN) and Internet connection as your storage system. 2. Click the Set up a new ReadyNAS Start button. 3. Click the Discover button. ReadyCLOUD automatically detects your ReadyNAS system on the network. Your new ReadyNAS system is marked with a NEW label. 4. Click the Setup button. 5. To use ReadyCLOUD to set up your system, leave the Setup with ReadyCLOUD (Default) radio button selected and click the Next button. 6. Follow the onscreen instructions to set up your system. For more information about ReadyCLOUD, see Use ReadyCLOUD on page 131. For information about advanced offline installation, see Local Setup Wizard on page 15. Local Setup Wizard The first time you access the local admin page, a setup wizard prompts you to configure the basic settings of your ReadyNAS storage system. Getting Started 15
-
 1
1 -
2
-
3
-
4
-
5
-
6
-
7
-
8
-
9
-
 10
10 -
 11
11 -
 12
12 -
 13
13 -
 14
14 -
 15
15 -
 16
16 -
 17
17 -
 18
18 -
 19
19 -
 20
20 -
21
-
22
-
23
-
24
-
25
-
26
-
27
-
28
-
29
-
30
-
31
-
32
-
33
-
34
-
35
-
36
-
37
-
38
-
39
-
40
-
41
-
42
-
43
-
44
-
45
-
46
-
47
-
48
-
49
-
50
-
51
-
52
-
53
-
54
-
55
-
56
-
57
-
58
-
59
-
60
-
61
-
62
-
63
-
64
-
65
-
66
-
67
-
68
-
69
-
70
-
71
-
72
-
73
-
74
-
75
-
76
-
77
-
78
-
79
-
80
-
81
-
82
-
83
-
84
-
85
-
86
-
87
-
88
-
89
-
90
-
91
-
92
-
93
-
94
-
95
-
96
-
97
-
98
-
99
-
100
-
101
-
102
-
103
-
104
-
105
-
106
-
107
-
108
-
109
-
110
-
111
-
112
-
113
-
114
-
115
-
116
-
117
-
118
-
119
-
120
-
121
-
122
-
123
-
124
-
125
-
126
-
127
-
128
-
129
-
130
-
131
-
132
-
133
-
134
-
135
-
136
-
137
-
138
-
139
-
140
-
141
-
142
-
143
-
144
-
145
-
146
-
147
-
148
-
149
-
150
-
151
-
152
-
153
-
154
-
155
-
156
-
157
-
158
-
159
-
160
-
161
-
162
-
163
-
164
-
165
-
166
-
167
-
168
-
169
-
170
-
171
-
172
-
173
-
174
-
175
-
176
-
177
-
178
-
179
-
180
-
181
-
182
-
183
-
184
-
185
-
186
-
187
-
188
-
189
-
190
-
191
-
192
-
193
-
194
-
195
-
196
-
197
-
198
-
199
-
200
-
201
-
202
-
203
-
204
-
205
-
206
-
207
-
208
-
209
-
210
-
211
-
212
-
213
-
214
-
215
-
216
-
217
-
218
-
219
-
220
-
221
-
222
-
223
-
224
-
225
-
226
-
227
-
228
-
229
-
230
-
231
-
232
-
233
-
234
-
235
-
236
-
237
-
238
-
239
-
240
-
241
-
242
-
243
-
244
-
245
-
246
-
247
-
248
-
249
-
250
-
251
-
252
-
253
-
254
-
255
 |
 |
