Netgear RN526X Software Manual - Page 248
Monitor and Change ReadyDR Jobs, Recovery Using ReadyDR Snapshots, Recovery to the Remote Site
 |
View all Netgear RN526X manuals
Add to My Manuals
Save this manual to your list of manuals |
Page 248 highlights
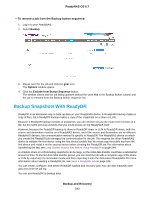
ReadyNAS OS 6.7 Monitor and Change ReadyDR Jobs You can manually start a job, view the job history, export a seed file, delete the job, enable a stopped job, and change the job settings. To check the history or change job parameters: 1. Log in to your ReadyNAS. 2. Select Backup. 3. Select the ReadyDR job you want to monitor or change from the ReadyDR section. 4. Click the gear icon. The options menu opens. 5. Click the desired action. Start Immediately runs the job. History Displays the job history. Export Delete Enable Creates a file archive of the share or LUN and opens a file browse window where you select the destination. The file name follows the format ReadyDR_Seed-.jobnamehostname Use this file to seed a new ReadyDR job. Deletes the job. Enables a stopped job. Disable Settings Disables the job. Opens the settings window for the job. From this window you can change the schedule, and the Bandwidth Limit, Compression, and Encrypted Transport options. Recovery Using ReadyDR Snapshots When you need to recover shares and LUNs from a ReadyDR backup, you can recover them by cloning a backed up snapshot. One application of ReadyDR is to maintain a disaster recovery site. Depending on specifics of your disaster recovery plan, you might want to restore the data to the original site, while in other cases you might want to use the disaster recovery site's ReadyNAS device as a replacement for the original ReadyNAS device. The process is different depending on the case. Recovery to the Remote Site If the ReadyDR share is on the server on which you want the recovered share or LUN, all you need to do is clone the snapshot. For information about cloning the snapshot, see Clone Snapshots on page 111. Recovery to the Original Site If you want the recovered share or LUN on the original ReadyNAS device, create a one time ReadyDR job to backup the ReadyDR share with the snapshots back to the original ReadyNAS device, and then clone the snapshots. For information on creating the ReadyDR job, see Create a ReadyDR Job on page 245. For information about cloning the snapshot, see Clone Snapshots on page 111. Backup and Recovery 248
-
 1
1 -
2
-
3
-
4
-
5
-
6
-
7
-
8
-
9
-
10
-
11
-
12
-
13
-
14
-
15
-
16
-
17
-
18
-
19
-
20
-
21
-
22
-
23
-
24
-
25
-
26
-
27
-
28
-
29
-
30
-
31
-
32
-
33
-
34
-
35
-
36
-
37
-
38
-
39
-
40
-
41
-
42
-
43
-
44
-
45
-
46
-
47
-
48
-
49
-
50
-
51
-
52
-
53
-
54
-
55
-
56
-
57
-
58
-
59
-
60
-
61
-
62
-
63
-
64
-
65
-
66
-
67
-
68
-
69
-
70
-
71
-
72
-
73
-
74
-
75
-
76
-
77
-
78
-
79
-
80
-
81
-
82
-
83
-
84
-
85
-
86
-
87
-
88
-
89
-
90
-
91
-
92
-
93
-
94
-
95
-
96
-
97
-
98
-
99
-
100
-
101
-
102
-
103
-
104
-
105
-
106
-
107
-
108
-
109
-
110
-
111
-
112
-
113
-
114
-
115
-
116
-
117
-
118
-
119
-
120
-
121
-
122
-
123
-
124
-
125
-
126
-
127
-
128
-
129
-
130
-
131
-
132
-
133
-
134
-
135
-
136
-
137
-
138
-
139
-
140
-
141
-
142
-
143
-
144
-
145
-
146
-
147
-
148
-
149
-
150
-
151
-
152
-
153
-
154
-
155
-
156
-
157
-
158
-
159
-
160
-
161
-
162
-
163
-
164
-
165
-
166
-
167
-
168
-
169
-
170
-
171
-
172
-
173
-
174
-
175
-
176
-
177
-
178
-
179
-
180
-
181
-
182
-
183
-
184
-
185
-
186
-
187
-
188
-
189
-
190
-
191
-
192
-
193
-
194
-
195
-
196
-
197
-
198
-
199
-
200
-
201
-
202
-
203
-
204
-
205
-
206
-
207
-
208
-
209
-
210
-
211
-
212
-
213
-
214
-
215
-
216
-
217
-
218
-
219
-
220
-
221
-
222
-
223
-
224
-
225
-
226
-
227
-
228
-
229
-
230
-
231
-
232
-
233
-
234
-
235
-
236
-
237
-
238
-
239
-
240
-
241
-
242
-
 243
243 -
 244
244 -
 245
245 -
 246
246 -
 247
247 -
 248
248 -
 249
249 -
 250
250 -
 251
251 -
 252
252 -
 253
253 -
254
-
255
 |
 |
