Nokia hf-3 User Guide - Page 24
Scenes, Take pictures in a sequence
 |
UPC - 758478002407
View all Nokia hf-3 manuals
Add to My Manuals
Save this manual to your list of manuals |
Page 24 highlights
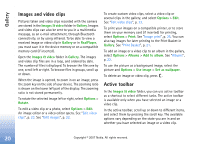
Camera If you select a new scene, the color and lighting settings are replaced by the selected scene. See "Scenes", p. 15. You can change the setup settings after selecting a scene if needed. Scenes A scene helps you to find the right color and lighting settings for the current environment. Select a proper scene for taking pictures or recording video clips from the scene list. The settings of each scene have been set according to a certain style or environment. Scenes are only available in the main camera. Use the scroll key to scroll through the active toolbar, and select from the following options: Video scenes Automatic ( ) (default) and Night ( ). Image scenes Auto ( ) (default), User defined ( ), Close-up mode( ), Portrait ( ), Landscape ( ), Sports ( ), Night ( ), and Night portrait ( ). When you take pictures, the default scene is Auto. You can select the User defined scene as the default scene. To make your own scene suitable for a certain environment, scroll to User defined, and select Options > Change. In the user defined scene you can adjust different lighting and color settings. To copy the settings of another scene, select Based on scene mode and the desired scene. Take pictures in a sequence The sequence mode is available only in the main camera. To set the camera to take six pictures or more in a sequence (if enough memory is available), in the active toolbar, select Switch to sequence mode. To take six pictures, press the capture key. To take more than six pictures, press and hold the capture key. To stop taking pictures, release the capture key. You can capture up to 100 images, depending on the available memory. After you take the pictures, they are shown in a grid on the display. To view a picture, press to open it. You can also use the sequence mode with the self-timer. When using the self-timer, the maximum number of pictures is six. To return to the sequence mode viewfinder, press the capture key. Copyright © 2007 Nokia. All rights reserved. 15
-
 1
1 -
2
-
3
-
4
-
5
-
6
-
7
-
8
-
9
-
10
-
11
-
12
-
13
-
14
-
15
-
16
-
17
-
18
-
 19
19 -
 20
20 -
 21
21 -
 22
22 -
 23
23 -
 24
24 -
 25
25 -
 26
26 -
 27
27 -
 28
28 -
 29
29 -
30
-
31
-
32
-
33
-
34
-
35
-
36
-
37
-
38
-
39
-
40
-
41
-
42
-
43
-
44
-
45
-
46
-
47
-
48
-
49
-
50
-
51
-
52
-
53
-
54
-
55
-
56
-
57
-
58
-
59
-
60
-
61
-
62
-
63
-
64
-
65
-
66
-
67
-
68
-
69
-
70
-
71
-
72
-
73
-
74
-
75
-
76
-
77
-
78
-
79
-
80
-
81
-
82
-
83
-
84
-
85
-
86
-
87
-
88
-
89
-
90
-
91
-
92
-
93
-
94
-
95
-
96
-
97
-
98
-
99
-
100
-
101
-
102
-
103
-
104
-
105
-
106
-
107
-
108
-
109
-
110
-
111
-
112
-
113
-
114
-
115
-
116
-
117
-
118
-
119
-
120
-
121
-
122
-
123
-
124
-
125
-
126
-
127
-
128
-
129
-
130
-
131
-
132
-
133
-
134
-
135
-
136
-
137
-
138
-
139
-
140
-
141
-
142
-
143
-
144
-
145
-
146
-
147
-
148
-
149
-
150
-
151
-
152
 |
 |
