Onkyo TX-NR626 Owner's Manual English - Page 34
Registering Other Internet Radio, Changing the Icon Layout on the Network Service Screen - hdmi 2 0
 |
View all Onkyo TX-NR626 manuals
Add to My Manuals
Save this manual to your list of manuals |
Page 34 highlights
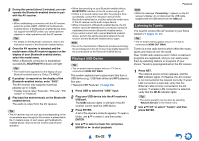
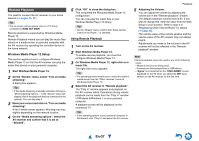
Registering Other Internet Radio You need to connect the AV receiver to your home network (➔ pages 16, 27). Tip • The on-screen menus appear only on a TV that is connected to HDMI OUT MAIN. Internet radio URLs in the following formats are supported: PLS, M3U, and podcast (RSS). However, depending on the type of data or audio format used by the Internet radio station, you may not be able to listen to some stations. To listen to other Internet radio stations, you must register your station in "My Favorites" of the network service screen, as described below. Note • Services available may vary depending on the region. See the separate instructions for more information. • Certain network service or contents available through this device may not be accessible in case the service provider terminates its service. 1 Select "Network" on the Setup menu to verify your IP address (➔ page 67). Take a note of the IP address. 2 On your computer, start your web browser. 3 Enter the AV receiver's IP address in the browser's Internet address (URL) field. If you are using Internet Explorer®, you can also enter the URL by selecting "Open..." on the "File" menu. Information on the AV receiver is then shown on your Internet browser (Web Setup). 4 Click on the "My Favorites" tab, and enter the Internet radio station's name and URL. 5 Click "Save" to save the Internet radio station. The Internet radio station is then added to "My Favorites". To play the registered station, press NET, and then select "My Favorites" on the network service screen. A list of registered Internet radio stations appears. Select the one that you saved and press ENTER. Tip • If you want to add a new station directly from "My Favorites", select an empty slot in the list and press MENU. Then, select "Create New Station" and press ENTER. Pressing ENTER again will display the keyboard screen. Use that keyboard to enter the station's name and URL respectively, and then press ENTER. • If you want to delete a station saved in "My Favorites", press MENU with the station selected or while the station is playing. Then, use R/X to select "Delete from My Favorites" and press ENTER. You can also delete stations from the Web Setup. • If you want to rename a station, select the desired station and press MENU. Then, use R/X to select "Rename this station" and press ENTER. • You can save up to 40 Internet radio stations. Playback Changing the Icon Layout on the Network Service Screen Tip • You need to connect your TV to the HDMI output (HDMI OUT MAIN) to make the following on-screen setting. The layout of icons can be customized by switching their positions on the network service screen. 1 Press NET. The network service screen appears. Tip • The same operation can be done by selecting "Network Service" in the Home menu. 2 Press MODE/D (blue) on the remote controller. 3 Use R/X/F/S to select an icon to move, and then press ENTER. 4 Use R/X/F/S to select another icon as the destination, and then press ENTER. The icons switch positions and the message "Completed!" appears. Playing Music Files on a Server (DLNA) You need to connect the AV receiver to your home network (➔ pages 16, 27). Tip • The on-screen menus appear only on a TV that is connected to HDMI OUT MAIN. This section explains how to play music files on a computer or media server through the AV receiver (Server Playback). En-34
-
 1
1 -
2
-
3
-
4
-
5
-
6
-
7
-
8
-
9
-
10
-
11
-
12
-
13
-
14
-
15
-
16
-
17
-
18
-
19
-
20
-
21
-
22
-
23
-
24
-
25
-
26
-
27
-
28
-
 29
29 -
 30
30 -
 31
31 -
 32
32 -
 33
33 -
 34
34 -
 35
35 -
 36
36 -
 37
37 -
 38
38 -
 39
39 -
40
-
41
-
42
-
43
-
44
-
45
-
46
-
47
-
48
-
49
-
50
-
51
-
52
-
53
-
54
-
55
-
56
-
57
-
58
-
59
-
60
-
61
-
62
-
63
-
64
-
65
-
66
-
67
-
68
-
69
-
70
-
71
-
72
-
73
-
74
-
75
-
76
-
77
-
78
-
79
-
80
-
81
-
82
-
83
-
84
-
85
-
86
-
87
-
88
-
89
-
90
-
91
-
92
-
93
-
94
-
95
-
96
-
97
-
98
-
99
-
100
-
101
-
102
-
103
-
104
-
105
-
106
-
107
-
108
-
109
-
110
-
111
-
112
-
113
-
114
-
115
-
116
-
117
-
118
-
119
-
120
-
121
-
122
-
123
-
124
-
125
-
126
-
127
-
128
-
129
-
130
-
131
-
132
-
133
-
134
-
135
-
136
-
137
-
138
-
139
-
140
 |
 |
