Onkyo TX-SR876 Owner Manual - Page 67
Notes, FinishCalculate, Review SP Config, Review SP Distance, Review SP Level, Cancel - 7 1 reviews
 |
UPC - 751398008337
View all Onkyo TX-SR876 manuals
Add to My Manuals
Save this manual to your list of manuals |
Page 67 highlights
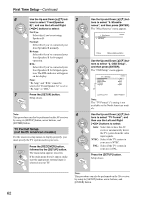
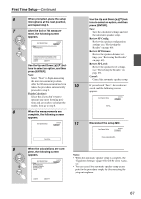
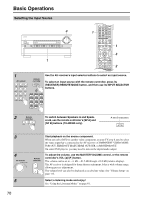
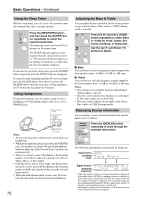
First Time Setup-Continued 6 When prompted, place the setup microphone at the next position, and repeat step 5. 7 After the 3rd or 7th measure- ment, the following screen appears. Auto Speaker Setup Next Finish(Calculate ) Select [Next] to measure the next position, or select [Finish] to calculate the Audyssey MultEQ room EQ solution. MOVE ENTER ENTER Use the Up and Down [R]/[X] buttons to select an option, and then press [ENTER]. Next: Select "Next" to begin measuring the next measurement position. After the 8th measurement has been taken, the procedure automatically proceeds to step 8. Finish(Calculate): Select this if you don't want to measure any more listening positions and are ready to calculate the results, then go to step 8. 10 8 When the measurements are complete, the following screen appears. Auto Speaker Setup 11 Calculating... Use the Up and Down [R]/[X] buttons to select an option, and then press [ENTER]. Save: Save the calculated settings and exit the automatic speaker setup. Review SP Config: Review the speaker configuration settings (see "Reviewing the Results" on page 69). Review SP Distance: Review the speaker distance settings (see "Reviewing the Results" on page 69). Review SP Level: Review the speaker level settings (see "Reviewing the Results" on page 69). Cancel: Cancel the automatic speaker setup. If you selected "Save", the results are saved, and the following screen appears. Auto Speaker Setup Saving... Disconnect the setup MIC. Auto Speaker Setup Please, unplug Setup Mic. 9 When the calculations are com- plete, the following screen appears. Notes: • When the automatic speaker setup is complete, the Auto Speaker Setup "Equalizer Settings" (page 102) will be set to Audys- Save Review SP Config Review SP Distance Review SP Level Cancel sey. • You can cancel the automatic speaker setup at any point in the procedure simply by disconnecting the setup microphone. MOVE ENTER ENTER 67
-
 1
1 -
2
-
3
-
4
-
5
-
6
-
7
-
8
-
9
-
10
-
11
-
12
-
13
-
14
-
15
-
16
-
17
-
18
-
19
-
20
-
21
-
22
-
23
-
24
-
25
-
26
-
27
-
28
-
29
-
30
-
31
-
32
-
33
-
34
-
35
-
36
-
37
-
38
-
39
-
40
-
41
-
42
-
43
-
44
-
45
-
46
-
47
-
48
-
49
-
50
-
51
-
52
-
53
-
54
-
55
-
56
-
57
-
58
-
59
-
60
-
61
-
 62
62 -
 63
63 -
 64
64 -
 65
65 -
 66
66 -
 67
67 -
 68
68 -
 69
69 -
 70
70 -
 71
71 -
 72
72 -
73
-
74
-
75
-
76
-
77
-
78
-
79
-
80
-
81
-
82
-
83
-
84
-
85
-
86
-
87
-
88
-
89
-
90
-
91
-
92
-
93
-
94
-
95
-
96
-
97
-
98
-
99
-
100
-
101
-
102
-
103
-
104
-
105
-
106
-
107
-
108
-
109
-
110
-
111
-
112
-
113
-
114
-
115
-
116
-
117
-
118
-
119
-
120
-
121
-
122
-
123
-
124
-
125
-
126
-
127
-
128
-
129
-
130
-
131
-
132
-
133
-
134
-
135
-
136
-
137
-
138
-
139
-
140
-
141
-
142
-
143
-
144
-
145
-
146
-
147
-
148
-
149
-
150
 |
 |
