Optoma CinemaX P2 User Manual - Page 18
Remote setup, Charging the remote control
 |
View all Optoma CinemaX P2 manuals
Add to My Manuals
Save this manual to your list of manuals |
Page 18 highlights
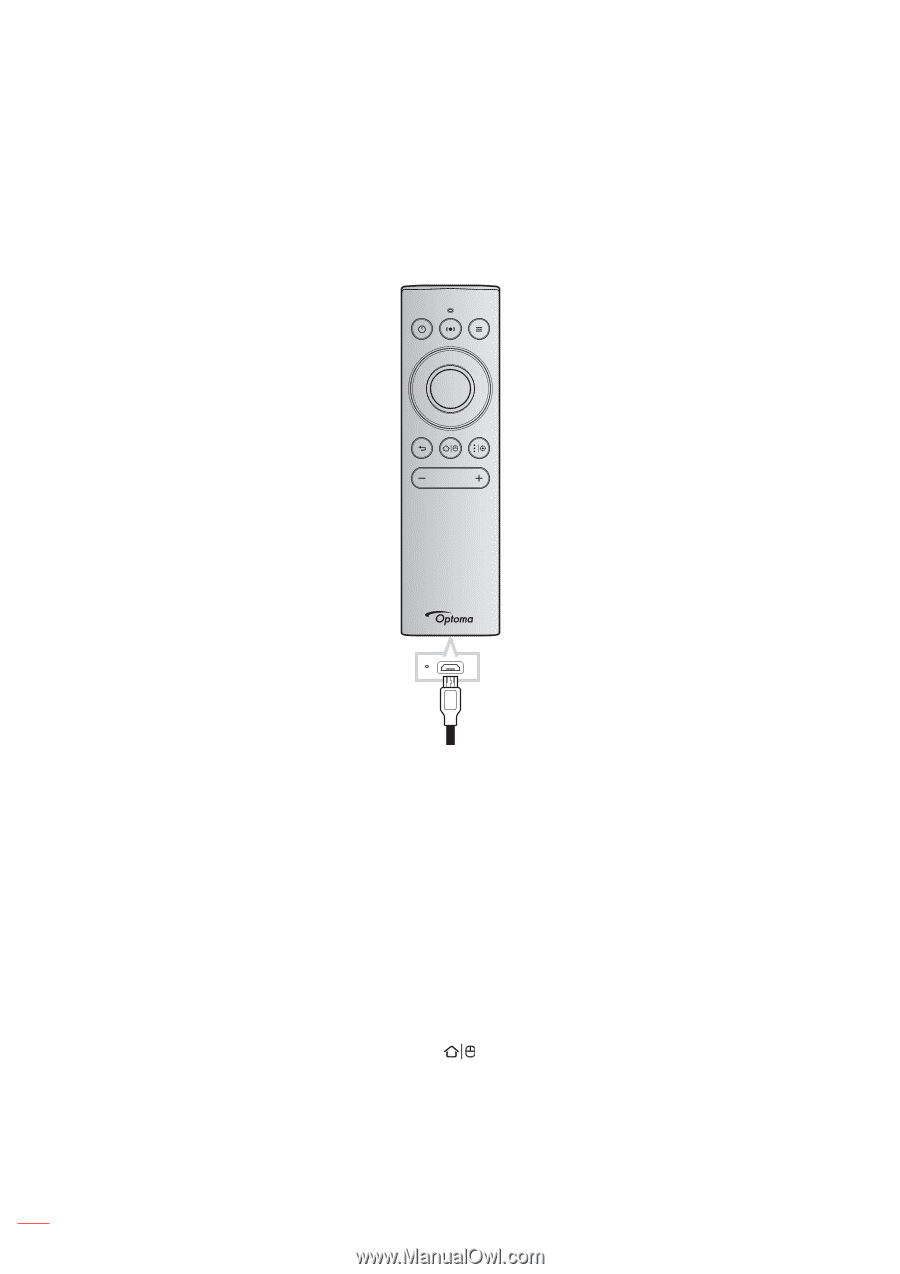
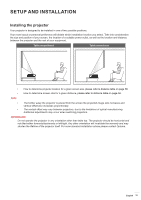
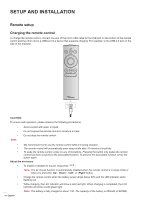
SETUP AND INSTALLATION Remote setup Charging the remote control To charge the remote control, connect one end of the micro USB cable to the USB port on the bottom of the remote control and the other end to a USB port of a device that supports charging. For example, to the USB 2.0 port on the side of the projector. CAUTION: To ensure safe operation, please observe the following precautions: Note: Avoid contact with water or liquid. Do not expose the remote control to moisture or heat. Do not drop the remote control. ‡‡ We recommend not to use the remote control while it is being charged. ‡‡ The remote control will automatically enter sleep mode after 10 minutes of inactivity. ‡‡ To wake the remote control, press on any of its buttons. Pressing the button only wakes the remote control but does not perform the associated function. To perform the associated function, press the button again. About the air mouse ‡‡ To enable or disable air mouse, long press " ". Note: The air mouse function is automatically disabled when the remote control is in sleep mode or when you press the "Up", "Down", "Left", or "Right" button. ‡‡ Charge the remote control when the battery power drops below 20% and the LED indicator starts flashing red. ‡‡ While charging, the LED indicator will show a solid red light. When charging is completed, the LED indicator will show a solid green light. Note: The battery is fully charged in about 1.5h. The capacity of the battery is 250mAh (0.925Wh). 18 English
-
 1
1 -
2
-
3
-
4
-
5
-
6
-
7
-
8
-
9
-
10
-
11
-
12
-
 13
13 -
 14
14 -
 15
15 -
 16
16 -
 17
17 -
 18
18 -
 19
19 -
 20
20 -
 21
21 -
 22
22 -
 23
23 -
24
-
25
-
26
-
27
-
28
-
29
-
30
-
31
-
32
-
33
-
34
-
35
-
36
-
37
-
38
-
39
-
40
-
41
-
42
-
43
-
44
-
45
-
46
-
47
-
48
-
49
-
50
-
51
-
52
-
53
-
54
-
55
-
56
-
57
-
58
-
59
-
60
-
61
-
62
-
63
-
64
-
65
-
66
 |
 |