Panasonic KX-HNC500 HomeHawk App Users Guide - Page 177
Troubleshooting, HomeHawk], Date and time settings, Time Adjustment]
 |
View all Panasonic KX-HNC500 manuals
Add to My Manuals
Save this manual to your list of manuals |
Page 177 highlights
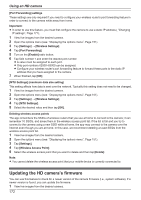
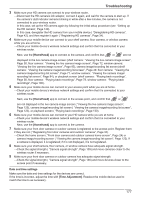
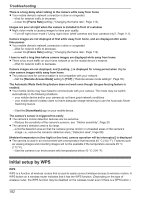
Troubleshooting 3 Make sure your HD camera can connect to your wireless router. →Disconnect the HD camera's AC adaptor, connect it again, and wait for the camera to start up. If the camera's LED indicator remains blinking in white after a few minutes, the camera is not connected to your wireless router. In this case, set up the HD camera again by following the initial setup procedure (see "Setting up the HD camera", Page 149). In this case, deregister the HD camera from your mobile device ( "Deregistering HD cameras", Page 42), and then register it again ( "Registering HD cameras", Page 34). 4 Make sure your mobile device can connect to your shelf camera, floor camera, or window camera while you are at home. →Check your mobile device's wireless network settings and confirm that it is connected to your wireless router. Next, use the [HomeHawk] app to connect to the camera, and confirm that or are not displayed in the live camera image screen (shelf camera: "Viewing the live camera image screen", Page 50, floor camera: "Viewing the live camera image screen", Page 72, window camera: "Viewing the live camera image screen", Page 95), camera image/recording list screen (shelf camera: "Viewing the camera image/recording list screen", Page 49, floor camera: "Viewing the camera image/recording list screen", Page 71, window camera: "Viewing the camera image/ recording list screen", Page 94), or playback screen (shelf camera: "Playing back recordings", Page 56, floor camera: "Playing back recordings", Page 78, window camera: "Playing back recordings", Page 100). 5 Make sure your mobile device can connect to your access point while you are at home. →Check your mobile device's wireless network settings and confirm that it is connected to your wireless router. Next, use the [HomeHawk] app to connect to the access point, and confirm that or are not displayed in the live camera image screen ( "Viewing the live camera image screen", Page 125), camera image/recording list screen ( "Viewing the camera image/recording list screen", Page 123), or playback screen ( "Playing back recordings", Page 130). 6 Make sure your mobile device can connect to your HD camera while you are at home. →Check your mobile device's wireless network settings and confirm that it is connected to your wireless router. Next, use the [HomeHawk] app to connect to the camera. 7 Make sure your front door camera or outdoor camera is registered to the access point. Register them if they are not ( "Registering front door cameras and outdoor cameras", Page 34). →Check the home screen ( "Front door camera and outdoor camera home screen", Page 24) or camera image/recording screen ( "Viewing the camera image/recording list screen", Page 123). If a camera is displayed, it is registered; if it is not displayed, it is not registered. 8 Make sure your shelf camera, floor camera, or window camera have adequate signal strength. →Check the signal strength ( "Camera signal strength", Page 109) and move cameras closer to the wireless router if necessary. 9 Make sure your front door camera or outdoor camera has adequate signal strength. →Check the signal strength ( "Camera signal strength", Page 136) and move devices closer to the access point if necessary. Date and time settings Make sure the date and time settings for the devices are correct. If the time is incorrect, adjust the time with [Time Adjustment]. Reselect the mobile device used to match the time to as necessary. 177
-
 1
1 -
2
-
3
-
4
-
5
-
6
-
7
-
8
-
9
-
10
-
11
-
12
-
13
-
14
-
15
-
16
-
17
-
18
-
19
-
20
-
21
-
22
-
23
-
24
-
25
-
26
-
27
-
28
-
29
-
30
-
31
-
32
-
33
-
34
-
35
-
36
-
37
-
38
-
39
-
40
-
41
-
42
-
43
-
44
-
45
-
46
-
47
-
48
-
49
-
50
-
51
-
52
-
53
-
54
-
55
-
56
-
57
-
58
-
59
-
60
-
61
-
62
-
63
-
64
-
65
-
66
-
67
-
68
-
69
-
70
-
71
-
72
-
73
-
74
-
75
-
76
-
77
-
78
-
79
-
80
-
81
-
82
-
83
-
84
-
85
-
86
-
87
-
88
-
89
-
90
-
91
-
92
-
93
-
94
-
95
-
96
-
97
-
98
-
99
-
100
-
101
-
102
-
103
-
104
-
105
-
106
-
107
-
108
-
109
-
110
-
111
-
112
-
113
-
114
-
115
-
116
-
117
-
118
-
119
-
120
-
121
-
122
-
123
-
124
-
125
-
126
-
127
-
128
-
129
-
130
-
131
-
132
-
133
-
134
-
135
-
136
-
137
-
138
-
139
-
140
-
141
-
142
-
143
-
144
-
145
-
146
-
147
-
148
-
149
-
150
-
151
-
152
-
153
-
154
-
155
-
156
-
157
-
158
-
159
-
160
-
161
-
162
-
163
-
164
-
165
-
166
-
167
-
168
-
169
-
170
-
171
-
 172
172 -
 173
173 -
 174
174 -
 175
175 -
 176
176 -
 177
177 -
 178
178 -
 179
179 -
 180
180 -
 181
181 -
 182
182 -
183
-
184
-
185
-
186
-
187
-
188
-
189
-
190
-
191
-
192
-
193
-
194
-
195
-
196
-
197
-
198
-
199
-
200
 |
 |
