Panasonic KX-HNC500 HomeHawk App Users Guide - Page 187
The camera's LED indicator is lit in blue.
 |
View all Panasonic KX-HNC500 manuals
Add to My Manuals
Save this manual to your list of manuals |
Page 187 highlights
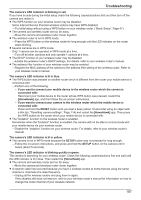
Troubleshooting The camera's LED indicator is blinking in red. If you have trouble during the initial setup check the following causes/solutions first and then turn off the camera and restart it. R The WPS function on your wireless router may be disabled. Some Internet Service Provider wireless routers may have WPS disabled. →Try initial setup without using a WPS button on your wireless router ( "Basic Setup", Page 47). R The camera and wireless router are too far away. →Move the camera and wireless router closer together. R The wireless router is not in WPS mode. →Press the WPS button on the wireless router for long enough until the LED indicator on the router starts blinking. R Several cameras are in WPS mode. Only 1 camera can be operated in WPS mode at a time. →Turn off all other cameras and only operate 1 camera at a time. R The DHCP function of your wireless router may be disabled. →Enable the wireless router's DHCP settings. For details, refer to your wireless router's manual. R The address filter function of your wireless router may be enabled. →Register the MAC address of the camera to the address filter setting of the wireless router. Refer to your wireless router's manual. The camera's LED indicator is lit in blue. R The WPS button was pressed on another router which is different from the router your mobile device is connected with. →Perform one of the following. - If you want to connect your mobile device to the wireless router which the camera is connected with: Reconnect your mobile device to the router whose WPS button was pressed, restart the [HomeHawk] app, and then follow the on-screen instructions. - If you want to connect your camera to the wireless router which the mobile device is connected with: Press and hold the RESET button until you hear a beep (about 10 seconds) using an object with a thin tip ( "Resetting camera settings", Page 114) and restart the [HomeHawk] app. Then press the WPS button on the router which your mobile device is connected with. R The "Isolation" function on the wireless router is enabled. Sometimes when the "Isolation" function is enabled, the camera will not be able to communicate with your mobile device via your wireless router. →Disable the "Isolation" function on your wireless router. For details, refer to your wireless router's manual. The camera's LED indicator is lit in yellow. R The camera is not in WPS mode because the SETUP button was not pressed for long enough. →Follow the on-screen instructions, and press and hold the SETUP button on the camera until it beeps (about 5 seconds). The camera's LED indicator is blinking quickly in green. The camera is searching for your wireless router. Check the following causes/solutions first and wait until the LED indicator is lit in blue. Then restart the [HomeHawk] app. R The camera and wireless router are too far away. →Move the camera and wireless router closer together. R A network clash has occurred because you have 2 wireless routers at home that are using the same channel or channels of a close frequency. →Unplug all the wireless routers and plug them in again. If the situation still does not improve, refer to your wireless router's manual for information on how to change the router channel of your wireless network. 187
-
 1
1 -
2
-
3
-
4
-
5
-
6
-
7
-
8
-
9
-
10
-
11
-
12
-
13
-
14
-
15
-
16
-
17
-
18
-
19
-
20
-
21
-
22
-
23
-
24
-
25
-
26
-
27
-
28
-
29
-
30
-
31
-
32
-
33
-
34
-
35
-
36
-
37
-
38
-
39
-
40
-
41
-
42
-
43
-
44
-
45
-
46
-
47
-
48
-
49
-
50
-
51
-
52
-
53
-
54
-
55
-
56
-
57
-
58
-
59
-
60
-
61
-
62
-
63
-
64
-
65
-
66
-
67
-
68
-
69
-
70
-
71
-
72
-
73
-
74
-
75
-
76
-
77
-
78
-
79
-
80
-
81
-
82
-
83
-
84
-
85
-
86
-
87
-
88
-
89
-
90
-
91
-
92
-
93
-
94
-
95
-
96
-
97
-
98
-
99
-
100
-
101
-
102
-
103
-
104
-
105
-
106
-
107
-
108
-
109
-
110
-
111
-
112
-
113
-
114
-
115
-
116
-
117
-
118
-
119
-
120
-
121
-
122
-
123
-
124
-
125
-
126
-
127
-
128
-
129
-
130
-
131
-
132
-
133
-
134
-
135
-
136
-
137
-
138
-
139
-
140
-
141
-
142
-
143
-
144
-
145
-
146
-
147
-
148
-
149
-
150
-
151
-
152
-
153
-
154
-
155
-
156
-
157
-
158
-
159
-
160
-
161
-
162
-
163
-
164
-
165
-
166
-
167
-
168
-
169
-
170
-
171
-
172
-
173
-
174
-
175
-
176
-
177
-
178
-
179
-
180
-
181
-
 182
182 -
 183
183 -
 184
184 -
 185
185 -
 186
186 -
 187
187 -
 188
188 -
 189
189 -
 190
190 -
 191
191 -
 192
192 -
193
-
194
-
195
-
196
-
197
-
198
-
199
-
200
 |
 |
