Panasonic PTDS8500U PTDS8500U User Guide - Page 85
LENS CALIBRATION, FILTER COUNTER RESET, Adjusting the date and time, automatically
 |
UPC - 885170010994
View all Panasonic PTDS8500U manuals
Add to My Manuals
Save this manual to your list of manuals |
Page 85 highlights
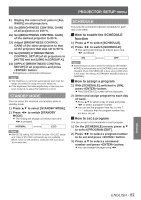
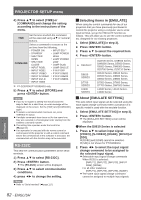
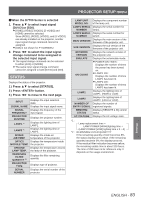
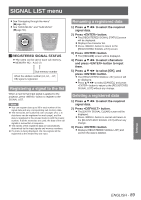
PROJECTOR SETUP menu 4444 Press button. zzThe [ADJUST CLOCK] screen will be displayed. 5555 Press ▲▼ to select the item to be set, and press ◄► to set the local time. 6666 Press ▲▼ to select [APPLY], and press button. zzThis completes setting of the time. JJAdjusting the date and time automatically 1111 Press ▲▼ to select [DATE AND TIME]. 2222 Press button. 3333 Press ▲▼ to select [ADJUST CLOCK]. 4444 Press button. zzThe [ADJUST CLOCK] screen will be displayed. 5555 Press ▲▼ to select [NTP SYNCHRONIZATION] and press ◄► to switch to [ON]. zzThe setting will change as follows each time ◄► is pressed. OFF ON 6666 Press ▲▼ to select [APPLY], and press button. zzThis completes setting of the time. Note zzTo set the date and time automatically, the projector must be connected to the network. zzIf synchronization with the NTP server fails just after [NTP SYNCHRONIZATION] is turned [ON], or if [NTP SYNCHRONIZATION] is turned [ON] while the NTP server is not set, [NTP SYNCHRONIZATION] will return to [OFF]. zzAccess the projector via a web browser to set the NTP server. (Æpage 106) LENS CALIBRATION This automatically sets the limit value of the lens shift and the home position of the projector. 1111 Press ▲▼ to select [LENS CALIBRATION]. 2222 Press button. zzA confirmation message will be displayed. 3333 Press ◄► to select [OK], and press button. zzTo stop, select [CANCEL]. zzThe lens will move vertically and horizontally, and the limit value of the lens shift and home position are set automatically. zzThe lens will stop, completing the calibration. Note zzWhile lens calibration is being executed, a message [PROGRESS] appears on the menu. The calibration cannot be canceled halfway. zzIf the lens calibration has been correctly executed, a message [COMPLETE] will appear. If the calibration has not been correctly executed, a message [INCOMPLETE] will appear. FILTER COUNTER RESET After you replaced the Auto Cleaning Filter (ACF), [REMAINING FILTER] of [STATUS] need to be reset to [0]. 1111 Press ▲▼ to select [FILTER COUNTER RESET]. 2222 Press button. zzThe [RESET FILTER COUNTER?] screen will be displayed. 3333 Press ◄► to select [OK], and press button. Note ■ zzFor replacing ACF unit, refer to " Procedure of ACF unit replacement" (Æpage 109). zzIf the filter has not been installed, [OK] cannot be selected. zzThe filter is wound during the resetting operation. Some sound may be produced during the winding operation. Settings ENGLISH - 85
-
 1
1 -
2
-
3
-
4
-
5
-
6
-
7
-
8
-
9
-
10
-
11
-
12
-
13
-
14
-
15
-
16
-
17
-
18
-
19
-
20
-
21
-
22
-
23
-
24
-
25
-
26
-
27
-
28
-
29
-
30
-
31
-
32
-
33
-
34
-
35
-
36
-
37
-
38
-
39
-
40
-
41
-
42
-
43
-
44
-
45
-
46
-
47
-
48
-
49
-
50
-
51
-
52
-
53
-
54
-
55
-
56
-
57
-
58
-
59
-
60
-
61
-
62
-
63
-
64
-
65
-
66
-
67
-
68
-
69
-
70
-
71
-
72
-
73
-
74
-
75
-
76
-
77
-
78
-
79
-
 80
80 -
 81
81 -
 82
82 -
 83
83 -
 84
84 -
 85
85 -
 86
86 -
 87
87 -
 88
88 -
 89
89 -
 90
90 -
91
-
92
-
93
-
94
-
95
-
96
-
97
-
98
-
99
-
100
-
101
-
102
-
103
-
104
-
105
-
106
-
107
-
108
-
109
-
110
-
111
-
112
-
113
-
114
-
115
-
116
-
117
-
118
-
119
-
120
-
121
-
122
-
123
-
124
-
125
-
126
-
127
-
128
-
129
 |
 |
