Philips DVT1500 User manual - Page 45
Setting the timer, 1.11 Enable/disable voice-activated recording
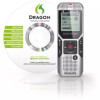 |
View all Philips DVT1500 manuals
Add to My Manuals
Save this manual to your list of manuals |
Page 45 highlights
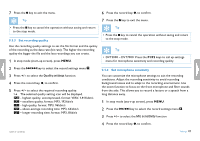
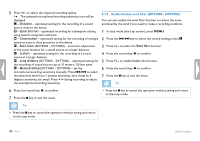
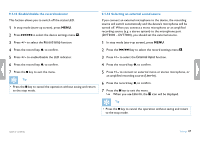
9.1.10 Setting the timer You can use this function to start a recording at a specified date and time. The device can record from the device's microphone, the radio or an external sound source. 10 Press the record key, g, to confirm. XX If this feature is on, the À icon is displayed. The device will start recording at a specified time. 11 Press + / - to select the Off function to turn off the timer. 1 In stop mode (start-up screen), press MENU. Tip 2 Press the h / b key to select the record settings menu Ó. 3 Press + / - to select the Timer function. 4 Press the record key, g, to confirm. 5 Press + / - to select the Set time function to set the alarm clock. 6 Set date and time as described (see also chapter 9.3.1 Set date & time, page 49). 7 Press the record key, g, to confirm. 8 Press + / - to select the Record source function to set the sound source. • Press the j key to cancel the operation without saving and return to the stop mode. 9.1.11 Enable/disable voice-activated recording If voice-activated recording is enabled, recording session will start when you begin speaking. When you stop speaking, the device will automatically pause recording after three seconds of silence, and resume only when you begin speaking again. Use the voice activation level to set the volume at which the device should begin recording. 1 In stop mode (start-up screen), press MENU. 2 Press the h / b key to select the record settings menu Ó. 9 Press + / - to select if the recording should be made from a microphone, an external source, or a radio station. Select the pre- set station before you record from the FM radio. 3 Press + / - to select the Voice Activation function. 4 Press the record key, g, to confirm. Table of contents Settings 45
-
 1
1 -
2
-
3
-
4
-
5
-
6
-
7
-
8
-
9
-
10
-
11
-
12
-
13
-
14
-
15
-
16
-
17
-
18
-
19
-
20
-
21
-
22
-
23
-
24
-
25
-
26
-
27
-
28
-
29
-
30
-
31
-
32
-
33
-
34
-
35
-
36
-
37
-
38
-
39
-
 40
40 -
 41
41 -
 42
42 -
 43
43 -
 44
44 -
 45
45 -
 46
46 -
 47
47 -
 48
48 -
 49
49 -
 50
50 -
51
-
52
-
53
-
54
-
55
-
56
-
57
-
58
-
59
-
60
 |
 |
