Pioneer DEH-P9800BT Owner's Manual
Pioneer DEH-P9800BT - Radio / CD Manual
 |
UPC - 012562793962
View all Pioneer DEH-P9800BT manuals
Add to My Manuals
Save this manual to your list of manuals |
Pioneer DEH-P9800BT manual content summary:
- Pioneer DEH-P9800BT | Owner's Manual - Page 1
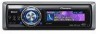
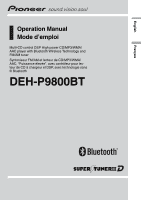
Manual Mode d'emploi Multi-CD control DSP High power CD/MP3/WMA/ AAC player with Bluetooth Wireless Technology and FM/AM tuner Syntoniseur FM/AM et lecteur de CD/MP3/WMA/ AAC, "Puissance élevée", avec contrôleur pour lecteur de CD à chargeur et DSP, avec technologie sans fil Bluetooth DEH-P9800BT - Pioneer DEH-P9800BT | Owner's Manual - Page 2
. Before You Start Information to User 7 For Canadian model 7 About this unit 7 - Operating environment 8 About this manual 8 After-sales service for Pioneer products 8 Product registration 9 Features 9 About WMA 10 About AAC 10 About Bluetooth 10 About the SAT RADIO READY mark 11 Resetting the - Pioneer DEH-P9800BT | Owner's Manual - Page 3
MP3/WMA/AAC disc 31 - When playing back a WAV disc 31 Scrolling text information in the display 31 Selecting tracks from the file name list 32 Displaying jacket arts on CD-ROM discs 32 - Reading jacket arts 32 - Selecting folders with jacket arts 33 Bluetooth registered phone manually 41 - - Pioneer DEH-P9800BT | Owner's Manual - Page 4
Stopping playback 54 Disconnecting a Bluetooth audio player 55 Displaying BD address of this unit 55 Displaying system version for repair 55 Multi-CD Player Playing a CD 56 Selecting a track directly 56 50-disc multi-CD player 57 Introduction of advanced multi-CD player operation 57 Repeating play - Pioneer DEH-P9800BT | Owner's Manual - Page 5
85 - Adjusting 16-band graphic equalizer 86 Using BBE sound 86 Using compression and BMX 87 Adjusting loudness 87 Adjusting source levels 87 Using auditory user interface 88 Initial Settings Adjusting initial settings 89 Selecting the display language 89 Setting the date 89 Setting the clock 90 - Pioneer DEH-P9800BT | Owner's Manual - Page 6
source 93 Entering PIN code for Bluetooth wireless connection 93 Resetting the Bluetooth wireless technology module 94 Other Functions Turning the clock display on or off 95 Using the AUX source 95 - About AUX1 and AUX2 95 - Selecting AUX as the source 95 - Setting the AUX title 95 Using different - Pioneer DEH-P9800BT | Owner's Manual - Page 7
User FCC ID: AJDK012 MODEL NO.: DEH-P9800BT IC: 775E-JK012 This device complies with Part installation. This equipment generates, uses and can radiate radio frequency energy and, if not installed and used in accordance with the instructions, may cause harmful interference to radio received, - Pioneer DEH-P9800BT | Owner's Manual - Page 8
accessories sold manual handy as a reference for operating procedures and precautions. ! Always keep the volume low enough so that you can hear sounds manual. After-sales service for Pioneer products Please contact the dealer or distributor from where you purchased this unit for after-sales service - Pioneer DEH-P9800BT | Owner's Manual - Page 9
or theft. 2 Receive updates on the latest products and technologies. 3 Download owner's manuals, order product catalogues, research new products, and much more. Features CD playback Music CD/CD-R/CD-RW playback is possible. MP3 file playback You can play back MP3 files recorded on CDROM/CD-R/CD-RW - Pioneer DEH-P9800BT | Owner's Manual - Page 10
When you use this unit with a Pioneer iPod adapter (CD-IB100), you can control an iPod with Dock Connector. ! iPod is a trademark of Apple Computer, Inc., registered in the U.S. and other countries. About WMA About AAC AAC is short for Advanced Audio Coding and refers to an audio compression - Pioneer DEH-P9800BT | Owner's Manual - Page 11
or nearest authorized Pioneer service station regarding the satellite radio tuner that can be connected to this unit. For satellite radio tuner operation, please refer to the satellite radio tuner owner's manual. Notes ! The system will use direct satellite-to-receiver broadcasting technology to - Pioneer DEH-P9800BT | Owner's Manual - Page 12
unit within five seconds of turning off the ignition, a warning tone will sound and the front panel will open. ! You can turn off the warning auto open on page 90. Important ! Never use force or grip the display and the buttons too tightly when removing or attaching. ! Avoid subjecting the front - Pioneer DEH-P9800BT | Owner's Manual - Page 13
feature demo mode. Press DISPLAY again to start the feature demo mode. Remember that if the feature demo continues operating when the car engine is turned off, . Use and care of the remote control Installing the battery Slide the tray out on the back of the remote control and insert the battery with - Pioneer DEH-P9800BT | Owner's Manual - Page 14
mode (random play)-Scan mode (scan play)- Pause (pause)-Search mode (search method)-Title Input (disc title input)-Jacket art (jacket art read) Note Refer to Introduction of advanced built-in CD player operation on page 23. AUDIO button operation % Press AUDIO to select the desired mode. Press - Pioneer DEH-P9800BT | Owner's Manual - Page 15
. b EJECT button Press to eject a CD from your built-in CD player. Press and hold to open or close the front panel. Remote control Operation is the same as when using the buttons on the head unit. c VOLUME buttons Press to increase or decrease the volume. d FUNCTION button Press to select functions - Pioneer DEH-P9800BT | Owner's Manual - Page 16
about 90%. Press once more to return to the original volume level. l ENTERTAINMENT button Press to change to the entertainment display. m AUDIO button Press to select various sound quality controls. e Joystick Move to perform manual seek tuning, fast forward, reverse and track search controls. Also - Pioneer DEH-P9800BT | Owner's Manual - Page 17
-Television-DVD player/Multi-DVD player- Built-in CD player-Multi-CD player- iPod-External unit player. - When the AUX (auxiliary input) is set to off (refer to page 91). - When the BT Audio source is set to off (refer to Activating the BT Audio source on page 93). ! External unit refers to a Pioneer - Pioneer DEH-P9800BT | Owner's Manual - Page 18
as ERROR-11 is displayed, refer to Understanding built-in CD player error messages on page 99. Adjusting the volume % Use MULTI-CONTROL to adjust the sound level. With the head unit, turn MULTI-CONTROL to increase or decrease the volume. With the remote control, press VOLUME to increase or decrease - Pioneer DEH-P9800BT | Owner's Manual - Page 19
radio. More advanced tuner operation is explained starting on the next page. 1 Stereo (5) indicator Shows when the selected frequency is being broadcast in stereo band (FM-1, FM-2, FM-3 for FM or AM) is displayed. 3 To perform manual tuning, push MULTI-CONTROL left or right. The frequencies move up - Pioneer DEH-P9800BT | Owner's Manual - Page 20
30 seconds, the display is automatically returned to the frequency display. Storing and recalling radio station frequencies assigned to preset tuning numbers by pressing and holding one of the preset tuning buttons 1-6 on the remote control. Storing the strongest broadcast frequencies BSM (best - Pioneer DEH-P9800BT | Owner's Manual - Page 21
and select one of them to receive. 1 Press LIST to switch to the preset channel list mode during the frequency display. 2 Use MULTI-CONTROL to display. ! You can also recall radio station frequencies assigned to preset tuning numbers by pressing one of the preset tuning buttons 1-6 on the remote - Pioneer DEH-P9800BT | Owner's Manual - Page 22
playing disc, nothing is displayed. 1 Press SOURCE to select the built-in CD player. Press SOURCE until you see Compact Disc displayed. # If no disc is using the remote control, you can select a track directly by entering the desired track number. 1 Press DIRECT. Track number input display appears. - Pioneer DEH-P9800BT | Owner's Manual - Page 23
)-Jacket art (jacket art read) # To return to the playback display, press BAND. Notes ! When playing a CD TEXT disc, you cannot switch to Title Input. The disc title will have already been recorded on a CD TEXT disc. ! When playing audio data (CD-DA), it is not effective even if you turn Jacket art - Pioneer DEH-P9800BT | Owner's Manual - Page 24
Section 05 Built-in CD Player Scanning tracks of a CD Scan play lets you hear the first 10 seconds of each track on the CD. 1 Use MULTI-CONTROL to select Scan mode in the function menu. Scan mode appears in the display. 2 Press MULTI-CONTROL to turn scan play on. The first 10 seconds of each - Pioneer DEH-P9800BT | Owner's Manual - Page 25
title is stored in memory. 7 Press BAND to return to the playback display. Notes ! Titles remain in memory, even after the disc has been If you connect a multi-CD player, you can input disc titles for up to 100 discs. ! When a multi-CD player that does not support disc title functions is connected - Pioneer DEH-P9800BT | Owner's Manual - Page 26
discs may contain such information as the CD title, track title, artist's name and playback time and are called CD TEXT discs. Only these specially encoded CD TEXT discs support the functions listed below. Displaying text information on CD TEXT discs You can display the text information of any disc - Pioneer DEH-P9800BT | Owner's Manual - Page 27
you see Compact Disc displayed. # If no disc is loaded in the unit, you cannot select Compact Disc (built-in CD player). Insert a disc in the unit. (Refer to page 17.) 2 Push MULTI-CONTROL up or down to select a folder. # You cannot select a folder that does not have an MP3/WMA/AAC/WAV file - Pioneer DEH-P9800BT | Owner's Manual - Page 28
displayed. ! There is no sound on fast forward or reverse. ! When an MP3/WMA/AAC/WAV disc is in- serted, folder name automatically begins to scroll in the display remote control, you can select a track directly by entering the desired track number. 1 Press DIRECT. Track number input display appears - Pioneer DEH-P9800BT | Owner's Manual - Page 29
Section 06 English Introduction of advanced built-in CD player (MP3/ WMA/AAC/WAV) operation 1 1 Function display Shows the function status. 1 Press MULTI-CONTROL to display the main menu. FUNCTION, AUDIO and ENTERTAINMENT appear on the display. 2 Use MULTI-CONTROL to select FUNCTION. Turn to - Pioneer DEH-P9800BT | Owner's Manual - Page 30
Section 06 MP3/WMA/AAC/WAV Player 3 Press MULTI-CONTROL to turn random play on. Tracks playback Pause lets you temporarily stop playback of the MP3/WMA/AAC/WAV. 1 Use MULTI-CONTROL to select Pause in the function menu. Pause appears in the display. 2 Press MULTI-CONTROL to turn pause on. Playback - Pioneer DEH-P9800BT | Owner's Manual - Page 31
the first track of the folder. # Depending on the version of iTunes® used to write MP3 files onto a disc, comment information may not be correctly displayed. # Depending on the version of Windows Media Player used to encode WMA files, album names and other text information may not be correctly - Pioneer DEH-P9800BT | Owner's Manual - Page 32
are recorded on CD-ROM disc, you can display them on this unit so you can easily find a specific folder looking at the jacket art. ! Record jacket arts for folders on CD-ROM in advance using your computer. For details, please visit the following site: http://www.pioneer.co.jp/car/pclink4/indexe.html - Pioneer DEH-P9800BT | Owner's Manual - Page 33
MP3/WMA/AAC/WAV Player Selecting folders with jacket arts You can display the list of folders that are already assigned jacket arts and select one to start playback. ! In the jacket art list, this unit displays up to 15 folders with jacket arts. ! For other folders with no jacket arts re- corded, - Pioneer DEH-P9800BT | Owner's Manual - Page 34
signal level. ! Depending on the cellular phones featuring Bluetooth wireless technology, radio field intensity is not available. In this case, been received and not checked yet. 5 Device name Shows the device name of the cellular phone. 6 Calendar display Shows the date, and time. 7 User number - Pioneer DEH-P9800BT | Owner's Manual - Page 35
be ready to receive a call. % Press SOURCE to select the telephone. Press SOURCE until you see Telephone displayed. # You can Bluetooth wireless connection between this unit and your phone, registering your phone with this unit, and adjusting the volume level. 1 Connection For detailed instructions - Pioneer DEH-P9800BT | Owner's Manual - Page 36
use handsfree phoning via Bluetooth wireless technology. More remote control. Voice recognition If your cellular phone features voice recognition technology, you can make a call by voice commands. ! Operation varies depending on the type of your cellular phone. Refer to the instruction manual - Pioneer DEH-P9800BT | Owner's Manual - Page 37
Bluetooth Telephone Section 07 English Taking a phone call Answering an incoming PHONE. The estimated call time appears in the display (this may differ slightly from the actual call time). # You can also perform this operation by pressing ON HOOK on the remote control. # You may hear a noise when - Pioneer DEH-P9800BT | Owner's Manual - Page 38
Number dial and Refuse calls cannot be selected. # To return to the playback display, press BAND. Connecting a cellular phone To use a phone wirelessly with this unit, it is necessary first to establish a connection using Bluetooth wireless technology. There are several ways you can do this. 38 En - Pioneer DEH-P9800BT | Owner's Manual - Page 39
the device name (Pioneer BT unit) and enter the link code on your cellular phone. If the connection is established, Connected is displayed. # The link code is set to 0000 as default. You can change this code in the initial setting. Refer to Entering PIN code for Bluetooth wireless connection on - Pioneer DEH-P9800BT | Owner's Manual - Page 40
, Disconnected is displayed. Registering connected cellular phone You can register a phone that is temporarily connected to this unit in order to take full advantage of the features available with Bluetooth wireless technology. A total of five phones can be registered: three user cellular phones and - Pioneer DEH-P9800BT | Owner's Manual - Page 41
work with all phones. If your registered phone fails to connect with Automatic Connection, use the manual connection method explained in Connecting to a registered phone manually on this page. ! This feature is not possible if you are playing back songs on your Bluetooth audio player via Bluetooth - Pioneer DEH-P9800BT | Owner's Manual - Page 42
. Perform phone book transfer using the cellular phone. For detailed instruction on this, refer to the instruction manual that came with your cellular phone. # While transferring the phone book, hourglass icon is displayed. # The display indicates how many entries have been transferred and the total - Pioneer DEH-P9800BT | Owner's Manual - Page 43
Bluetooth Telephone Section 07 English Changing the Phone Book display order You can choose to display the Phone Book sorted call. 7 To end the call, press PHONE. The estimated call time appears in the display (this may differ slightly from the actual call time). Assign genres to phone numbers If - Pioneer DEH-P9800BT | Owner's Manual - Page 44
07 Bluetooth Telephone 2 Use MULTI-CONTROL to display the detailed list of your desired Phone Book entry. See step 2 to 5 on Calling a number in the Phone Book on the previous page for how to do this. 3 Press and hold MULTI-CONTROL to display the genre input screen. Edit genre is displayed. 4 Push - Pioneer DEH-P9800BT | Owner's Manual - Page 45
Bluetooth Telephone Section 07 English Editing phone numbers You can edit the phone numbers of Phone Book entries. 1 Press LIST to display the Phone Book. 2 Use MULTI-CONTROL to display and hold MULTI-CONTROL to display the genre input screen. Edit genre is displayed. 4 Turn MULTI-CONTROL - Pioneer DEH-P9800BT | Owner's Manual - Page 46
page 43 for how to do this. 3 Press and hold MULTI-CONTROL to display the genre input screen. Edit genre is displayed. 4 Turn MULTI-CONTROL clockwise or counterclockwise to switch to the clear memory of each item; Phone Book, dialed/received/missed call history list and preset phone number. 46 En - Pioneer DEH-P9800BT | Owner's Manual - Page 47
Bluetooth wireless technology, Phone book cannot be selected. 3 Push MULTI-CONTROL right to determine the item that you want to delete from this unit. Clear memory YES is displayed Displaying the Call History The Call History is divided into three groups: Missed calls, Dialed calls, and Received - Pioneer DEH-P9800BT | Owner's Manual - Page 48
stored in the Call History, proceed the country code with a +. 1 With the detailed list displayed, press MULTI-CONTROL and hold to add +. Pressing to display the detailed list. Calling time and date, and phone number are displayed in the detailed list. 3 Press and hold one of 0-9 on the remote - Pioneer DEH-P9800BT | Owner's Manual - Page 49
. This function reduces the echo and noise and keeps a certain sound quality. ! This feature cannot be set for each different user phone. 1 Use MULTI-CONTROL to select Echo cancel in the function menu. Echo cancel appears in the display. 2 Press MULTI-CONTROL to turn echo canceling on. ON appears - Pioneer DEH-P9800BT | Owner's Manual - Page 50
-CONTROL to assign the icon to the user phone. The selected icon is assigned to the user phone. Note You can rewrite icons for user phones. (Refer to Rewriting the entertainment displays and the icons for telephone functions on page 98.) Displaying BD (Bluetooth Device) address Each device featuring - Pioneer DEH-P9800BT | Owner's Manual - Page 51
user phone 1)-Phone2 (user phone 2)-Phone3 (user phone 3)-Guest1 (guest phone 1)-Guest2 (guest phone 2) # If the assignment is empty, No data is displayed with dealer for repair, you may be asked to indicate the system versions of this unit and of Bluetooth module. You can display the versions and - Pioneer DEH-P9800BT | Owner's Manual - Page 52
in great range. Please refer to the instruction manual that came with your Bluetooth audio player as well as this manual while operating your player on this unit. ! Information about songs (e.g. the elapsed playing time, song title, song index, etc.) cannot be displayed on this unit. ! While you are - Pioneer DEH-P9800BT | Owner's Manual - Page 53
, Connected is displayed. # Operation varies depending on the type of your Bluetooth audio player. Refer to the instruction manual that came with your Bluetooth audio player for detailed instructions. Connecting a Bluetooth audio player For this unit to control your Bluetooth audio player it needs - Pioneer DEH-P9800BT | Owner's Manual - Page 54
connected to this unit, function operations may not be correctly operated. Playing songs on Bluetooth audio player 1 Use MULTI-CONTROL to select Play in the function menu. Play appears in the display. 2 Press MULTI-CONTROL to start playback. Pausing a song Pause lets you temporarily stop playback - Pioneer DEH-P9800BT | Owner's Manual - Page 55
to select Disconnect audio in the function menu. Disconnect audio appears in the display. 2 Press MULTI-CONTROL to disconnect the Bluetooth audio player. Disconnected is displayed. The Bluetooth audio player is now diconnected from this unit. Displaying BD address of this unit Each device featuring - Pioneer DEH-P9800BT | Owner's Manual - Page 56
! If an error message such as ERROR-11 is displayed, refer to the multi-CD player owner's manual. ! If there are no discs in the multi-CD player magazine, No Disc is displayed. ! When you select a CD TEXT disc on a CD TEXT compatible multi-CD player, the disc title automatically begins to scroll in - Pioneer DEH-P9800BT | Owner's Manual - Page 57
will play. Note After entering the number input mode, if you do not perform an operation within about eight seconds, the mode is automatically canceled. 50-disc multi-CD player Only those functions described in this manual are supported by 50-disc multi-CD players. This unit is not designed to - Pioneer DEH-P9800BT | Owner's Manual - Page 58
-CONTROL to select the repeat range. Press MULTI-CONTROL repeatedly until the desired repeat range appears in the display. ! Multi-CD repeat - Repeat all discs in the multi-CD player ! Track repeat - Repeat just the current track ! Disc repeat - Repeat the current disc Notes ! If you select other - Pioneer DEH-P9800BT | Owner's Manual - Page 59
Multi-CD Player Section 09 English Note After track or disc scanning is finished, normal playback of the tracks will begin again. Pausing CD playback Pause lets you temporarily stop playback of the CD. 1 Use MULTI-CONTROL to select Pause in the function menu. Pause appears in the display. 2 Press - Pioneer DEH-P9800BT | Owner's Manual - Page 60
. Using disc title functions You can input CD titles and display the titles. Then you can easily search for and play a desired disc. Entering disc titles Use the disc title input feature to store up to 100 CD titles (with ITS playlist) into the multiCD player. Each title can be up to 10 characters - Pioneer DEH-P9800BT | Owner's Manual - Page 61
lets you see the list of disc titles that have been entered into the multi-CD player and select one of them to play back. 1 Press LIST to switch to the disc title list mode during the playback display. 2 Use MULTI-CONTROL to select the desired disc title. Turn to change the disc - Pioneer DEH-P9800BT | Owner's Manual - Page 62
Section 09 Multi-CD Player Displaying text information on CD TEXT discs % Press DISPLAY. Press DISPLAY repeatedly to switch between the following settings: : disc title- : disc artist name- : track title- : track artist name- : disc title and : disc artist name- : track title - Pioneer DEH-P9800BT | Owner's Manual - Page 63
time of the current song. 3 Album title indicator Shows the title of the currently playing album. 1 Press SOURCE to select the iPod. Press SOURCE until you see iPod displayed. 2 To perform fast forward or reverse, push and hold MULTI-CONTROL left or right. 3 To skip back or forward to another - Pioneer DEH-P9800BT | Owner's Manual - Page 64
press to play. # If no songs have been stored in playlist, STOP is displayed and playback stops. Displaying text information on iPod Text information recorded on the iPod can be displayed. % Press DISPLAY. Press DISPLAY repeatedly to switch between the following settings: : album title- : song title - Pioneer DEH-P9800BT | Owner's Manual - Page 65
, press BAND. Note If you do not operate the function within about 30 seconds, the display is automatically returned to the playback display. Repeating play For playback of the songs on the iPod, there are two repeat play ranges: Repeat one (re- peat one song) and Repeat all (repeat all songs - Pioneer DEH-P9800BT | Owner's Manual - Page 66
Section 10 Playing songs on iPod Pausing a song Pause lets you temporarily stop playback of a song. 1 Use MULTI-CONTROL to select Pause in the function menu. Pause appears in the display. 2 Press MULTI-CONTROL to turn pause on. Playback of the current song pauses. # To turn pause off, press MULTI- - Pioneer DEH-P9800BT | Owner's Manual - Page 67
1 Press DIRECT on the remote control. CHANNEL INPUT appears in the display. 2 Use 0-9 on the remote control to input the desired channel number. # To cancel the input numbers, press CLEAR on the remote control. 3 While the input number is displayed, press DIRECT on the remote control. The entered XM - Pioneer DEH-P9800BT | Owner's Manual - Page 68
tuning numbers by pressing and holding one of the preset tuning buttons 1-6 on the remote control. Switching the XM display % Press DISPLAY to switch the XM display. Each press of DISPLAY changes the XM display in the following order: Text information (channel name)-Artist name and text information - Pioneer DEH-P9800BT | Owner's Manual - Page 69
another channel, display of the ID code is canceled. # Display of the ID code repeats displaying RADIO ID and the ID code one after the other. Selecting stations from the preset channel list The preset channel list lets you see the list of preset stations and select one of them to receive. 1 Press - Pioneer DEH-P9800BT | Owner's Manual - Page 70
DIRECT on the remote control. CHANNEL INPUT appears in the display. 2 Use 0-9 on the remote control to input the desired channel number. # To cancel the input numbers, press CLEAR on the remote control. 3 While the input number is displayed, press DIRECT on the remote control. The entered SIRIUS - Pioneer DEH-P9800BT | Owner's Manual - Page 71
Radio tuner Section 12 English Introduction of advanced SIRIUS tuner operation % Press and hold DISPLAY to select the scroll setting. Press and hold DISPLAY selects scroll setting in the following order: Continuous scroll setting-One-time scroll setting 1 1 Function display the remote control - Pioneer DEH-P9800BT | Owner's Manual - Page 72
Use MULTI-CONTROL to select FUNCTION. Channel mode appears on the display. 2 Press MULTI-CONTROL to select the desired channel select desired channel in the selected channel category. Displaying the Radio ID If you select CH : 000, the ID code is displayed. % Push MULTI-CONTROL left or right to select - Pioneer DEH-P9800BT | Owner's Manual - Page 73
TV tuner is tuned. 1 Press SOURCE to select the TV. Press SOURCE until you see Television displayed. 2 Press BAND to select a band. Press BAND until the desired band is displayed, TV-1 or TV-2. 3 To perform manual tuning, push MULTI-CONTROL left or right. The channels move up or down step by step - Pioneer DEH-P9800BT | Owner's Manual - Page 74
of the preset tuning buttons 1-6 on the remote control. Storing the strongest broadcast stations sequentially 1 Use MULTI-CONTROL and select FUNCTION to display BSSM. 2 Press MULTI-CONTROL to turn BSSM on. Searching is displayed. While Searching is displayed, the 12 strongest broadcast stations will - Pioneer DEH-P9800BT | Owner's Manual - Page 75
stations and select one of them to receive. 1 Press LIST to switch to the preset channel list mode during the channel display. 2 Use MULTI-CONTROL to select the numbers by pushing MULTI-CONTROL up or down during the channel display. ! You can also recall stations assigned to preset tuning numbers 1-6 - Pioneer DEH-P9800BT | Owner's Manual - Page 76
DVD video) or track (when playing video CD, CD, MP3 or WMA) currently playing. 5 Play time indicator Shows the elapsed playing time of the current track. 1 Press SOURCE to select the DVD player/ multi-DVD player. Press SOURCE until you see DVD displayed. 2 To perform fast forward or reverse, push - Pioneer DEH-P9800BT | Owner's Manual - Page 77
)-Title Input (disc title input) During MP3/WMA playback Play mode (repeat play)-Random mode (random play)-Scan mode (scan play)- Pause (pause) # To return to the playback display, press BAND. Repeating play ! During PBC playback of Video CDs, this function cannot be operated. 1 Use MULTI-CONTROL - Pioneer DEH-P9800BT | Owner's Manual - Page 78
function differs slightly from ITS playback with a multi-CD player. With multiDVD player, ITS playback applies only to the CD playing. For details, refer to Using ITS playlists on page 59. Using disc title functions You can input CD titles and display the titles. Then you can easily search for and - Pioneer DEH-P9800BT | Owner's Manual - Page 79
titles on page 60. ! You can operate this function only when a DVD player is connected to this unit. ! When playing a CD TEXT disc on a CD TEXT compatible DVD player, you cannot switch to disc title input. The disc title will have already been recorded on a CD TEXT disc. English Section 14 En 79 - Pioneer DEH-P9800BT | Owner's Manual - Page 80
audio system to match the car interior acoustic characteristics, which vary depending on the type of car. ! Recalling equalizer curves ! user interface (AUI sound level) Important When phone is selected as a source, no audio adjustments, except balance adjustment, are possible. 1 Audio display - Pioneer DEH-P9800BT | Owner's Manual - Page 81
audio function within about 30 seconds, the display is automatically returned to the source display. Using the position selector One way to assure a more natural sound is to clearly position the stereo image, putting you right in the center of the sound field. The position selector function lets you - Pioneer DEH-P9800BT | Owner's Manual - Page 82
any time. 1 Use MULTI-CONTROL to select TA Mode. TA Mode appears in the display. 2 Push MULTI-CONTROL left or right to select the type of car. Each time MULTI-CONTROL is pushed left or right, types of car are selected in the following order: Sedan (sedan)-Wagon (wagon)-Mini-Van (mini van - Pioneer DEH-P9800BT | Owner's Manual - Page 83
and MONO appears in the display. Push MULTI-CONTROL right to select stereo and STEREO appears in the display. Adjusting subwoofer settings When can adjust the continuity of sound between speaker units. 1 Use MULTI-CONTROL to select Subwoofer3. Subwoofer3 appears in the display. # When the subwoofer - Pioneer DEH-P9800BT | Owner's Manual - Page 84
mute front and rear speaker units (filters) separately. When speaker units (filters) are muted, no sound is outputted from those speakers. ! If you mute the selected speaker unit (fil- ter), MUTE ON is displayed and no adjustments are possible. ! Even if any speaker unit (filter) is muted, you can - Pioneer DEH-P9800BT | Owner's Manual - Page 85
Rear HPF FREQ. Rear HPF FREQ. appears in the display. 4 Push MULTI-CONTROL left or right to select cut you adjust the equalization to match car interior acoustic characteristics as desired. is selected no supplement or correction is made to the sound. This is useful to check the effect of the - Pioneer DEH-P9800BT | Owner's Manual - Page 86
each source. (The built-in CD player and the multi-CD player are set to the same equalizer curve is selected, the Custom2 curve will be updated. 1 Recall the equalizer curve you want to equalization band increases or decreases. +6 to -6 is displayed as the level is increased or decreased. # You - Pioneer DEH-P9800BT | Owner's Manual - Page 87
and softer sounds at higher volumes. BMX controls sound reverberations to give playback a fuller sound. Listen to each of the effects as you select through them and use the one that best enhances the playback of the track or CD that you are listening to. ! When tuner, television or AUX is selected - Pioneer DEH-P9800BT | Owner's Manual - Page 88
is pushed up or down, source volume increases or decreases. +4 to -4 is displayed as the source volume is increased or decreased. Notes ! The AM tuner volume level can also be ad- justed with source level adjustments. ! The built-in CD player and the multi-CD player are set to the same source level - Pioneer DEH-P9800BT | Owner's Manual - Page 89
scroll)-Calibration (RPM calibration)-BT AUDIO (Bluetooth audio)-Pin code input (pin code input)- Phone reset (phone reset) Use the following instructions to operate each particular setting. # To cancel initial settings, press BAND. Selecting the display language For your convenience, this unit - Pioneer DEH-P9800BT | Owner's Manual - Page 90
instructions to set the clock. 1 Use MULTI-CONTROL to select Clock. Clock appears in the display. 2 Push MULTI-CONTROL left or right to select the segment of the clock display sound. You can turn off the warning tone. 1 Use MULTI-CONTROL to select Warning tone. Warning tone appears in the display. - Pioneer DEH-P9800BT | Owner's Manual - Page 91
is muted or attenuated automatically when the signal from the equipment with mute function is received. ! The sound is muted or attenuated, MUTE or ATT are displayed and no audio adjustment is possible. ! Sound from this system returns to normal when the muting or attenuation is canceled. En 91 - Pioneer DEH-P9800BT | Owner's Manual - Page 92
operating when the car engine is turned off, it may drain battery power. ! You can also turn on or off feature demo by pressing DISPLAY while this Ever Scroll is set to ON, text information recorded on CD or iPod scrolls continuously in the display. Set to OFF if you prefer the information to scroll - Pioneer DEH-P9800BT | Owner's Manual - Page 93
may be required to enter to this unit in advance PIN code of your Bluetooth audio player, in order to set this unit ready for a connection from your Bluetooth audio player. 1 Use MULTI-CONTROL to select Pin code input. Pin code input appears in the display. 2 Push MULTI-CONTROL up or down to select - Pioneer DEH-P9800BT | Owner's Manual - Page 94
press MULTI-CONTROL again on the same display, the PIN code you entered is stored in this unit. # Pusing MULTI-CONTROL right in the confirmation display returns you to the PIN code input display, and you can change the PIN code. Resetting the Bluetooth wireless technology module Should you need to - Pioneer DEH-P9800BT | Owner's Manual - Page 95
equipments to this unit. AUX1 source: When connecting auxiliary equipment using a stereo mini plug cable % Insert the stereo mini plug into the AUX input jack on this unit. For more details, refer to the installation manual. The allocation of this auxiliary equipment is automatically set to AUX1 - Pioneer DEH-P9800BT | Owner's Manual - Page 96
Source icon Shows which source has been selected. ! Jacket art of current folder is displayed when playing an MP3/WMA/AAC/WAV disc. Setting the entertainment display You can change the entertainment display and text color. ! When you select Vehicle Dynamics 1, Vehicle Dynamics 2 or Vehicle Dynamics - Pioneer DEH-P9800BT | Owner's Manual - Page 97
Dynamics 3 (vehicle dynamics processor 3)-Movie (movie screen)-Clock (entertainment clock) -OFF (entertainment display off) # You can also switch between the entertainment display by pressing ENTERTAINMENT on the remote control. # When Standard is selected, source icon can be turned on or off by - Pioneer DEH-P9800BT | Owner's Manual - Page 98
use ENTERTAINMENT on the remote control to switch between the background display. 4 When BGV1, displays and the icons for telephone functions. Please create or download the data using your Computer, and record it on CD-R. For details, please visit the following site: http://www.pioneer.co.jp/car - Pioneer DEH-P9800BT | Owner's Manual - Page 99
error message on rewriting the entertainment displays When you contact your dealer or your nearest Pioneer Service Center, be sure to record the error message. Message Cause Action CD ERROR CD player error Press EJECT and check the disc. CD ERROR A0 Electrical error Turn the ignition - Pioneer DEH-P9800BT | Owner's Manual - Page 100
using them. ! If the heater is used in cold weather, moisture may form on components inside the CD player. Condensation may cause the CD player to malfunction. If you think that condensation is a problem turn off the CD player for an hour or so to allow it to dry out and wipe any damp discs with - Pioneer DEH-P9800BT | Owner's Manual - Page 101
using Windows Media Player version 7 or later. ! AAC is short for Advanced Audio Coding and refers to displayed. ! When playing discs with MP3/WMA/AAC/ WAV files and audio data (CD-DA) such as CD-EXTRA and MIXED-MODE CDs, both types can be played only by switching mode between MP3/WMA/AAC/WAV and CD - Pioneer DEH-P9800BT | Owner's Manual - Page 102
(MP3 interactive) or mp3 PRO formats. ! The sound quality of MP3 sound of a certain quality, we recommend using discs recorded with a higher transmission rate. ! This unit doesn't support The sampling frequency shown in the display may be rounded. ! The sound quality of WAV files generally becomes - Pioneer DEH-P9800BT | Owner's Manual - Page 103
3 Third level Notes ! This unit assigns folder numbers. The user cannot assign folder numbers. ! It is not possible to check folders that do not include MP3/WMA/AAC/WAV files. (These folders will be skipped without displaying the folder number.) ! MP3/WMA/AAC/WAV files in up to 8 tiers of folders - Pioneer DEH-P9800BT | Owner's Manual - Page 104
expresses data volume per second, or bps (bits per second) units. The higher the rate, the more information is available to reproduce the sound. Using the same encoding method (such as MP3), the higher the rate, the better the sound. Bluetooth Bluetooth is a short-range wireless radio connectivity - Pioneer DEH-P9800BT | Owner's Manual - Page 105
for linear pulse code modulation, which is the signal recording system used for music CDs and DVDs. m3u Playlists created using the "WINAMP" software have a playlist file extension (.m3u). MP3 MP3 is short for MPEG Audio Layer 3. It is an audio compression standard set by a working group (MPEG) of - Pioneer DEH-P9800BT | Owner's Manual - Page 106
kHz) (volume: -30 work) Dynamic range 95 dB (1 kHz) Number of channels 2 (stereo) MP3 decoding format MPEG-1 & 2 Audio Layer 3 WMA decoding format ......... Ver. 7, 7.1, 8, 9, 10 (2ch audio) (Windows Media Player Bluetooth Version Bluetooth 1.2 certified Output power 4 dBm Max. (Power class 2) - Pioneer DEH-P9800BT | Owner's Manual - Page 107
Additional Information Profile GAP (Generic Access Profile) SDP (Service Discovery Protocol) HSP (Head Set Profile) HFP (Hands Free Profile) A2DP (Advanced Audio Distribution Profile) AVRCP (Audio Video Remote Control Profile) OPP (Object Push Profile) Note Specifications and the design are subject - Pioneer DEH-P9800BT | Owner's Manual - Page 108
Service après-vente des produits Pioneer 114 Enregistrement du produit 114 Caractéristiques 114 Quelques mots sur WMA 115 Quelques mots sur AAC 116 Quelques mots sur Bluetooth 116 A propos de la marque SAT RADIO télécommande 119 - Installation de la pile 119 un CD 131 Pause de la lecture d'un CD 132 - Pioneer DEH-P9800BT | Owner's Manual - Page 109
au fonctionnement détaillé du lecteur de CD (MP3/WMA/AAC/WAV) intégré 137 Bluetooth Téléphonie mains libres avec des téléphones cellulaires disposant de la technologie sans fil Bluetooth d'un numéro de l'Annuaire 153 - Affectation de genres aux numéros de téléphone 154 - Modification du nom d'une - Pioneer DEH-P9800BT | Owner's Manual - Page 110
166 110 Fr Déconnexion d'un lecteur audio Bluetooth 167 Affichage de l'adresse BD de cet appareil 167 Affichage de la version du système pour les réparations 167 Lecteur de CD à chargeur Écoute d'un CD 168 Sélection directe d'une plage 169 Lecteur de CD 50 disques 169 Introduction au fonctionnement - Pioneer DEH-P9800BT | Owner's Manual - Page 111
de plages musicales sur l'iPod Ecoute de plages musicales sur votre iPod 176 Recherche d'une plage ordre aléatoire 185 Examen du contenu d'un CD/MP3/ WMA 185 Utilisation de la liste ITS et me audio 187 Fonctions additionnelles 187 Introduction aux réglages sonores 188 Utilisation du sélecteur - Pioneer DEH-P9800BT | Owner's Manual - Page 112
de la source BT Audio 203 Saisie du code PIN pour la connexion sans fil Bluetooth 203 Réinitialisation du module technologie sans fil Bluetooth 204 Autres fonctions Mise en service ou hors service de l'affichage de l'horloge 205 Utilisation de la source AUX 205 - Quelques mots sur AUX1 et AUX2 205 - Pioneer DEH-P9800BT | Owner's Manual - Page 113
DEH-P9800BT IC : 775E-JK012 Cet appareil est conforme à la Partie 15 des Règles FCC et RSS-Gen des Règles IC. Son utilisation est soumise aux deux conditions suivantes : (1) cet appareil ne doit pas provoquer d'interférence, et (2) cet appareil doit supporter d'exposition aux fréquences radio (RF). - Pioneer DEH-P9800BT | Owner's Manual - Page 114
Pioneer Electronics (USA) Inc. CUSTOMER SUPPORT DIVISION P.O. Box 1760 Long Beach, CA 90801-1760 800-421-1404 CANADA Pioneer électroniques du Canada, Inc. Département de service aux consommateurs et bien plus. 114 Fr Caractéristiques Lecture de CD La lecture de CD/CD-R/CD-RW musicaux est possible. - Pioneer DEH-P9800BT | Owner's Manual - Page 115
Bluetooth. Compatibilité iPod® Quand vous utilisez cet appareil avec un adaptateur iPod Pioneer (CD-IB100), vous pouvez contrôler un iPod avec un Dock Connector (Connecteur de station d'accueil). ! iPod est une marque commerciale de Apple Computer, Inc. déposée aux Windows Media Player version 7 ou - Pioneer DEH-P9800BT | Owner's Manual - Page 116
Advanced Audio Coding (Codage audio Pioneer le plus proche pour savoir quel syntoniseur radio satellite peut être connecté à cet appareil. Pour avoir des informations sur l'utilisation du syntoniseur radio satellite, reportezvous au mode d'emploi du syntoniseur radio satellite considéré. Bluetooth - Pioneer DEH-P9800BT | Owner's Manual - Page 117
ées sont des marques commerciales de Sirius Satellite Radio Inc., et de XM Satellite Radio Inc. Réinitialisation du microprocesseur Le microprocesseur doit être réinitialisé dans les conditions suivantes : ! Avant la première utilisation de cet appareil après son installation ! En cas d'anomalie de - Pioneer DEH-P9800BT | Owner's Manual - Page 118
. ! Conservez la face avant à l'abri des tempéra- tures élevées et de la lumière directe du soleil. ! Quelques secondes après la mise en service ou la coupure du contact d'allumage, la face avant se déplace automatiquement. Quand cela se produit, vos doigts pourraient être coincés dans la face avant - Pioneer DEH-P9800BT | Owner's Manual - Page 119
Utilisation et soin du boîtier de télécommande Installation de la pile Sortez le porte-pile de l'arri DISPLAY pendant le fonctionnement du mode démonstration des fonctions annule ce mode. Appuyez à nouveau sur DISPLAY glements nationaux ou les instructions locales en vigueur dans le pays ou - Pioneer DEH-P9800BT | Owner's Manual - Page 120
mode désiré (par exemple, Lecteur de CD intégré). Appuyez de manière répétée sur (méthode de recherche)-Title Input (saisie du titre du fonctionnement détaillé du lecteur de CD intégré. Utilisation de la sound level (interface utilisateur auditif) Remarque Reportez-vous à la page 188, Introduction - Pioneer DEH-P9800BT | Owner's Manual - Page 121
phone cellulaire est connecté via la technologie sans fil Bluetooth. 3 Touche DISPLAY Appuyez sur cette touche pour choisir un affichage différent b Touche EJECT Appuyez sur cette touche pour éjecter le CD que contient le lecteur de CD intégré. Appuyez et maintenez a pression sur cette touche pour - Pioneer DEH-P9800BT | Owner's Manual - Page 122
les mêmes que celles de MULTI-CONTROL sauf pour la commande du volume. f Touche DIRECT Appuyez sur cette touche pour choisir directement la plage le syntoniseur ou la recherche de numéro de disque pour le lecteur de CD à chargeur. i Touche OFF HOOK Appuyez pour commencer à parler dans le téléphone - Pioneer DEH-P9800BT | Owner's Manual - Page 123
Lecteur de DVD à chargeur-Lecteur de CD intégré-Lecteur de CD à chargeur -iPod-Appareil externe 1-Appareil externe 2-AUX1-AUX2 CD à chargeur ne contient pas de chargeur. - Le lecteur de DVD à chargeur ne contient pas de chargeur. - L'entrée AUX (entrée pour un appareil auxiliaire) est hors service - Pioneer DEH-P9800BT | Owner's Manual - Page 124
sonore. Sur l'appareil central, tournez MULTI-CONTROL pour augmenter ou diminuer le volume. Sur le boîtier de télécommande, appuyez sur VOLUME pour augmenter ou diminuer le volume. Remarques ! Le lecteur de CD intégré joue un CD standard 12 cm ou 8 cm à la fois. N'utilisez pas un adaptateur pour - Pioneer DEH-P9800BT | Owner's Manual - Page 125
utiliser la radio. Une utilisation plus élaborée du syntoniseur est expliquée à partir de la page suivante. 1 Indicateur de stéréo (5) Il signale que la station sélectionnée émet en stéréo. 2 Indicateur LOC Indique quand l'accord automatique sur une station locale est en service. 3 Indicateur de - Pioneer DEH-P9800BT | Owner's Manual - Page 126
vous avez choisi clignote, puis reste allumé. La fréquence de la station de radio sélectionnée a été enregistrée en mémoire. # Si vous n'utilisez pas la AM. ! Vous pouvez aussi mettre en mémoire des fréquences de station de radio affectées à des numéros de présélection en appuyant de façon prolong - Pioneer DEH-P9800BT | Owner's Manual - Page 127
Appuyez sur MULTI-CONTROL pour mettre en service BSM. L'icône Searching s'affiche. pouvez aussi rappeler les fréquences de station de radio affectées à des numéros de présélection en aux touches 1-6. Accord sur les signaux puissants L'accord automatique sur une station locale ne s'intéresse qu'aux - Pioneer DEH-P9800BT | Owner's Manual - Page 128
l'accord automatique sur les stations locales (par exemple, Level 2) apparaît sur l'afficheur. # Pour mettre l'accord automatique sur les stations locales hors service, appuyez à nouveau sur MULTI-CONTROL. 3 Poussez MULTI-CONTROL vers la gauche ou vers la droite pour régler la sensibilité. En FM, la - Pioneer DEH-P9800BT | Owner's Manual - Page 129
de titre, rien ne s'affiche. 1 Appuyez sur SOURCE pour choisir le lecteur de CD intégré. Appuyez sur SOURCE jusqu'à ce que Compact Disc s'affiche. # Si aucun un disque CD TEXT est inséré, le titre du disque commence à défiler automatiquement. Quand la fonction Ever Scroll est mise en service lors du - Pioneer DEH-P9800BT | Owner's Manual - Page 130
les huit secondes environ. Introduction au fonctionnement détaillé du lecteur de CD intégré 1 1 Afficheur de fonction Il indique l'état de la mode (examen du disque)-Pause (pause)-Search mode (méthode de recherche)-Title Input (saisie du titre du disque)- Jacket art (lecture des illustrations de - Pioneer DEH-P9800BT | Owner's Manual - Page 131
! Lors de la lecture d'un disque CD TEXT, vous ne pouvez pas basculer sur Title Input. Sur un disque CD TEXT, le titre du disque a déjà été enregistré. ! Quand vous jouez des données audio (CDDA), il n'est pas actif même si vous mettez Jacket art en service. (Reportez-vous à la page 141.) ! Si - Pioneer DEH-P9800BT | Owner's Manual - Page 132
du CD. 1 Utilisez MULTI-CONTROL pour sélectionner Pause dans le menu des fonctions. Pause apparaît sur l'afficheur. 2 Appuyez sur MULTI-CONTROL pour activer la pause. La lecture de la plage en cours se met en pause. # Appuyez à nouveau sur MULTI-CONTROL pour mettre la pause hors service. Sélection - Pioneer DEH-P9800BT | Owner's Manual - Page 133
pour lequel un titre de disque a été saisi. 1 Jouez un CD pour lequel vous voulez entrer un titre. 2 Utilisez MULTI-CONTROL pour sélectionner Title Input dans le menu des fonctions. Title Input apparaît sur l'afficheur. 3 Appuyez sur DISPLAY pour choisir le type de caractères désiré. Appuyez de mani - Pioneer DEH-P9800BT | Owner's Manual - Page 134
ces disques CD TEXT codés spécialement supportent les fonctions listées ci-dessous. Affichage des informations textuelles sur les disques CD TEXT Vous pouvez afficher les informations textuelles de n'importe quel disque pour lequel un titre de disque a été saisi. % Appuyez sur DISPLAY. Appuyez de - Pioneer DEH-P9800BT | Owner's Manual - Page 135
/AAC/WAV 1 23 4 6 5 Voici les étapes élémentaires pour lire un fichier MP3/WMA/AAC/WAV avec votre lecteur de CD intégré. Une utilisation plus élaborée des fichiers MP3/WMA/AAC/WAV est expliquée à partir de la page 137. 1 Indicateur MP3/WMA/AAC/WAV Il indique le type du fichier en cours de lecture - Pioneer DEH-P9800BT | Owner's Manual - Page 136
MP3/WMA/AAC/WAV et CD-DA avec BAND. ! Si vous avez basculé entre la lecture de fichiers MP3/WMA/AAC/WAV et celle de données audio (CD- ère un disque MP3/WMA/AAC/ WAV, le nom du dossier commence à défiler automatiquement sur l'écran. Quand la fonction Ever Scroll est mise en service lors du réglage - Pioneer DEH-P9800BT | Owner's Manual - Page 137
06 Français Introduction au fonctionnement détaillé du lecteur de CD (MP3/WMA/ AAC/WAV) intégré Remarque Si vous ne ré revenir à l'affichage des conditions de lecture. Répétition de la lecture Pour la lecture MP3/WMA/AAC/WAV, il existe trois étendues de répétition : Folder repeat (répétition - Pioneer DEH-P9800BT | Owner's Manual - Page 138
du MP3/WMA/AAC/WAV. 1 Utilisez MULTI-CONTROL pour sélectionner Pause dans le menu des fonctions. Pause apparaît sur l'afficheur. 2 Appuyez sur MULTI-CONTROL pour activer la pause. La lecture de la plage en cours se met en pause. # Appuyez à nouveau sur MULTI-CONTROL pour mettre la pause hors service - Pioneer DEH-P9800BT | Owner's Manual - Page 139
, maintenir MULTI-CONTROL poussé vers la droite rappelle la dernière plage du dossier. De Si vous lisez un disque MP3/ WMA/AAC % Appuyez sur DISPLAY. Appuyez de manière répétée sur DISPLAY pour passer d'un des paramètres à l'autre : : nom du dossier- : nom du fichier- : nom du dossier et : nom du - Pioneer DEH-P9800BT | Owner's Manual - Page 140
appareil peut afficher les 30 premiers caractères de l'information textuelle. % Maintenez la pression sur DISPLAY jusqu'à ce que l'information textuelle commence à défiler sur l'écran. L'information textuelle défile. Remarques ! Contrairement aux formats de fichiers MP3, WMA et AAC, les fichiers - Pioneer DEH-P9800BT | Owner's Manual - Page 141
CD-ROM les il- lustrations de pochette pour les dossiers en utilisant votre ordinateur. Pour les détails, veuillez visiter le site suivant : http://www.pioneer.co.jp/car et les fichiers MP3/WMA/ AAC/WAV. Lecture des illustrations de pochette illustration de pochette hors service, appuyez à nouveau - Pioneer DEH-P9800BT | Owner's Manual - Page 142
Section 06 Lecteur MP3/WMA/AAC/ WAV 1 Appuyez sur LIST pour sélectionner le mode liste des illustrations de pochette. Appuyez de manière répétée sur LIST pour passer d'une des - Pioneer DEH-P9800BT | Owner's Manual - Page 143
certains téléphones cellulaires disposant de la technologie sans fil Bluetooth, l'intensité du champ radio n'est pas disponible. Dans ce cas, l'indicateur la réponse automatique). Affiche REF quand la fonction rejet automatique est en service (pour plus de détails, reportez-vous à la page 161, Param - Pioneer DEH-P9800BT | Owner's Manual - Page 144
avec les profils suivants. - GAP (Generic Access Profile) - SDP (Service Discovery Protocol) - OPP (Object Push Profile) - HSP (Head Set du volume sonore. 1 Connexion Pour des instructions détaillées sur la connexion de votre téléphone à cet appareil via la technologie sans fil Bluetooth, reportez - Pioneer DEH-P9800BT | Owner's Manual - Page 145
Bluetooth Section 07 Français # Avant de déconnecter le téléphone cellulaire de l'appareil, assurez-vous de régler le volume au niveau approprié. Si le volume a été réglé sur silencieux (niveau zéro) sur votre téléphone cellulaire, ce volume de téléphone pour des instructions détaillées. Appel - Pioneer DEH-P9800BT | Owner's Manual - Page 146
Bluetooth ! Le mode opératoire dépend du type de votre téléphone cellulaire. Reportez-vous au mode d'emploi fourni avec votre téléphone cellulaire pour les instructions service, vous pouvez toujours répondre aux appels entrants. Si vous réglez cet appareil pour qu'il réponde automatiquement aux - Pioneer DEH-P9800BT | Owner's Manual - Page 147
Téléphone Bluetooth Section 07 Français 1 Appuyez sur MULTI-CONTROL pour répondre à un appel en attente. # Vous pouvez aussi effectuer cette opération en appuyant sur OFF - Pioneer DEH-P9800BT | Owner's Manual - Page 148
cellulaire Pour utiliser un téléphone avec cet appareil en liaison sans fil, il faut d'abord établir une connexion en utilisant la technologie sans fil Bluetooth. Il existe plusieurs manières d'effectuer cette opération. ! La connexion est en principe établie par HFP, ce qui vous permet un contrôle - Pioneer DEH-P9800BT | Owner's Manual - Page 149
cellulaires équipés de la technologie sans fil Bluetooth, les noms d'appareil de ces téléphones le nom de l'appareil (Pioneer BT unit) et entrez le code de liaison sur votre téléphone téléphone cellulaire pour les instructions détaillées. # Vous devrez peut-être saisir le code de liaison sur votre - Pioneer DEH-P9800BT | Owner's Manual - Page 150
nouveau téléphone, supprimez d'abord l'affectation actuelle. Pour avoir plus des instructions plus détaillées, reportez-vous à cette page, Suppression d'un téléphone enregistré. # Si vous avez besoin de connaître l'adresse BD (Bluetooth Device) du téléphone, poussez MULTI-CONTROL vers la gauche ici - Pioneer DEH-P9800BT | Owner's Manual - Page 151
é 2) # Si l'affectation est vide, No data s'affiche et l'opération n'est pas possible. # Si vous avez besoin de connaître l'adresse BD (Bluetooth Device) du téléphone, poussez MULTI-CONTROL vers la gauche ici. 3 Appuyez sur MULTI-CONTROL pour connecter le téléphone cellulaire sélectionné. Pendant la - Pioneer DEH-P9800BT | Owner's Manual - Page 152
phone enregistré. ! L'exécution de cette fonction n'est pas possible pendant que vous lisez des plages musicales sur votre lecteur audio Bluetooth via la technologie sans fil Bluetooth. Dans ce cas, arrêtez la lecture et passez à une autre source pour que votre téléphone cellulaire se connecte à cet - Pioneer DEH-P9800BT | Owner's Manual - Page 153
Téléphone Bluetooth Section 07 Français 1 Utilisez MULTI-CONTROL pour sélectionner Phone book transfert d'annuaire. Effectuez le transfert d'annuaire en utilisant le téléphone cellulaire. Pour des instructions détaillées sur cette opération, reportez-vous au mode d'emploi fourni avec votre - Pioneer DEH-P9800BT | Owner's Manual - Page 154
Téléphone Bluetooth 5 nom et le numéro de téléphone en maintenant la pression sur DISPLAY. # Si une entrée comporte plusieurs numéros de téléphone, sélectionnez- érer légèrement de la durée réelle de l'appel). Affectation de genres aux numéros de téléphone Si l'Annuaire comporte de nombreuses entrées il peut - Pioneer DEH-P9800BT | Owner's Manual - Page 155
phone Bluetooth ères russes # Appuyer de façon prolongée sur la touche DISPLAY vous permet de choisir alternativement l'ensemble caractères ISO8859-1 (caractè pour afficher la liste détaillée de l'entrée de l'Annuaire désirée. Reportez-vous aux étapes 2 à 5 de la page 153, Appel d'un numéro de l' - Pioneer DEH-P9800BT | Owner's Manual - Page 156
Section 07 Téléphone Bluetooth 6 Poussez MULTI-CONTROL vers le haut ou vers le bas pour l'Annuaire. 2 Utilisez MULTI-CONTROL pour afficher la liste détaillée de l'entrée de l'Annuaire désirée. Reportez-vous aux étapes 2 à 5 de la page 153, Appel d'un numéro de l'Annuaire pour la procédure à suivre - Pioneer DEH-P9800BT | Owner's Manual - Page 157
Téléphone Bluetooth Section 07 Français Effacement d'une entrée de l'Annuaire Vous l'Annuaire. 2 Utilisez MULTI-CONTROL pour afficher la liste détaillée de l'entrée de l'Annuaire désirée. Reportez-vous aux étapes 2 à 5 de la page 153, Appel d'un numéro de l'Annuaire pour la procédure à suivre - Pioneer DEH-P9800BT | Owner's Manual - Page 158
phone invité est connecté à cet appareil via la technologie sans fil Bluetooth, Phone book ne peut pas être sélectionné. 3 Poussez MULTI-CONTROL l'autre : PHONE BOOK (annuaire)-MISSED (appel manqué)-DIALLED (numéro appelé)- RECEIVED (appel reçu) # Pour des détails sur la liste de l'Annuaire, reportez - Pioneer DEH-P9800BT | Owner's Manual - Page 159
Téléphone Bluetooth Section 07 Français 2 Tournez MULTI-CONTROL pour sélectionner un appels Si vous appelez un numéro international enregistré dans l'Historique des appels, faites précéder le code pays d'un +. 1 Pendant que la liste détaillée est affichée, appuyez sur MULTI-CONTROL et maintenez - Pioneer DEH-P9800BT | Owner's Manual - Page 160
Section 07 Téléphone Bluetooth 1 Affichez la liste et sélectionnez un numéro de téléphone. Affichez le numéro de téléphone que vous désirez mettre en mémoire. 2 Poussez MULTI-CONTROL - Pioneer DEH-P9800BT | Owner's Manual - Page 161
Téléphone Bluetooth Section 07 Français Annulation d'écho et réduction de bruit Quand la source (en fonction ou hors fonction). Paramétrage du rejet automatique Si cette fonction est en service, cet appareil rejette automatiquement tous les appels entrants. ! Cette fonction ne peut pas être param - Pioneer DEH-P9800BT | Owner's Manual - Page 162
Section 07 Téléphone Bluetooth Paramétrage de la réponse automatique Si cette fonction est en service, cet appareil répond automatiquement à tous les appels Telephone icon apparaît sur l'afficheur. Affichage de l'adresse BD (Bluetooth Device) Une adresse d'appareil de 48 bits unique est attribuée - Pioneer DEH-P9800BT | Owner's Manual - Page 163
sélectionner Device INFO. dans le menu des fonctions. Le nom d'appareil (Pioneer BT unit) de cet appareil apparaît sur l'afficheur. 2 Poussez MULTI-CONTROL # Pousser MULTI-CONTROL vers la gauche affiche la version du module Bluetooth de cet appareil. Pousser MULTI-CONTROL vers la droite ramène à - Pioneer DEH-P9800BT | Owner's Manual - Page 164
musicales sur votre lecteur audio est possible. - Profil AVRCP (Audio/Video Remote Control Profile) : La lecture, la pause, la sélection des plages, etc. sont possibles. ! Comme il existe un certain nombre de lecteurs audio Bluetooth disponibles sur le marché, l'utilisation de votre lecteur audio - Pioneer DEH-P9800BT | Owner's Manual - Page 165
instructions sur la mise en service de la source BT Audio. 2 Connexion Reportez-vous à cette page, Connexion d'un lecteur audio Bluetooth pour savoir comment connecter votre lecteur audio Bluetooth le code PIN en vous reportant à la page 203, Saisie du code PIN pour la connexion sans fil Bluetooth. - Pioneer DEH-P9800BT | Owner's Manual - Page 166
. s'affichent dans le menu des fonctions. # Si aucun lecteur audio Bluetooth n'a été connecté à cet appareil, Connection open et Device INFO. # Appuyez à nouveau sur MULTI-CONTROL pour mettre la pause hors service. Arrêt de la lecture 1 Utilisez MULTI-CONTROL pour sélectionner Stop dans le menu - Pioneer DEH-P9800BT | Owner's Manual - Page 167
sélectionner Device INFO. dans le menu des fonctions. Le nom d'appareil (Pioneer BT unit) de cet appareil apparaît sur l'afficheur. 2 Poussez MULTI-CONTROL Pousser MULTI-CONTROL vers la gauche affiche la version du module Bluetooth de cet appareil. Pousser MULTI-CONTROL vers la droite ramène à l' - Pioneer DEH-P9800BT | Owner's Manual - Page 168
but de la plage en cours. Pousser une nouvelle fois fera passer à la plage précédente. Remarques ! Ready s'affiche tandis que le lecteur de CD à chargeur procède aux opérations préalables à la lecture. ! Si un message d'erreur tel que ERROR-11 s'affiche, reportez-vous au mode d'emploi du lecteur de - Pioneer DEH-P9800BT | Owner's Manual - Page 169
en permanence. A propos d'Ever Scroll, reportez-vous à la page 202, Mise en service ou hors service du Défilement Permanent. Cet appareil n'est pas conçu pour utiliser les fonctions de liste des titres de disque avec un lecteur de CD à chargeur de 50 disques. Pour les fonctions liste des titres de - Pioneer DEH-P9800BT | Owner's Manual - Page 170
(pause)-ITS play mode (lecture ITS)- ITS memory (programmation ITS)- Title Input (saisie du titre du disque) # Appuyez sur BAND pour revenir à lecture. Remarques ! Lors de la lecture d'un disque CD TEXT sur un lecteur de CD à chargeur compatible CD TEXT, vous ne pouvez pas passer en saisie du Répé - Pioneer DEH-P9800BT | Owner's Manual - Page 171
éatoire. Les plages seront jouées dans un ordre aléatoire à l'intérieur des limites Multi-CD repeat ou Disc repeat sélectionnées précédemment. # Appuyez à nouveau sur MULTI-CONTROL pour mettre hors service la fonction lecture aléatoire. Examen du contenu des disques et des plages Quand vous utilisez - Pioneer DEH-P9800BT | Owner's Manual - Page 172
extraites de votre liste de lecture incluses dans les étendues de plages Multi-CD repeat ou Disc repeat commence. # Si aucune plage incluse dans l'étendue ITS, ITS empty est affiché. # Pour mettre la lecture ITS hors service, appuyez à nouveau sur MULTI-CONTROL. Suppression d'une plage de votre liste - Pioneer DEH-P9800BT | Owner's Manual - Page 173
un titre. Poussez MULTI-CONTROL vers le haut ou vers le bas pour choisir le CD. 2 Utilisez MULTI-CONTROL pour sélectionner Title Input dans le menu des fonctions. Title Input apparaît sur l'afficheur. 3 Appuyez sur DISPLAY pour choisir le type de caractères désiré. Appuyez de manière répétée sur la - Pioneer DEH-P9800BT | Owner's Manual - Page 174
de manière répétée sur DISPLAY pour passer d'un des paramètres à l'autre : : titre du disque-Affichage simple Choix d'un disque à partir de la liste des titres de disques Vous pouvez choisir un disque sur la liste des titres de disques que contient le lecteur de CD à chargeur, puis commander la - Pioneer DEH-P9800BT | Owner's Manual - Page 175
et durée de lecture, sont appelés disques CD TEXT. Seuls ces disques CD TEXT codés spécialement supportent les fonctions listées ci-dessous. Affichage des informations textuelles sur les disques CD TEXT % Appuyez sur DISPLAY. Appuyez de manière répétée sur DISPLAY pour passer d'un des paramètres - Pioneer DEH-P9800BT | Owner's Manual - Page 176
cours. 3 Indicateur de titre de l'album Indique le titre de l'album en cours de lecture. 1 Appuyez sur SOURCE pour sélectionner l'iPod. Appuyez sur SOURCE jusqu'à ce que iPod s'affiche. 2 Pour une avance rapide ou un retour rapide, poussez et maintenez MULTI-CONTROL vers la gauche ou vers la droite - Pioneer DEH-P9800BT | Owner's Manual - Page 177
l'iPod Vous pouvez afficher les informations textuelles enregistrées sur l'iPod. % Appuyez sur DISPLAY. Appuyez de manière répétée sur DISPLAY titre de l'album-Affichage simple # Si les caractères enregistrés sur l'iPod ne sont pas compatibles avec cet appareil, ils ne seront pas affichés. Remarques - Pioneer DEH-P9800BT | Owner's Manual - Page 178
les plages musicales de la liste sélectionnée Lecture des plages musicales dans un ordre aléatoire (shuffle) Pour la lecture de plages musicales sur l'iPod, il existe deux méthodes de lecture aléatoire : Shuffle Songs (lecture des plages musicales dans un ordre aléatoire) et Shuffle Albums (lecture - Pioneer DEH-P9800BT | Owner's Manual - Page 179
Lecture de plages musicales sur l'iPod 2 Appuyez sur MULTI-CONTROL pour choisir la correction désirée. Appuyez sur MULTI-CONTROL de façon répétée jusqu'à ce que le la plage en cours se met en pause. # Appuyez à nouveau sur MULTI-CONTROL pour mettre la pause hors service. Section 10 Fr 179 Français - Pioneer DEH-P9800BT | Owner's Manual - Page 180
Section 11 Syntoniseur TV Regarder la télévision 12 3 Vous pouvez utiliser cet appareil pour commander un syntoniseur TV, vendu séparément. Pour avoir des détails sur ce mode de fonctionnement, reportez-vous au mode d'emploi du syntoniseur TV. Cette section donne des informations sur les opé - Pioneer DEH-P9800BT | Owner's Manual - Page 181
des stations les plus fortes 1 Utilisez MULTI-CONTROL et sélectionnez FUNCTION pour afficher BSSM. 2 Appuyez sur MULTI-CONTROL pour mettre BSSM en service. Searching s'affiche. Pendant que Searching est affiché, les 12 stations d'émission les plus fortes sont enregistrées dans l'ordre croissant des - Pioneer DEH-P9800BT | Owner's Manual - Page 182
Section 11 Syntoniseur TV # Vous pouvez aussi changer de station en poussant MULTI-CONTROL vers le haut ou vers le bas. # Si vous n'utilisez pas la liste dans les 30 secondes environ, le mode liste des canaux présélectionnés est annulé automatiquement. Remarque La mise en mémoire de fréquences à l' - Pioneer DEH-P9800BT | Owner's Manual - Page 183
, vendu séparément. Pour des détails concernant leur utilisation, reportez-vous aux modes d'emploi du lecteur de DVD ou du lecteur de DVD à chargeur. la lecture d'un DVD vidéo) ou la plage (pendant la lecture d'un CD vidéo, CD, MP3 ou WMA) en cours de lecture. 5 Indicateur du temps de lecture Il - Pioneer DEH-P9800BT | Owner's Manual - Page 184
(pause) Pendant la lecture d'un CD Play mode (répétition de la lecture)- Random mode (lecture aléatoire)- Scan mode (examen du disque)-Pause (pause)-ITS play mode (lecture ITS)- ITS memory (saisie ITS)-Title Input (saisie du titre du disque) Pendant la lecture MP3/WMA Play mode (répétition de la - Pioneer DEH-P9800BT | Owner's Manual - Page 185
un ordre aléatoire. # Appuyez à nouveau sur MULTI-CONTROL pour mettre hors service la fonction lecture aléatoire. Examen du contenu d'un CD/MP3/WMA ! Vous ne pouvez utiliser cette fonction que pendant la lecture d'un CD/MP3/WMA. 1 Utilisez MULTI-CONTROL pour sélectionner Scan mode dans le menu des - Pioneer DEH-P9800BT | Owner's Manual - Page 186
les détails, reportezvous à la page 172, Utilisation des listes ITS. Utilisation des fonctions de titre de disque Vous pouvez saisir les titres des CDs et les afficher. Vous pouvez alors facilement rechercher et jouer le disque désiré. ! Vous pouvez utiliser cette fonction pendant la lecture d'un - Pioneer DEH-P9800BT | Owner's Manual - Page 187
vous permettent de régler facilement votre système audio pour l'adapter aux caractéristiques acoustiques de l'intérieur de votre voiture, qui dépendent des sources (SLA) ! Utilisation de l'interface utilisateur auditif (AUI sound level) Réglage fin du système audio En effectuant les réglages - Pioneer DEH-P9800BT | Owner's Manual - Page 188
/BMX (compression et BMX)-SLA (ajustement du niveau de la source)- AUI sound level (interface utilisateur auditif) # Si vous choisissez OFF dans TA Mode, . # Quand la source sélectionnée, est le syntoniseur, la télévision ou AUX, vous ne pouvez pas sélectionner COMP/BMX. # Si le syntoniseur FM - Pioneer DEH-P9800BT | Owner's Manual - Page 189
Réglages sonores Section 13 Français Utilisation du sélecteur de position Une façon d'assurer un son plus naturel consiste à positionner clairement l'image stéréo, en vous plaçant exactement au centre du champ sonore. La fonction sélecteur de position vous permet de régler automatiquement les - Pioneer DEH-P9800BT | Owner's Manual - Page 190
le haut-parleur d'extrêmes graves gauche et le haut-parleur d'extrêmes graves droit quand la sortie haut-parleur d'extrêmes graves est hors service. 5 Poussez MULTI-CONTROL vers le haut ou vers le bas pour régler la distance entre le haut-parleur sélectionné et la position d'écoute. Chaque fois - Pioneer DEH-P9800BT | Owner's Manual - Page 191
sur l'afficheur. Poussez MULTI-CONTROL vers la droite pour choisir le mode stéréo et STEREO apparaît sur l'afficheur. Réglages du haut-parleur d'extrêmes graves Lorsque la sortie haut-parleur d'extrêmes graves est en service, vous pouvez choisir la fréquence de coupure et régler le niveau de sortie - Pioneer DEH-P9800BT | Owner's Manual - Page 192
équence de la sortie hautparleur d'extrêmes graves soient émis par les haut-parleurs avant ou arrière, mettez le filtre passe-haut (HPF) en service. Seules les fréquences supérieures à celles de la plage sélectionnée sont émises par les haut-parleurs avant ou arrière. Coupure des haut-parleurs - Pioneer DEH-P9800BT | Owner's Manual - Page 193
Réglages sonores Section 13 Français -12- -6-Pass (0) (dB/oct.) # Si vous réglez la pente à 0 dB/oct. (Pass), le signal audio contourne le filtre, et le filtre n'a aucun effet. 3 Tournez MULTI-CONTROL pour choisir Front HPF FREQ. Front HPF FREQ. apparaît sur l'afficheur. 4 Poussez MULTI-CONTROL - Pioneer DEH-P9800BT | Owner's Manual - Page 194
Section 13 Réglages sonores Affichage Courbe d'égalisation Powerful Accentuation de la puissance Natural Sonorité naturelle Vocal Chant Flat Absence de correction Custom1 Courbe personnalisée 1 Custom2 Courbe personnalisée 2 Super Bass Accentuation des graves ! Custom1 et Custom2 sont - Pioneer DEH-P9800BT | Owner's Manual - Page 195
distincte peut être créée pour chaque source. (Le lecteur de CD intégré et le lecteur de CD à chargeur sont automatiquement placés dans les mêmes conditions d'égalisation 2 Appuyez sur MULTI-CONTROL pour mettre le BBE en service. # Appuyez à nouveau sur MULTI-CONTROL pour mettre la fonction BBE hors - Pioneer DEH-P9800BT | Owner's Manual - Page 196
sous la patente de BBE Sound, Inc. BBE est une marque de BBE Sound, Inc. Utilisation de la compression entre les sons les plus forts et les plus faibles aux volumes élevés. BMX contrôle les réverbérations du service. # Appuyez à nouveau sur MULTI-CONTROL pour mettre la fonction COMP/BMX hors service - Pioneer DEH-P9800BT | Owner's Manual - Page 197
de cette fonction. ! Le lecteur de CD intégré et le lecteur de CD à chargeur sont automatiquement placés dans les volume des sons AUI lorsque vous utilisez cet appareil. Selon les opérations utilisées, différents sons AUI sont émis. ! Aucun son AUI n'est émis quand les sour- ces sont hors service - Pioneer DEH-P9800BT | Owner's Manual - Page 198
réglages initiaux code PIN)-Phone reset (réinitialisation téléphone) Pour de plus amples détails sur chaque réglage, reportez-vous aux instructions qui suivent. permanent)- Calibration (étalonnage RPM)-BT AUDIO (audio Bluetooth)-Pin code input (saisie du Sélection de la langue d'affichage Pour - Pioneer DEH-P9800BT | Owner's Manual - Page 199
lectionnée ou que les sources et la démonstration des fonctions sont hors service. 1 Utilisez MULTI-CONTROL pour choisir Calendar. Calendar apparaît sur l' : jour, mois ou année. Réglage de l'horloge Utilisez ces instructions pour régler l'horloge. 1 Utilisez MULTI-CONTROL pour choisir Clock. - Pioneer DEH-P9800BT | Owner's Manual - Page 200
AUX1/AUX2. ON apparaît sur l'afficheur. # Appuyez à nouveau sur MULTI-CONTROL pour mettre la fonction AUX hors service. Mise en service ou hors service de l'ouverture automatique de la face avant Pour la protection contre les vols, la face avant s'ouvre automatiquement et se détache facilement - Pioneer DEH-P9800BT | Owner's Manual - Page 201
énuateur de luminosité est en fonction, le niveau de luminosité peut être réglé entre 0 et 21. Correction de la distorsion sonore Lors de l'écoute d'un CD ou d'une autre source dont le niveau sonore est élevé, régler à une valeur importante le niveau de la courbe d'égalisation peut conduire à de la - Pioneer DEH-P9800BT | Owner's Manual - Page 202
-vous à la page 119, Mode inverse. Mise en service ou hors service du Défilement Permanent Quand la fonction Ever Scroll est en service, les informations textuelles enregistrées sur le CD ou l'iPod défilent en permanence. Mettez la fonction hors service si vous préférez que l'information défile une - Pioneer DEH-P9800BT | Owner's Manual - Page 203
Section 14 Français Etalonnage des RPMs Suivez les instructions suivantes pour mesurer les RPM (tours par minute) prêt pour une connexion Bluetooth en provenance de votre lecteur audio Bluetooth. 1 Utilisez MULTI-CONTROL pour choisir Pin code input. Pin code input apparaît sur l'afficheur. - Pioneer DEH-P9800BT | Owner's Manual - Page 204
. # Pousser MULTI-CONTROL vers la droite dans l'écran de confirmation vous ramène à l'écran de saisie du code PIN, et vous pouvez changer le code PIN. Réinitialisation du module technologie sans fil Bluetooth Au cas où vous en auriez besoin, vous pouvez réinitialiser le module technologie sans fil - Pioneer DEH-P9800BT | Owner's Manual - Page 205
des fonctions sont hors service met l'affichage de l'horloge en service et hors service. Utilisation de la source AUX Cet appareil peut contrô éréo dans le jack d'entrée AUX de cet appareil. Pour avoir plus de détails, reportez-vous au manuel d'installation. L'affectation de l'équipement auxiliaire - Pioneer DEH-P9800BT | Owner's Manual - Page 206
Section 15 Autres fonctions 1 Après avoir sélectionné AUX comme source, utilisez MULTI-CONTROL et sélectionnez FUNCTION pour afficher Title Input. 2 Appuyez sur DISPLAY pour choisir le type de caractères désiré. Appuyez de manière répétée sur la touche DISPLAY pour passer de l'un à l'autre des - Pioneer DEH-P9800BT | Owner's Manual - Page 207
pochette du dossier en cours est affichée quand vous lisez un disque MP3/WMA/AAC/WAV. Réglage de l'affichage divertissant Vous pouvez changer sélectionné, l'icône de la source peut être mise en service ou hors service en appuyant sur DISPLAY. 4 Poussez MULTI-CONTROL vers le haut ou vers le bas pour - Pioneer DEH-P9800BT | Owner's Manual - Page 208
d'arrière-plan 8)-Slideshow (diaporama)- Texture1 (texture 1)-Texture2 (texture 2)- Texture3 (texture 3)-Texture4 (texture 4)- OFF (affichage d'arrière-plan hors service) # Vous ne pouvez pas utiliser ENTERTAINMENT sur le boîtier de télécommande pour changer d'affichage d'arrière-plan. 4 Quand BGV1 - Pioneer DEH-P9800BT | Owner's Manual - Page 209
les icônes des fonctions téléphoniques. Créez ou téléchargez les données avec votre PC, puis enregistrez-les sur CD-R. Pour les détails, veuillez visiter : http://www.pioneer.co.jp/car/pclink4/indexe.html Important Une fois que le processus de réécriture a commencé, ne retirez pas la face avant et - Pioneer DEH-P9800BT | Owner's Manual - Page 210
des messages d'erreur du lecteur de CD intégré Quand vous contactez votre distributeur ou le Service d'entretien agréé par Pioneer le plus proche, n'oubliez pas de noter le message d'erreur. Message Causes possi- Action corrective bles ERROR-11, 12, Disque sale 17, 30 Nettoyez le disque. ERROR - Pioneer DEH-P9800BT | Owner's Manual - Page 211
ées. ! Ne posez aucune étiquette à la surface des disques, n'écrivez pas sur un disque, n'appliquez aucun agent chimique sur un disque. ! Pour nettoyer un CD, essuyez le disque avec un chiffon doux en partant du centre vers l'extérieur. ! Si le chauffage est utilisé en période de froid, de l'humidit - Pioneer DEH-P9800BT | Owner's Manual - Page 212
Media Player version 7 ou ultérieure. ! AAC est une abréviation pour Advanced Audio Coding et premiers caractères peuvent être affichés. ! Quand vous jouez des disques qui comprennent à la fois des fichiers MP3/ WMA/AAC/WAV et des données audio (CDDA) tels que des disques CD-EXTRA et MIXED-MODE CD - Pioneer DEH-P9800BT | Owner's Manual - Page 213
CD audio original. Important ! Quand vous donnez un nom à un fichier MP3/ WMA/AAC/WAV, ajoutez l'extension de nom de fichier correspondante (.mp3 Player version 7, 7.1, 8, 9 et 10. ! Vous pouvez seulement lire des fichiers WMA aux élevé. ! Cet appareil ne supporte pas les formats suivants. - Windows - Pioneer DEH-P9800BT | Owner's Manual - Page 214
supporte pas les formats suivants. - Apple Lossless Quelques mots sur les dossiers et les fichiers MP3/ WMA/AAC/WAV ! Une vue générale d'un CD-ROM contenant des fichiers MP3 pouvez seulement lire des fichiers WAV aux fréquences 16, 22,05, Premier niveau 2 Deuxième niveau 3 Troisième niveau 214 Fr - Pioneer DEH-P9800BT | Owner's Manual - Page 215
/WMA/ AAC/WAV. (Ces dossiers seront sautés sans afficher le numéro de dossier.) ! L'appareil peut lire des fichiers MP3/WMA/ AAC/WAV contenus dans 8 niveaux de dossiers au maximum. Toutefois, le démarrage de la lecture s'effectue avec un certain retard sur les disques comportant - Pioneer DEH-P9800BT | Owner's Manual - Page 216
Bluetooth. AAC AAC est un acronyme pour Advanced Audio Coding Remote Control Profile. Ce profil permet l'interfonctionnement des fonctions audio et vidéo de l'appareil Bluetooth connecté via la technologie sans fil Bluetooth. Bluetooth Bluetooth est une technologie de connexion par radio le volume de - Pioneer DEH-P9800BT | Owner's Manual - Page 217
lecture (.m3u). MP3 MP3 est une abré CDs et les DVDs musicaux. SDP SDP est un acronyme pour Service Discovery Protocol. Ce protocole est utilisé pour rechercher les services, et les caractéristiques de ces services, disponibles sur d'autres appareils disposant de la technologie sans fil Bluetooth - Pioneer DEH-P9800BT | Owner's Manual - Page 218
et fait référence à une technologie de compression développée par Microsoft Corporation. Les données WMA peuvent être encodées en utilisant Windows Media Player version 7 ou ultérieure. Windows Media et le logo Windows sont des marques commerciales ou des marques commerciales déposées de Microsoft - Pioneer DEH-P9800BT | Owner's Manual - Page 219
(100 Hz), +6,5 dB (10 kHz) (volume : -30 dB) Egaliseur (Egaliseur graphique à 16 Lecteur de CD Système MP3 ... MPEG-1 & 2 Couche Audio 3 Format de décodage WMA Ver. 7, 7.1, 8, 9, 10 (audio 2 canaux) (Windows Media Player Bluetooth Version Certifié Bluetooth 1.2 Puissance de sortie 4 dBm Max. (Classe - Pioneer DEH-P9800BT | Owner's Manual - Page 220
Annexe Informations complémentaires Profil GAP (Generic Access Profile) SDP (Service Discovery Protocol) HSP (Head Set Profile) HFP (Hands Free Profile) A2DP (Advanced Audio Distribution Profile) AVRCP (Audio Video Remote Control Profile) OPP (Object Push Profile) Remarque Les caractéristiques et - Pioneer DEH-P9800BT | Owner's Manual - Page 221
-4270 44號13 02) 2521-3588 9樓901-6 0852) 2848-6488 Published by Pioneer Corporation. Copyright © 2006 by Pioneer Corporation. All rights reserved. Publié par Pioneer Corporation. Copyright © 2006 par Pioneer Corporation. Tous droits réservés. Printed in Thailand Imprimé en
-
 1
1 -
 2
2 -
 3
3 -
 4
4 -
 5
5 -
 6
6 -
 7
7 -
8
-
9
-
10
-
11
-
12
-
13
-
14
-
15
-
16
-
17
-
18
-
19
-
20
-
21
-
22
-
23
-
24
-
25
-
26
-
27
-
28
-
29
-
30
-
31
-
32
-
33
-
34
-
35
-
36
-
37
-
38
-
39
-
40
-
41
-
42
-
43
-
44
-
45
-
46
-
47
-
48
-
49
-
50
-
51
-
52
-
53
-
54
-
55
-
56
-
57
-
58
-
59
-
60
-
61
-
62
-
63
-
64
-
65
-
66
-
67
-
68
-
69
-
70
-
71
-
72
-
73
-
74
-
75
-
76
-
77
-
78
-
79
-
80
-
81
-
82
-
83
-
84
-
85
-
86
-
87
-
88
-
89
-
90
-
91
-
92
-
93
-
94
-
95
-
96
-
97
-
98
-
99
-
100
-
101
-
102
-
103
-
104
-
105
-
106
-
107
-
108
-
109
-
110
-
111
-
112
-
113
-
114
-
115
-
116
-
117
-
118
-
119
-
120
-
121
-
122
-
123
-
124
-
125
-
126
-
127
-
128
-
129
-
130
-
131
-
132
-
133
-
134
-
135
-
136
-
137
-
138
-
139
-
140
-
141
-
142
-
143
-
144
-
145
-
146
-
147
-
148
-
149
-
150
-
151
-
152
-
153
-
154
-
155
-
156
-
157
-
158
-
159
-
160
-
161
-
162
-
163
-
164
-
165
-
166
-
167
-
168
-
169
-
170
-
171
-
172
-
173
-
174
-
175
-
176
-
177
-
178
-
179
-
180
-
181
-
182
-
183
-
184
-
185
-
186
-
187
-
188
-
189
-
190
-
191
-
192
-
193
-
194
-
195
-
196
-
197
-
198
-
199
-
200
-
201
-
202
-
203
-
204
-
205
-
206
-
207
-
208
-
209
-
210
-
211
-
212
-
213
-
214
-
215
-
216
-
217
-
218
-
219
-
220
-
221
 |
 |
Operation Manual
Mode d
’
emploi
Multi-CD control DSP High power CD/MP3/WMA/
AAC player with Bluetooth Wireless Technology and
FM/AM tuner
Syntoniseur FM/AM et lecteur de CD/MP3/WMA/
AAC,
“
Puissance élevée
”
, avec contrôleur pour lec-
teur de CD à chargeur et DSP, avec technologie sans
fil Bluetooth
DEH-P9800BT
English
Français