Pioneer DEH-P9800BT Owner's Manual - Page 90
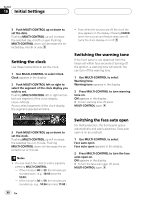
Setting the clock, Switching the warning tone, Switching the face auto open, Initial Settings
 |
UPC - 012562793962
View all Pioneer DEH-P9800BT manuals
Add to My Manuals
Save this manual to your list of manuals |
Page 90 highlights
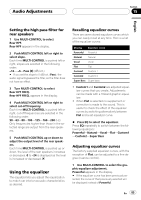
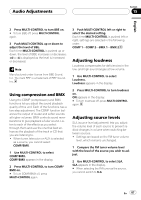
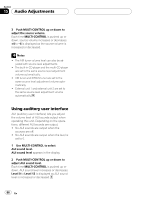
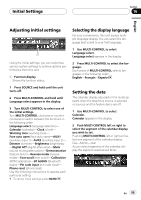
Section 16 Initial Settings 3 Push MULTI-CONTROL up or down to set the date. Pushing MULTI-CONTROL up will increase the selected day, month or year. Pushing MULTI-CONTROL down will decrease the selected day, month or year. Setting the clock Use these instructions to set the clock. 1 Use MULTI-CONTROL to select Clock. Clock appears in the display. 2 Push MULTI-CONTROL left or right to select the segment of the clock display you wish to set. Pushing MULTI-CONTROL left or right will select one segment of the clock display: Hour-Minute As you select segments of the clock display the segment selected will blink. ! Even when the sources are off, the clock display appears on the display. Pressing CLOCK when the sources and feature demo are off, turns the clock display on or off. Switching the warning tone If the front panel is not detached from the head unit within four seconds of turning off the ignition, a warning tone will sound. You can turn off the warning tone. 1 Use MULTI-CONTROL to select Warning tone. Warning tone appears in the display. 2 Press MULTI-CONTROL to turn warning tone on. ON appears in the display. # To turn warning tone off, press MULTI-CONTROL again. 3 Push MULTI-CONTROL up or down to set the clock. Pushing MULTI-CONTROL up will increase the selected hour or minute. Pushing MULTI-CONTROL down will decrease the selected hour or minute. Notes ! You can match the clock to a time signal by pressing MULTI-CONTROL. - If the minute is 00 to 29, the minutes are rounded down. (e.g., 10:18 becomes 10:00.) - If the minute is 30 to 59, the minutes are rounded up. (e.g., 10:36 becomes 11:00.) 90 En Switching the face auto open For theft protection, the front panel opens automatically and easily detaches. Face auto open is on as a default. 1 Use MULTI-CONTROL to select Face auto open. Face auto open appears in the display. 2 Press MULTI-CONTROL to turn the face auto open on. ON appears in the display. # To turn the face auto open off, press MULTI-CONTROL again.
-
 1
1 -
2
-
3
-
4
-
5
-
6
-
7
-
8
-
9
-
10
-
11
-
12
-
13
-
14
-
15
-
16
-
17
-
18
-
19
-
20
-
21
-
22
-
23
-
24
-
25
-
26
-
27
-
28
-
29
-
30
-
31
-
32
-
33
-
34
-
35
-
36
-
37
-
38
-
39
-
40
-
41
-
42
-
43
-
44
-
45
-
46
-
47
-
48
-
49
-
50
-
51
-
52
-
53
-
54
-
55
-
56
-
57
-
58
-
59
-
60
-
61
-
62
-
63
-
64
-
65
-
66
-
67
-
68
-
69
-
70
-
71
-
72
-
73
-
74
-
75
-
76
-
77
-
78
-
79
-
80
-
81
-
82
-
83
-
84
-
 85
85 -
 86
86 -
 87
87 -
 88
88 -
 89
89 -
 90
90 -
 91
91 -
 92
92 -
 93
93 -
 94
94 -
 95
95 -
96
-
97
-
98
-
99
-
100
-
101
-
102
-
103
-
104
-
105
-
106
-
107
-
108
-
109
-
110
-
111
-
112
-
113
-
114
-
115
-
116
-
117
-
118
-
119
-
120
-
121
-
122
-
123
-
124
-
125
-
126
-
127
-
128
-
129
-
130
-
131
-
132
-
133
-
134
-
135
-
136
-
137
-
138
-
139
-
140
-
141
-
142
-
143
-
144
-
145
-
146
-
147
-
148
-
149
-
150
-
151
-
152
-
153
-
154
-
155
-
156
-
157
-
158
-
159
-
160
-
161
-
162
-
163
-
164
-
165
-
166
-
167
-
168
-
169
-
170
-
171
-
172
-
173
-
174
-
175
-
176
-
177
-
178
-
179
-
180
-
181
-
182
-
183
-
184
-
185
-
186
-
187
-
188
-
189
-
190
-
191
-
192
-
193
-
194
-
195
-
196
-
197
-
198
-
199
-
200
-
201
-
202
-
203
-
204
-
205
-
206
-
207
-
208
-
209
-
210
-
211
-
212
-
213
-
214
-
215
-
216
-
217
-
218
-
219
-
220
-
221
 |
 |