Pioneer PDP-434CMX Operating Instructions - Page 24
CLAMP POSITION] setup
 |
View all Pioneer PDP-434CMX manuals
Add to My Manuals
Save this manual to your list of manuals |
Page 24 highlights
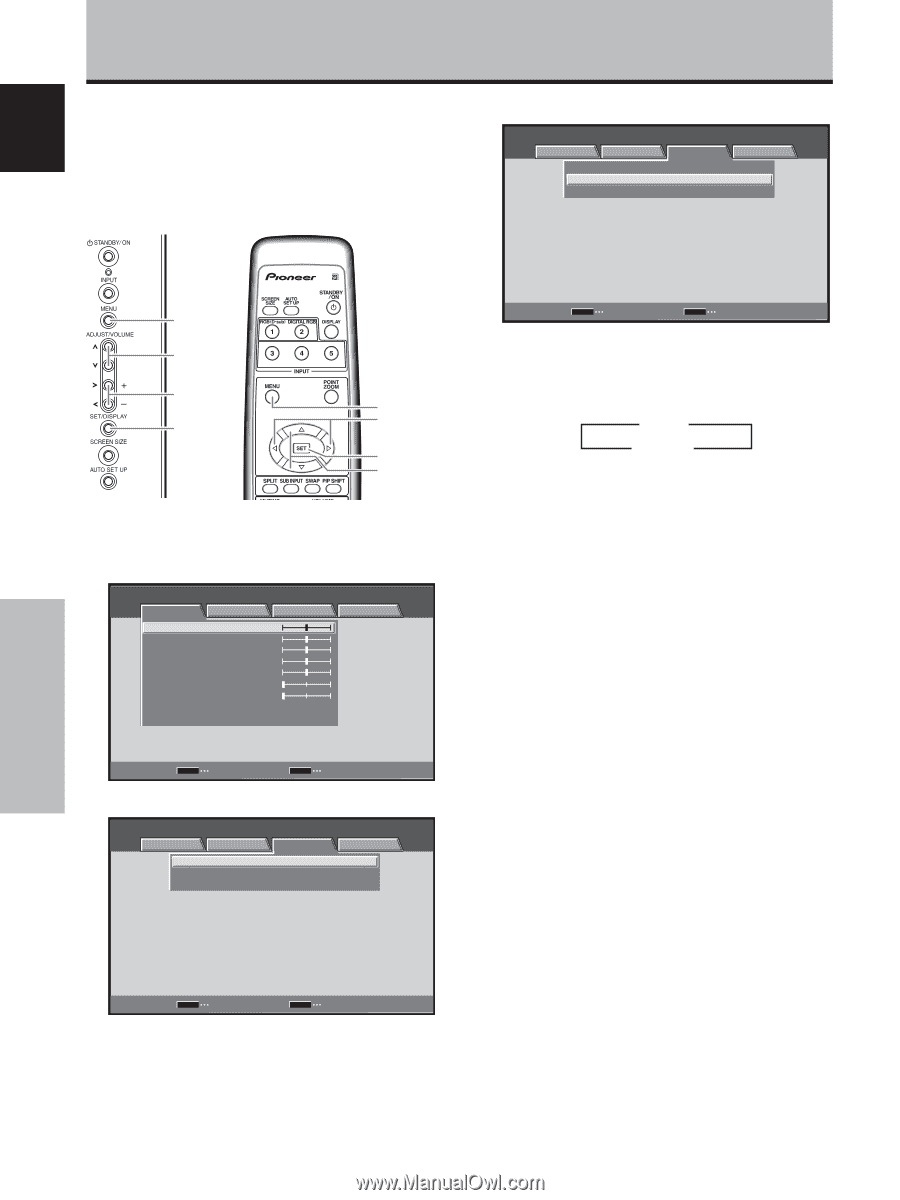
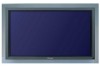
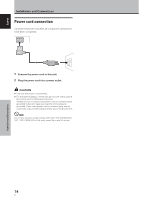
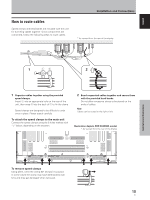
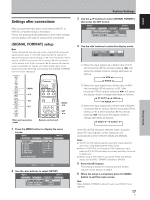
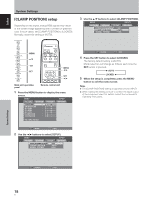
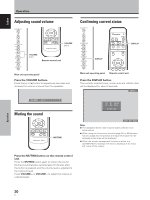
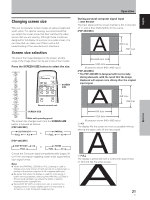
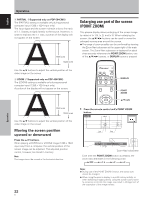
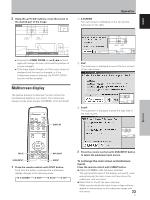
English System Settings [CLAMP POSITION] setup Depending on the signal, analog RGB signals may result in the screen image appearing with a whitish or greenish cast. In such cases, set [CLAMP POSITION] to [LOCKED]. Normally, leave this setting at [AUTO]. 3 Use the 5/∞ buttons to select [CLAMP POSITION]. MENU INPUT1 PICTURE SCREEN SETUP OPTION POWER MANAGEMENT CLAMP POSITION SIGNAL FORMAT : OFF : AUTO : VGA MENU 5/∞ 2/3 SET MENU 2/3 SET 5/∞ Main unit operating panel Remote control unit 1 Press the MENU button to display the menu screen. MENU INPUT1 PICTURE SCREEN CONTRAST : BRIGHTNESS : R.LEVEL : G.LEVEL : B.LEVEL : H.ENHANCE : V. E N H A N C E : SETUP 0 0 0 0 0 0 0 OPTION PICTURE RESET SET ENTER MENU EXIT 2 Use the 2/3 buttons to select [SETUP]. MENU INPUT1 PICTURE SCREEN SETUP OPTION POWER MANAGEMENT CLAMP POSITION SIGNAL FORMAT : OFF : AUTO : VGA SET CHANGE MENU EXIT 4 Press the SET button to select [LOCKED]. The factory default setting is [AUTO]. Mode selection will change as follows each time the SET button is pressed: 3 AUTO LOCKED 2 5 When the setup is completed, press the MENU button to exit the menu screen. Notes ÷ The [CLAMP POSITION] setting is supported only for INPUT1. ÷ When making this setting, be sure to confirm the signal output of the component used. For details, consult the component's Operating Instructions. SET CHANGE MENU EXIT System Settings 18 En
-
 1
1 -
2
-
3
-
4
-
5
-
6
-
7
-
8
-
9
-
10
-
11
-
12
-
13
-
14
-
15
-
16
-
17
-
18
-
 19
19 -
 20
20 -
 21
21 -
 22
22 -
 23
23 -
 24
24 -
 25
25 -
 26
26 -
 27
27 -
 28
28 -
 29
29 -
30
-
31
-
32
-
33
-
34
-
35
-
36
-
37
-
38
-
39
-
40
-
41
-
42
-
43
-
44
-
45
-
46
-
47
-
48
-
49
-
50
-
51
-
52
-
53
-
54
-
55
-
56
-
57
-
58
-
59
-
60
-
61
-
62
-
63
-
64
-
65
-
66
-
67
-
68
-
69
-
70
-
71
-
72
-
73
-
74
-
75
-
76
-
77
-
78
-
79
-
80
-
81
-
82
-
83
-
84
-
85
-
86
-
87
-
88
-
89
-
90
-
91
-
92
-
93
-
94
-
95
 |
 |