Pioneer PDP-5000EX User Manual - Page 31
Selecting an input signal type, Color system setting
 |
View all Pioneer PDP-5000EX manuals
Add to My Manuals
Save this manual to your list of manuals |
Page 31 highlights
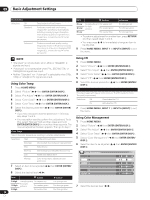
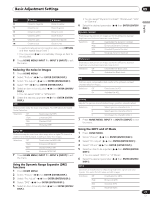
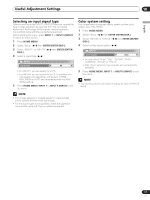
Useful Adjustment Settings 10 English Selecting an input signal type After connecting to the INPUT1 or INPUT4 terminal, specify the type of video signals to be received from the connected equipment. For the type of the signals, see the operation manual that came with the connected equipment. Before starting the menu, press INPUT 1 or INPUT 4 (INPUT) to select an input source. 1 Press HOME MENU. 2 Select "Setup" ( / then ENTER (ENTER/DISP.)). 3 Select "INPUT1" or "INPUT4" ( / then ENTER (ENTER/ DISP.)). 4 Select a signal type ( / ). INPUT1 Signal Type AV • For INPUT1, you can select AV or PC. • For INPUT4, you can select AV or PC. In addition, you may select color decoding, component, or RGB. XGA, WXGA or AUTO can be selected with the XGA/ WXGA setting. 5 Press HOME MENU, INPUT 1 to INPUT 6 (INPUT) to exit the menu. NOTE • If no image appears or images appear in inappropriate colors, specify another video signal type. • For the signal types to be specified, check the operation manual that came with the connected equipment. Color system setting If an image does not appear clearly, select another color system (e.g., PAL, NTSC). 1 Press HOME MENU. 2 Select "Setup" ( / then ENTER (ENTER/DISP.)). 3 Select "INPUT5" or "INPUT6" ( / then ENTER (ENTER/ DISP.)). 4 Select a video signal system ( / ). INPUT5 Color system Auto • You can select "Auto", "PAL", "SECAM", "NTSC", "4.43NTSC", "PAL-M" or "PAL-N". • With "Auto" selected, input signals are automatically identified. 5 Press HOME MENU, INPUT 1 to INPUT 6 (INPUT) to exit the menu. NOTE • You need to perform color system setting for each of INPUT5 and 6. 31 En
-
 1
1 -
2
-
3
-
4
-
5
-
6
-
7
-
8
-
9
-
10
-
11
-
12
-
13
-
14
-
15
-
16
-
17
-
18
-
19
-
20
-
21
-
22
-
23
-
24
-
25
-
 26
26 -
 27
27 -
 28
28 -
 29
29 -
 30
30 -
 31
31 -
 32
32 -
 33
33 -
 34
34 -
 35
35 -
 36
36 -
37
-
38
-
39
-
40
-
41
-
42
-
43
-
44
-
45
-
46
-
47
-
48
-
49
-
50
-
51
-
52
-
53
-
54
-
55
-
56
-
57
-
58
-
59
-
60
-
61
-
62
-
63
-
64
-
65
-
66
-
67
-
68
-
69
-
70
-
71
-
72
-
73
-
74
-
75
-
76
-
77
-
78
-
79
-
80
-
81
-
82
-
83
-
84
-
85
-
86
-
87
-
88
-
89
-
90
-
91
-
92
-
93
-
94
-
95
-
96
-
97
-
98
-
99
-
100
-
101
-
102
-
103
-
104
-
105
-
106
-
107
-
108
-
109
-
110
-
111
-
112
-
113
-
114
-
115
-
116
-
117
-
118
-
119
-
120
-
121
-
122
-
123
-
124
-
125
-
126
-
127
-
128
-
129
-
130
-
131
-
132
-
133
-
134
-
135
-
136
-
137
-
138
-
139
-
140
-
141
-
142
-
143
-
144
-
145
-
146
-
147
-
148
-
149
-
150
-
151
-
152
-
153
-
154
-
155
-
156
-
157
-
158
-
159
-
160
-
161
-
162
-
163
-
164
-
165
-
166
-
167
-
168
-
169
-
170
-
171
-
172
-
173
-
174
-
175
-
176
-
177
-
178
-
179
-
180
-
181
-
182
-
183
-
184
-
185
-
186
-
187
-
188
-
189
-
190
-
191
-
192
-
193
-
194
-
195
-
196
-
197
-
198
-
199
-
200
-
201
-
202
-
203
-
204
-
205
-
206
-
207
-
208
-
209
-
210
-
211
-
212
-
213
-
214
-
215
-
216
-
217
-
218
-
219
-
220
-
221
-
222
-
223
-
224
-
225
-
226
-
227
-
228
-
229
-
230
 |
 |