Pioneer VSX 1019AH-K Owner's Manual - Page 74
Controlling the rest of your system, Resetting the remote control, presets, Controls the components
 |
UPC - 012562954646
View all Pioneer VSX 1019AH-K manuals
Add to My Manuals
Save this manual to your list of manuals |
Page 74 highlights
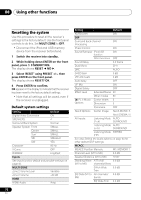
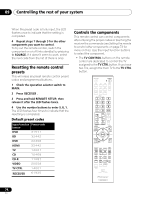
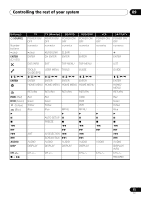
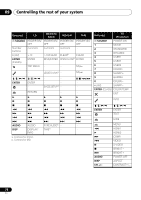
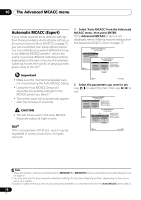
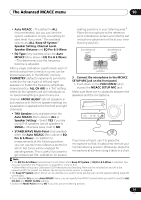
09 Controlling the rest of your system When the preset code is fully input, the LED flashes once to indicate that the setting is completed. 4 Repeat steps 1 through 3 for the other components you want to control. To try out the remote control, switch the component on or off (into standby) by pressing SOURCE. If it doesn't seem to work, select the next code from the list (if there is one). Resetting the remote control presets This will erase all preset remote control preset codes and programmed buttons. 1 Check the operation selector switch to MAIN. 2 Press RECEIVER . 3 Press and hold REMOTE SETUP, then release it after the LED flashes twice. 4 Use the number buttons to enter 9, 8, 1. The LED flashes four times to indicate that the resetting is completed. Default preset codes Input function Preset code button DVD 31571 BD 32442 DVR 22306 HDMI 32442 TV 14001 CD 70468 CD-R 71087 VIDEO 20058 TV CTRL 14001 RECEIVER 6 1 9 3 5 Controls the components This remote control can control components after entering the proper codes or teaching the receiver the commands (see Setting the remote to control other components on page 73 for more on this). Use the input function buttons to select the component. • The TV CONTROL buttons on the remote control are dedicated to control the TV assigned to the TV CTRL button. If you have two TVs, assign the main TV to the TV CTRL button. RECEIVER SOURCE DVD BD DVR HDMI TV CD CD-R VIDEO iPod USB TUNER SIRIUS INPUT SELECT 12 SIGNAL SEL MCACC 45 SBch A.ATT 78 D.ACCESS CH LEVEL 0 INPUT 3 SLEEP 6 DIMMER 9 CLASS ENTER MASTER VOLUME TV CONTROL CH VOL MUTE AUDIO PARAMETER LIST VIDEO PARAMETER TUNE TOOLS TOP MENU BAND T.EDIT GUIDE PRESET ENTER PRESET CATEGORY HOME MENU TUNE iPod CTRL RETURN AUTO/ALC/ MENU DIRECT STEREO STANDARD ADV SURR HDD DVD PHASE CTRL STATUS ANT MPX PQLS MEMORY AUDIO INFO CH DISP TV CTRL RECEIVER REMOTE SETUP MAIN ZONE 2 RECEIVER 74 En
-
 1
1 -
2
-
3
-
4
-
5
-
6
-
7
-
8
-
9
-
10
-
11
-
12
-
13
-
14
-
15
-
16
-
17
-
18
-
19
-
20
-
21
-
22
-
23
-
24
-
25
-
26
-
27
-
28
-
29
-
30
-
31
-
32
-
33
-
34
-
35
-
36
-
37
-
38
-
39
-
40
-
41
-
42
-
43
-
44
-
45
-
46
-
47
-
48
-
49
-
50
-
51
-
52
-
53
-
54
-
55
-
56
-
57
-
58
-
59
-
60
-
61
-
62
-
63
-
64
-
65
-
66
-
67
-
68
-
 69
69 -
 70
70 -
 71
71 -
 72
72 -
 73
73 -
 74
74 -
 75
75 -
 76
76 -
 77
77 -
 78
78 -
 79
79 -
80
-
81
-
82
-
83
-
84
-
85
-
86
-
87
-
88
-
89
-
90
-
91
-
92
-
93
-
94
-
95
-
96
-
97
-
98
-
99
-
100
-
101
-
102
-
103
-
104
-
105
-
106
-
107
-
108
-
109
-
110
-
111
-
112
-
113
-
114
-
115
-
116
-
117
-
118
-
119
-
120
-
121
-
122
-
123
-
124
-
125
-
126
-
127
-
128
 |
 |
