Samsung SGH-X507 User Manual (user Manual) (ver.d2) (English) - Page 56
Email, Graphic, Ringtone, Group, Options, Select
 |
View all Samsung SGH-X507 manuals
Add to My Manuals
Save this manual to your list of manuals |
Page 56 highlights
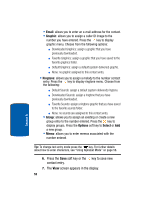
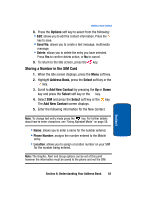
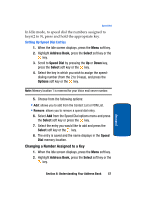
• Email: allows you to enter an e-mail address for the contact. • Graphic: allows you to assign a caller ID image to the number you have entered. Press the key to display graphic menu. Choose from the following options: ⅷ Downloaded Graphics: assign a graphic that you have previously downloaded. ⅷ Favorite Graphics: assign a graphic that you have saved to the favorite graphics folder. ⅷ Default Graphics: assign a default (system delivered) graphic. ⅷ None: no graphic assigned to this contact entry. • Ringtone: allows you to assign a melody to the number contact entry. Press the key to display ringtone menu. Choose from the following: ⅷ Default Sounds: assign a default (system delivered) ringtone. ⅷ Downloaded Sounds: assign a ringtone that you have previously downloaded. ⅷ Favorite Sounds: assign a ringtone graphic that you have saved to the favorite sounds folder. ⅷ None: no sounds are assigned to this contact entry. • Group: allows you to assign an existing or create a new group entry to the number entered. Press the key to display groups. Press the Options soft key to Select or Add a new group. • Memo: allows you to enter memos associated with the number entered. Tip: To change text entry mode press the key. For further details about how to enter characters, see "Using Alphabet Mode" on page 58. 6. Press the Save soft key or the key to save new contact entry. 7. The View screen appears in the display. 52 Section 6
-
 1
1 -
2
-
3
-
4
-
5
-
6
-
7
-
8
-
9
-
10
-
11
-
12
-
13
-
14
-
15
-
16
-
17
-
18
-
19
-
20
-
21
-
22
-
23
-
24
-
25
-
26
-
27
-
28
-
29
-
30
-
31
-
32
-
33
-
34
-
35
-
36
-
37
-
38
-
39
-
40
-
41
-
42
-
43
-
44
-
45
-
46
-
47
-
48
-
49
-
50
-
 51
51 -
 52
52 -
 53
53 -
 54
54 -
 55
55 -
 56
56 -
 57
57 -
 58
58 -
 59
59 -
 60
60 -
 61
61 -
62
-
63
-
64
-
65
-
66
-
67
-
68
-
69
-
70
-
71
-
72
-
73
-
74
-
75
-
76
-
77
-
78
-
79
-
80
-
81
-
82
-
83
-
84
-
85
-
86
-
87
-
88
-
89
-
90
-
91
-
92
-
93
-
94
-
95
-
96
-
97
-
98
-
99
-
100
-
101
-
102
-
103
-
104
-
105
-
106
-
107
-
108
-
109
-
110
-
111
-
112
-
113
-
114
-
115
-
116
-
117
-
118
-
119
-
120
-
121
-
122
-
123
-
124
-
125
-
126
-
127
-
128
-
129
-
130
-
131
-
132
-
133
-
134
-
135
-
136
-
137
-
138
-
139
-
140
-
141
-
142
-
143
-
144
-
145
-
146
-
147
-
148
-
149
-
150
-
151
-
152
-
153
-
154
-
155
-
156
-
157
-
158
-
159
-
160
-
161
-
162
-
163
-
164
-
165
-
166
-
167
-
168
-
169
-
170
-
171
-
172
-
173
-
174
-
175
-
176
-
177
-
178
 |
 |