Sony CAV-M1000ES Installation Manual Integrated A/V System - Page 22
Press ENTER., Main Unit.
 |
View all Sony CAV-M1000ES manuals
Add to My Manuals
Save this manual to your list of manuals |
Page 22 highlights
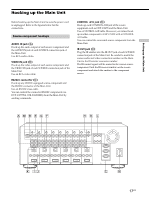
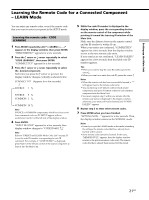
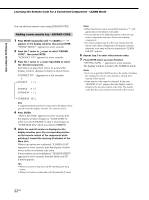
Setting up the Main Unit Learning the Remote Code for a Connected Component - LEARN Mode ... ... You can add new remote codes using EXPAND CODE. Adding a new remote key - EXPAND CODE 1 Press MODE repeatedly until "Tt" appears in the display window, then press ENTER. "WHICH MENU?" appears for a few seconds. 2 Press the R cursor or r cursor to select "EXPAND CODE", then press ENTER. "CONNECT TO?" appears for a few seconds. 3 Press the R cursor or r cursor repeatedly to select the desired component. Each time you press the R cursor or r cursor, the display window changes cyclically as shown below. CONNECT TO? (Appears for a few seconds) r t SOURCE 1 R r SOURCE 8 R r COMMON 1 R r t COMMON 10 R r Note A component that has not been connected to the Main Unit is grayed out in the display window. You cannot select it. 4 Press ENTER. "INPUT IR CODE" appears for a few seconds, then the display window changes to "CODE ID #81 R r" when you select SOURCE in step 3, and changes to "CODE ID #110R r" when you select COMMON. 5 While the code ID number is displayed in the display window, press the corresponding button on the remote control of the component while pointing it toward the learning IR window of the Main Unit. When your entries are confirmed, "COMPLETED!" appears for a few seconds, then the display window moves to the next remote code entry. If your entries are not confirmed, "LEARN FAILED!" appears for a few seconds, then the failed code ID number appears. Tips • When you want to skip the code ID number, press the r cursor. • When you want to re-enter the code ID, press the R cursor. Notes • When the remote code is successfully learned, a "*" will appear next to the remote code name. • You can add up to 31 additional remote codes for each source component, and up to 10 for each common components. • You must complete step 5 within one minute after the remote code name is displayed in the display window; otherwise, your entry will not be learned and "LEARN FAILED!" appears. 6 Repeat step 5 to enter other remote codes. 7 Press ENTER when you have finished. "SETTING NOW..." appears for a few seconds. The display window returns to the NORMAL mode. Notes • Even if you quit the LEARN mode in the midst of making the settings, the remote codes that have already been learned will be stored. • Some remote codes cannot be learned. In this case, "MEMORY FULL" appears, then the display window returns to the previous remote code entry. The remote codes that have previously been learned will be stored. 22US
-
 1
1 -
2
-
3
-
4
-
5
-
6
-
7
-
8
-
9
-
10
-
11
-
12
-
13
-
14
-
15
-
16
-
 17
17 -
 18
18 -
 19
19 -
 20
20 -
 21
21 -
 22
22 -
 23
23 -
 24
24 -
 25
25 -
 26
26 -
 27
27 -
28
-
29
-
30
-
31
-
32
-
33
-
34
-
35
-
36
-
37
-
38
-
39
-
40
-
41
-
42
-
43
-
44
 |
 |
