Sony DCR-HC30 Camera Operations Guide - Page 105
Dubbing/Editing, To set the end point for audio dubbing
 |
UPC - 027242644588
View all Sony DCR-HC30 manuals
Add to My Manuals
Save this manual to your list of manuals |
Page 105 highlights
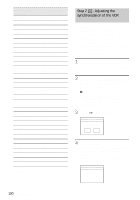
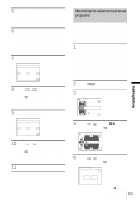
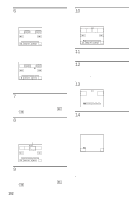
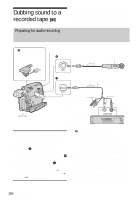
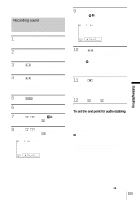
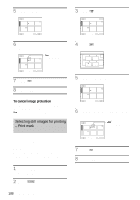
you have recorded afterwards is not output from the speaker. Check the sound by using a TV. Recording sound 9 Touch [AUDIO DUB]. A green X mark appears on the LCD screen. 60min AUD DUB CTRL 0:00:00:00 1 Insert a recorded cassette into your camcorder. 2 Slide the POWER switch repeatedly to select the PLAY/EDIT mode. 3 Touch tape. (play/pause) to play the 4 Touch (play/pause) again at the point where you want to start recording the sound. The playback pauses. 5 Touch . 6 Touch [MENU]. 7 Touch / to select PLAY), then touch . (EDIT/ 8 Touch / to select [AUD DUB CTRL], then touch . 60min AUD DUB CTRL 0:00:00:00 AUDIO DUB AUDIO DUB 10Touch (play) and start playing back the audio you want to record at the same time. A red mark remains on the LCD screen while recording sound. The new sound is recorded in stereo 2 (ST2) during the playback of the tape. 11Touch (stop) when you want to stop recording. To dub on other scenes, repeat steps 3 and 4 to select scenes, then touch [AUDIO DUB]. 12Touch , then . To set the end point for audio dubbing During playback, press ZERO SET MEMORY on the Remote Commander at the scene at which you want to stop audio dubbing. Then, perform steps 4 to 10. The recording stops automatically at the selected scene. b Note • You can only record additional audio over a tape recorded on your camcorder. The sound may deteriorate when you dub audio on a tape recorded on other camcorders (including other DCR-HC30/ HC40 camcorders). Dubbing/Editing ,continued Dubbing/Editing 105
-
 1
1 -
2
-
3
-
4
-
5
-
6
-
7
-
8
-
9
-
10
-
11
-
12
-
13
-
14
-
15
-
16
-
17
-
18
-
19
-
20
-
21
-
22
-
23
-
24
-
25
-
26
-
27
-
28
-
29
-
30
-
31
-
32
-
33
-
34
-
35
-
36
-
37
-
38
-
39
-
40
-
41
-
42
-
43
-
44
-
45
-
46
-
47
-
48
-
49
-
50
-
51
-
52
-
53
-
54
-
55
-
56
-
57
-
58
-
59
-
60
-
61
-
62
-
63
-
64
-
65
-
66
-
67
-
68
-
69
-
70
-
71
-
72
-
73
-
74
-
75
-
76
-
77
-
78
-
79
-
80
-
81
-
82
-
83
-
84
-
85
-
86
-
87
-
88
-
89
-
90
-
91
-
92
-
93
-
94
-
95
-
96
-
97
-
98
-
99
-
 100
100 -
 101
101 -
 102
102 -
 103
103 -
 104
104 -
 105
105 -
 106
106 -
 107
107 -
 108
108 -
 109
109 -
 110
110 -
111
-
112
-
113
-
114
-
115
-
116
-
117
-
118
-
119
-
120
-
121
-
122
-
123
-
124
-
125
-
126
-
127
-
128
-
129
-
130
-
131
-
132
-
133
-
134
-
135
-
136
-
137
-
138
-
139
-
140
-
141
-
142
-
143
-
144
-
145
-
146
-
147
-
148
 |
 |
