Sony DCR-HC30 Camera Operations Guide - Page 19
Step 3: Turning the, power - dcr camcorder
 |
UPC - 027242644588
View all Sony DCR-HC30 manuals
Add to My Manuals
Save this manual to your list of manuals |
Page 19 highlights
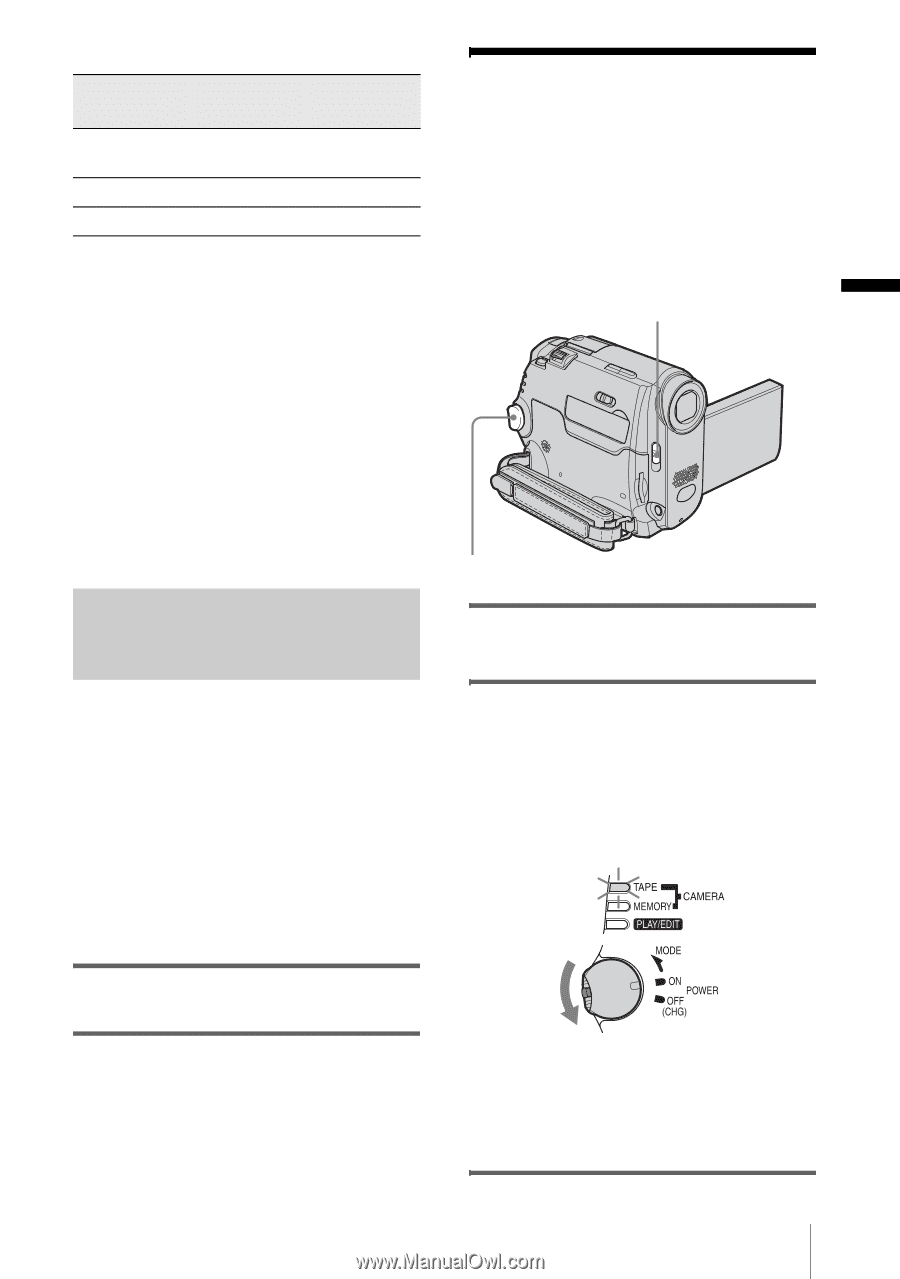
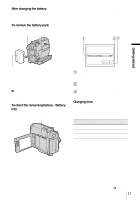
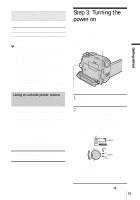
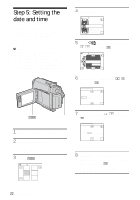
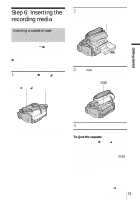
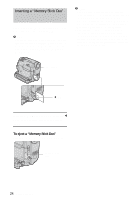
Getting started For DCR-HC30: Battery pack LCD panel opened* NP-FP50 120 (supplied) NP-FP70 255 NP-FP90 455 LCD panel closed 140 295 525 * With LCD BACKLIGHT set to ON. b Notes • The power will not be supplied from the battery pack when the AC Adaptor is connected to the DC IN jack of your camcorder, even if its power cord is disconnected from the wall outlet. • The recording and playback time will be shorter when you use your camcorder in low temperature. • The CHG (charge) lamp flashes during charging, or the battery information will not be correctly displayed in following conditions. - The battery pack is not attached correctly. - The battery pack is damaged. - The battery pack is fully discharged. (For Battery information only) Using an outside power source You can use the AC Adaptor as the power source when you do not want the battery to run out. While you are using the AC Adaptor, the battery pack will not lose its charge even when it is attached to your camcorder. PRECAUTION Even if your camcorder is turned off, AC power (house current) is still supplied to it while connected to the wall outlet via the AC Adaptor. Step 3: Turning the power on You need to slide the POWER switch repeatedly to select the desired power mode to record or play. When using this camcorder for the first time, the [CLOCK SET] screen appears (p. 22). LENS COVER switch POWER switch 1 Set the LENS COVER switch to OPEN. 2 While pressing the green button, slide the POWER switch down. The power turns on. To enter the recording or playing mode, slide the switch repeatedly until the respective lamp for the desired power mode lights up. Connect your camcorder as shown in "Charging the battery pack" (p. 16). • CAMERA-TAPE mode: To record on a tape. • CAMERA-MEMORY mode: To record on a "Memory Stick Duo." • PLAY/EDIT mode: To play or edit pictures on a tape or "Memory Stick Duo." ,continued Getting started 19
-
 1
1 -
2
-
3
-
4
-
5
-
6
-
7
-
8
-
9
-
10
-
11
-
12
-
13
-
 14
14 -
 15
15 -
 16
16 -
 17
17 -
 18
18 -
 19
19 -
 20
20 -
 21
21 -
 22
22 -
 23
23 -
 24
24 -
25
-
26
-
27
-
28
-
29
-
30
-
31
-
32
-
33
-
34
-
35
-
36
-
37
-
38
-
39
-
40
-
41
-
42
-
43
-
44
-
45
-
46
-
47
-
48
-
49
-
50
-
51
-
52
-
53
-
54
-
55
-
56
-
57
-
58
-
59
-
60
-
61
-
62
-
63
-
64
-
65
-
66
-
67
-
68
-
69
-
70
-
71
-
72
-
73
-
74
-
75
-
76
-
77
-
78
-
79
-
80
-
81
-
82
-
83
-
84
-
85
-
86
-
87
-
88
-
89
-
90
-
91
-
92
-
93
-
94
-
95
-
96
-
97
-
98
-
99
-
100
-
101
-
102
-
103
-
104
-
105
-
106
-
107
-
108
-
109
-
110
-
111
-
112
-
113
-
114
-
115
-
116
-
117
-
118
-
119
-
120
-
121
-
122
-
123
-
124
-
125
-
126
-
127
-
128
-
129
-
130
-
131
-
132
-
133
-
134
-
135
-
136
-
137
-
138
-
139
-
140
-
141
-
142
-
143
-
144
-
145
-
146
-
147
-
148
 |
 |