Sony DCR-HC30 Camera Operations Guide - Page 62
Selecting menu items
 |
UPC - 027242644588
View all Sony DCR-HC30 manuals
Add to My Manuals
Save this manual to your list of manuals |
Page 62 highlights
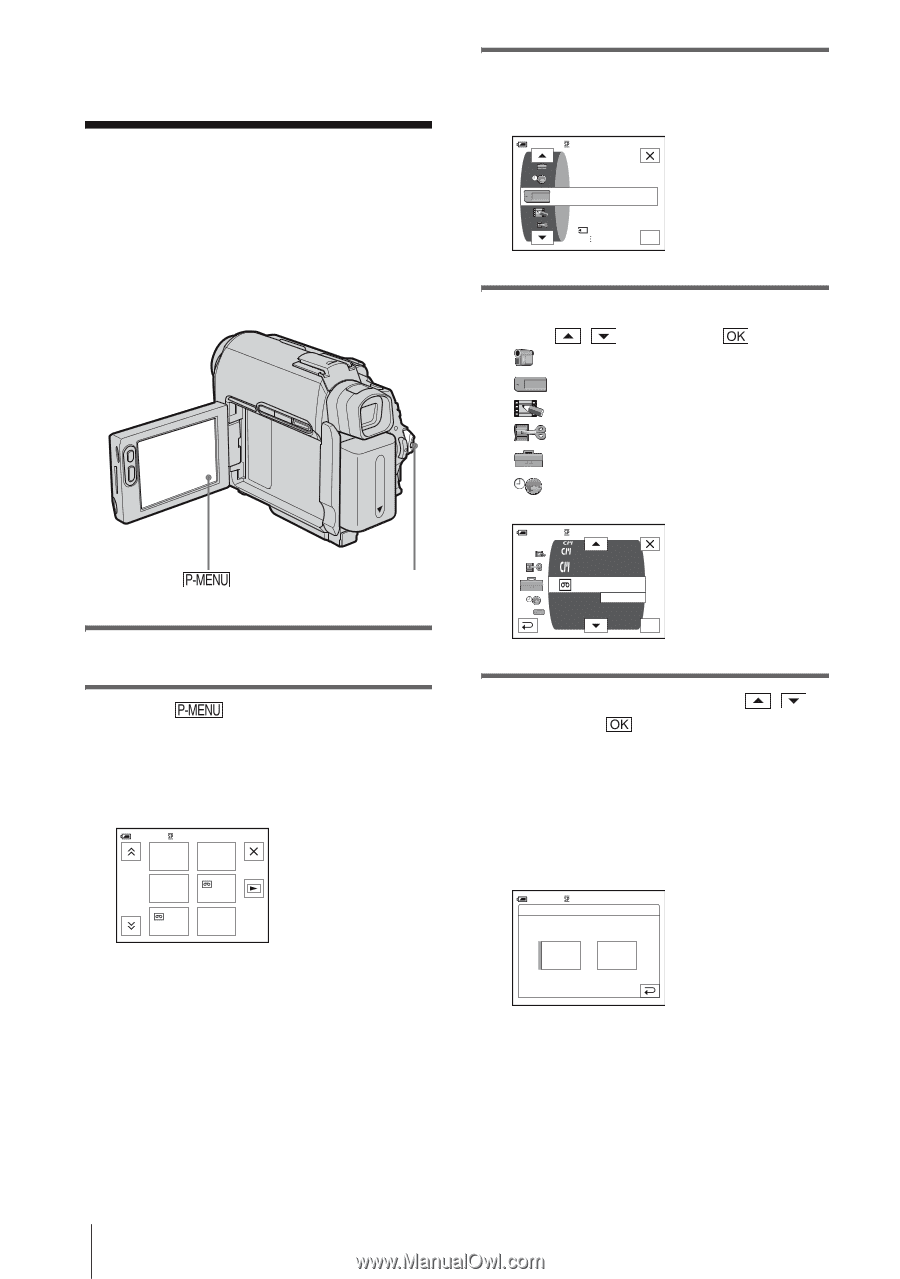
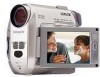
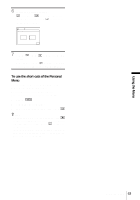
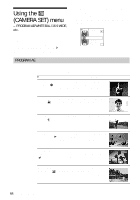
BAdvanced operations Using the Menu Selecting menu items You can change various settings or make detailed adjustments using the menu items displayed on the screen. POWER switch 1 Turn on the power (p. 19). 2 Touch . The Personal Menu appears. Items that are used often are displayed as short-cuts. Example: PLAY/EDIT mode's Personal Menu 60min MENU 0:00:00:00 END SEARCH 1/3 VOLUME VAR. SPD PB REC DATA CTRL CODE 3 Touch [MENU] to display the menu index screen. 60min 0:00:00:00 MEMORY SET STILL SET MOVIE SET ALL ERASE OK 4 Select the icon of the desired menu with / , then touch . CAMERA SET (p. 64) MEMORY SET (p. 70) PICT. APPLI. (p. 74) EDIT/PLAY (p. 79) STANDARD SET (p. 83) TIME/LANGU. (p. 88) 60min 0:00:00:00 TITLE ERASE TAPE TITLE ALL ERASE REC MODE AUDIO MODE SP VOLUME MULTI SOUND OK 5 Select the desired item with / , then touch . You can also touch the item directly to select it. You can scroll and see all items. The available items vary depending on the power mode of your camcorder. Unavailable items will be grayed out. 60min 0:00:00:00 REMOTE CTRL: ON ON OFF 62 Using the Menu
-
 1
1 -
2
-
3
-
4
-
5
-
6
-
7
-
8
-
9
-
10
-
11
-
12
-
13
-
14
-
15
-
16
-
17
-
18
-
19
-
20
-
21
-
22
-
23
-
24
-
25
-
26
-
27
-
28
-
29
-
30
-
31
-
32
-
33
-
34
-
35
-
36
-
37
-
38
-
39
-
40
-
41
-
42
-
43
-
44
-
45
-
46
-
47
-
48
-
49
-
50
-
51
-
52
-
53
-
54
-
55
-
56
-
 57
57 -
 58
58 -
 59
59 -
 60
60 -
 61
61 -
 62
62 -
 63
63 -
 64
64 -
 65
65 -
 66
66 -
 67
67 -
68
-
69
-
70
-
71
-
72
-
73
-
74
-
75
-
76
-
77
-
78
-
79
-
80
-
81
-
82
-
83
-
84
-
85
-
86
-
87
-
88
-
89
-
90
-
91
-
92
-
93
-
94
-
95
-
96
-
97
-
98
-
99
-
100
-
101
-
102
-
103
-
104
-
105
-
106
-
107
-
108
-
109
-
110
-
111
-
112
-
113
-
114
-
115
-
116
-
117
-
118
-
119
-
120
-
121
-
122
-
123
-
124
-
125
-
126
-
127
-
128
-
129
-
130
-
131
-
132
-
133
-
134
-
135
-
136
-
137
-
138
-
139
-
140
-
141
-
142
-
143
-
144
-
145
-
146
-
147
-
148
 |
 |