Sony DCR-HC62 Operating Guide - Page 49
REC CTRL, Movie recording control, AUD DUB CTRL Audio dubbing, Recording sound - dcr
 |
UPC - 027242727397
View all Sony DCR-HC62 manuals
Add to My Manuals
Save this manual to your list of manuals |
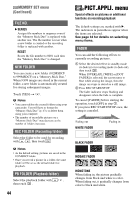
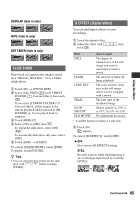
Page 49 highlights
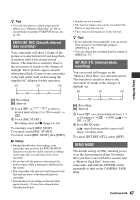
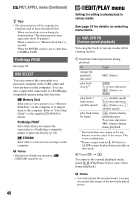
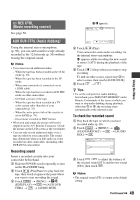
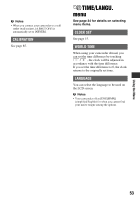
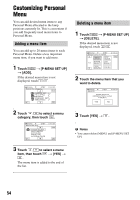
REC CTRL (Movie recording control) See page 58. AUD DUB CTRL (Audio dubbing) Using the internal stereo microphone (p. 90), you can add sound to a tape already recorded in the 12-bit mode (p. 50) without erasing the original sound. b Notes • You cannot record additional audio: - When the tape has been recorded in the 16-bit mode (p. 50). - When the tape has been recorded in the LP mode. - When your camcorder is connected via an i.LINK cable. - When the tape has been recorded in 4CH MIC mode on other camcorders. - On blank sections of the tape. - When the tape has been recorded in a TV color system other than that of your camcorder (p. 78). - When the write-protect tab of the cassette is set to SAVE (p. 79). - On sections recorded in HDV format. • When you add sound, the picture will not be output from the A/V Remote Connector. Check the picture on the LCD screen or the viewfinder. • You can only record additional audio over a tape recorded on your camcorder. The sound may deteriorate when you dub audio on a tape recorded on other camcorders (including other DCR-HC62 camcorders). Recording sound Insert a recorded cassette into your camcorder beforehand. 1 Slide the POWER switch repeatedly to turn on the PLAY/EDIT lamp. 2 Touch (Play/Pause) to play back the tape, then touch it again at the point where you want to start recording the sound. 3 Touch t [MENU] t (EDIT/PLAY) t t [AUD DUB CTRL] t t [AUDIO DUB]. X appears. 6 0 min AUD DUB CTRL 0:00:00:00 AUDIO DUB 4 Touch (Play). Your camcorder starts audio recording via the internal stereo microphone. appears while recording the new sound in stereo 2 (ST2) during the playback of the tape. 5 Touch (Stop) when you want to stop recording. To dub on other scenes, repeat step 2 to select scenes, then touch [AUDIO DUB]. 6 Touch t . z Tips • To set the end point for audio dubbing, beforehand, press ZERO SET MEMORY on the Remote Commander at the scene at which you want to stop audio dubbing during playback. After step 2 to 4, the recording stops automatically at the selected scene. To check the recorded sound 1 Play back the tape on which you have recorded audio (p. 26). 2 Touch t [MENU] t (STANDARD SET) t t [AUDIO MIX] t . 60min AUDIO MIX 0:00:00:00 ST1 ST2 3 Touch / to adjust the balance of the original sound (ST1) and the new sound (ST2), then touch . b Notes • The original sound (ST1) is output at the default setting. Continued , 49 Using the Menu
-
 1
1 -
2
-
3
-
4
-
5
-
6
-
7
-
8
-
9
-
10
-
11
-
12
-
13
-
14
-
15
-
16
-
17
-
18
-
19
-
20
-
21
-
22
-
23
-
24
-
25
-
26
-
27
-
28
-
29
-
30
-
31
-
32
-
33
-
34
-
35
-
36
-
37
-
38
-
39
-
40
-
41
-
42
-
43
-
 44
44 -
 45
45 -
 46
46 -
 47
47 -
 48
48 -
 49
49 -
 50
50 -
 51
51 -
 52
52 -
 53
53 -
 54
54 -
55
-
56
-
57
-
58
-
59
-
60
-
61
-
62
-
63
-
64
-
65
-
66
-
67
-
68
-
69
-
70
-
71
-
72
-
73
-
74
-
75
-
76
-
77
-
78
-
79
-
80
-
81
-
82
-
83
-
84
-
85
-
86
-
87
-
88
-
89
-
90
-
91
-
92
-
93
-
94
-
95
-
96
-
97
-
98
-
99
-
100
-
101
-
102
-
103
-
104
-
105
-
106
-
107
-
108
-
109
-
110
-
111
-
112
-
113
-
114
-
115
-
116
 |
 |
