Sony DSC-RX10M2 Help Guide (Printable PDF) - Page 67
Shooting super-slow-motion movies HFR Settings
 |
View all Sony DSC-RX10M2 manuals
Add to My Manuals
Save this manual to your list of manuals |
Page 67 highlights
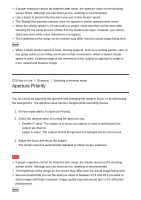
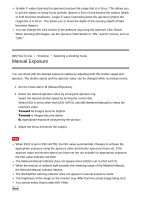
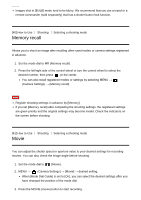
Press the MOVIE button again to stop recording. Menu item details Program Auto: Allows you to shoot with the exposure adjusted automatically (both the shutter speed and the aperture value). Aperture Priority: Allows you to shoot after adjusting the aperture value manually. Shutter Priority: Allows you to shoot after adjusting the shutter speed manually. Manual Exposure: Allows you to shoot after adjusting the exposure (both the shutter speed and the aperture value) manually. Note When you adjust the aperture using the aperture ring while recording a movie, set the Aperture Click Switch to "OFF." If you change the aperture value while shooting a movie with the Aperture Click Switch set to "ON," the sound of the aperture ring will be recorded. [42] How to Use Shooting Selecting a shooting mode Shooting super-slow-motion movies (HFR Settings) By shooting with a higher frame rate than the recording format, you can record a smooth super-slow-motion movie. 1. Set the mode dial to (High Frame Rate). The HFR setting screen will be displayed. 2. Select MENU→ (Camera Settings)→[ HFR Settings] and select the desired settings for [ Record Setting], [ Frame Rate], [ Priority Setting], and [ REC Timing]. You can adjust the desired exposure mode by selecting MENU→ Settings)→[High Frame Rate]. (Camera You can set other shooting settings such as focus area, focus mode, and frame rate, and perform zooming on the HFR setting screen. 3. Press the in the center of the control wheel. The HFR shooting screen will be displayed. To change the settings, press in the center once again to switch to the HFR
-
 1
1 -
2
-
3
-
4
-
5
-
6
-
7
-
8
-
9
-
10
-
11
-
12
-
13
-
14
-
15
-
16
-
17
-
18
-
19
-
20
-
21
-
22
-
23
-
24
-
25
-
26
-
27
-
28
-
29
-
30
-
31
-
32
-
33
-
34
-
35
-
36
-
37
-
38
-
39
-
40
-
41
-
42
-
43
-
44
-
45
-
46
-
47
-
48
-
49
-
50
-
51
-
52
-
53
-
54
-
55
-
56
-
57
-
58
-
59
-
60
-
61
-
 62
62 -
 63
63 -
 64
64 -
 65
65 -
 66
66 -
 67
67 -
 68
68 -
 69
69 -
 70
70 -
 71
71 -
 72
72 -
73
-
74
-
75
-
76
-
77
-
78
-
79
-
80
-
81
-
82
-
83
-
84
-
85
-
86
-
87
-
88
-
89
-
90
-
91
-
92
-
93
-
94
-
95
-
96
-
97
-
98
-
99
-
100
-
101
-
102
-
103
-
104
-
105
-
106
-
107
-
108
-
109
-
110
-
111
-
112
-
113
-
114
-
115
-
116
-
117
-
118
-
119
-
120
-
121
-
122
-
123
-
124
-
125
-
126
-
127
-
128
-
129
-
130
-
131
-
132
-
133
-
134
-
135
-
136
-
137
-
138
-
139
-
140
-
141
-
142
-
143
-
144
-
145
-
146
-
147
-
148
-
149
-
150
-
151
-
152
-
153
-
154
-
155
-
156
-
157
-
158
-
159
-
160
-
161
-
162
-
163
-
164
-
165
-
166
-
167
-
168
-
169
-
170
-
171
-
172
-
173
-
174
-
175
-
176
-
177
-
178
-
179
-
180
-
181
-
182
-
183
-
184
-
185
-
186
-
187
-
188
-
189
-
190
-
191
-
192
-
193
-
194
-
195
-
196
-
197
-
198
-
199
-
200
-
201
-
202
-
203
-
204
-
205
-
206
-
207
-
208
-
209
-
210
-
211
-
212
-
213
-
214
-
215
-
216
-
217
-
218
-
219
-
220
-
221
-
222
-
223
-
224
-
225
-
226
-
227
-
228
-
229
-
230
-
231
-
232
-
233
-
234
-
235
-
236
-
237
-
238
-
239
-
240
-
241
-
242
-
243
-
244
-
245
-
246
-
247
-
248
-
249
-
250
-
251
-
252
-
253
-
254
-
255
-
256
-
257
-
258
-
259
-
260
 |
 |
