Sony DSC T1 Operating Instructions - Page 79
Connecting the camera to, your computer
 |
UPC - 027242629608
View all Sony DSC T1 manuals
Add to My Manuals
Save this manual to your list of manuals |
Page 79 highlights
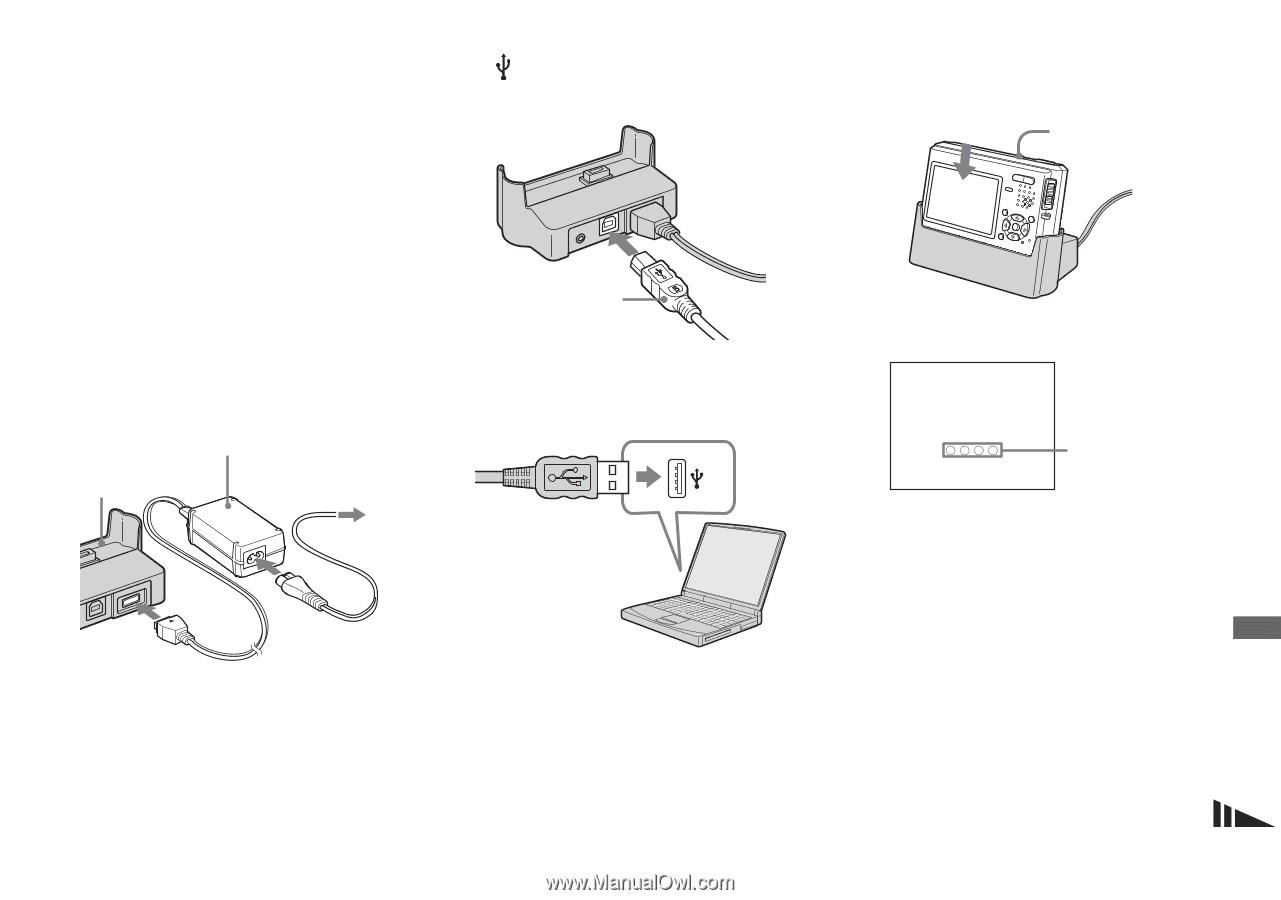
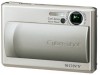
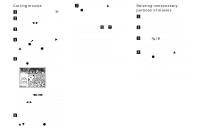
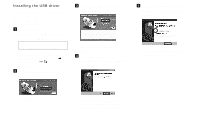
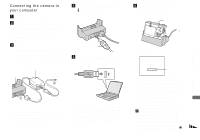
Connecting the camera to your computer a Turn on your computer. b Insert the "Memory Stick Duo" with the images you want to copy into the camera. • For further details on the "Memory Stick Duo," see page 19. c Connect the USB cradle (supplied) and the AC Adaptor (supplied), and plug the adaptor into a wall outlet (wall socket). AC Adaptor USB cradle To a wall outlet (wall socket) 2 1 • When you copy images to your computer using the battery pack, battery shutoff may cause copying to fail or data corruption. In addition, power is not supplied from the USB cable, so we recommend that you use the AC Adaptor. d Connect the USB cable to the (USB) jack of the USB cradle. USB cable e Connect the USB cable to your computer. • When you use a desktop computer, we recommend that you connect the USB cable to the USB connector on the rear panel. • When using Windows XP, the AutoPlay wizard automatically appears on the desktop. Proceed to page 82. f Connect the camera to the USB cradle and turn on the camera. POWER • Make sure the camera is securely connected to the USB cradle. USB Mode Normal Access indicators* "USB Mode Normal" appears on the LCD screen of the camera. When a USB connection is established for the first time, your computer automatically runs the used program to recognize the camera. Wait for a while. * During communication, the access indicators turn red. • If "USB Mode Normal" does not appear in step 6, confirm that [USB Connect] is set to [Normal] on the Setup screen (page 107). • Do not remove the camera from the USB cradle during USB connection, as the image data may be destroyed. To end the USB connection, see the note P on page 80. 79 Enjoying images on your computer
-
 1
1 -
2
-
3
-
4
-
5
-
6
-
7
-
8
-
9
-
10
-
11
-
12
-
13
-
14
-
15
-
16
-
17
-
18
-
19
-
20
-
21
-
22
-
23
-
24
-
25
-
26
-
27
-
28
-
29
-
30
-
31
-
32
-
33
-
34
-
35
-
36
-
37
-
38
-
39
-
40
-
41
-
42
-
43
-
44
-
45
-
46
-
47
-
48
-
49
-
50
-
51
-
52
-
53
-
54
-
55
-
56
-
57
-
58
-
59
-
60
-
61
-
62
-
63
-
64
-
65
-
66
-
67
-
68
-
69
-
70
-
71
-
72
-
73
-
 74
74 -
 75
75 -
 76
76 -
 77
77 -
 78
78 -
 79
79 -
 80
80 -
 81
81 -
 82
82 -
 83
83 -
 84
84 -
85
-
86
-
87
-
88
-
89
-
90
-
91
-
92
-
93
-
94
-
95
-
96
-
97
-
98
-
99
-
100
-
101
-
102
-
103
-
104
-
105
-
106
-
107
-
108
-
109
-
110
-
111
-
112
-
113
-
114
-
115
-
116
-
117
-
118
-
119
-
120
 |
 |