Sony DSC T1 Operating Instructions - Page 81
Changing Image Transfer, settings, Copying images without, When an image with the same
 |
UPC - 027242629608
View all Sony DSC T1 manuals
Add to My Manuals
Save this manual to your list of manuals |
Page 81 highlights
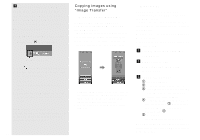
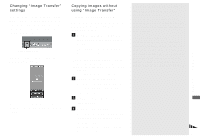
Changing "Image Transfer" settings You can change "Image Transfer" settings. Right-click the "Image Transfer" icon on the tasktray, select [Open Settings]. The settings you can set are as follows: [Basic], [Copy], and [Delete]. Right-click here When the "Image Transfer" starts, the below window appears. When you select [Settings] from the above window, you can only change the [Basic] setting. Copying images without using "Image Transfer" - Windows 98/98SE/2000/Me If you do not set to launch "Image Transfer" automatically, you can copy images as following procedure. a Double-click [My Computer], then double-click [Removable Disk]. The contents of the "Memory Stick Duo" inserted in your camera appear. • This section describes an example of copying images to the "My Documents" folder. • When the "Removable Disk" icon is not shown, see page 82. • When using Windows XP, see page 82. b Double-click [DCIM], then double-click the folder which contains the desired images. The folder opens. c Right-click the image, then click [Copy]. d Double-click the "My Documents" folder. Right-click the inside of the folder, then click [Paste]. The image files are copied to the "My Documents" folder. When an image with the same file name exists in the copy destination folder The overwrite confirmation message appears. When you overwrite the existing image with the new one, the original file data is deleted. To change the file name To copy an image file to the computer without overwriting, change the file name to the desired name. However, note that if you change the file name, you may not be able to play back that image with your camera. To play back images with the camera, perform the operation on page 85. 81 Enjoying images on your computer
-
 1
1 -
2
-
3
-
4
-
5
-
6
-
7
-
8
-
9
-
10
-
11
-
12
-
13
-
14
-
15
-
16
-
17
-
18
-
19
-
20
-
21
-
22
-
23
-
24
-
25
-
26
-
27
-
28
-
29
-
30
-
31
-
32
-
33
-
34
-
35
-
36
-
37
-
38
-
39
-
40
-
41
-
42
-
43
-
44
-
45
-
46
-
47
-
48
-
49
-
50
-
51
-
52
-
53
-
54
-
55
-
56
-
57
-
58
-
59
-
60
-
61
-
62
-
63
-
64
-
65
-
66
-
67
-
68
-
69
-
70
-
71
-
72
-
73
-
74
-
75
-
 76
76 -
 77
77 -
 78
78 -
 79
79 -
 80
80 -
 81
81 -
 82
82 -
 83
83 -
 84
84 -
 85
85 -
 86
86 -
87
-
88
-
89
-
90
-
91
-
92
-
93
-
94
-
95
-
96
-
97
-
98
-
99
-
100
-
101
-
102
-
103
-
104
-
105
-
106
-
107
-
108
-
109
-
110
-
111
-
112
-
113
-
114
-
115
-
116
-
117
-
118
-
119
-
120
 |
 |