Sony DSC V1 Operating Instructions - Page 39
Before advanced operations, How to setup and operate your camera, Changing the menu settings
 |
UPC - 027242621459
View all Sony DSC V1 manuals
Add to My Manuals
Save this manual to your list of manuals |
Page 39 highlights
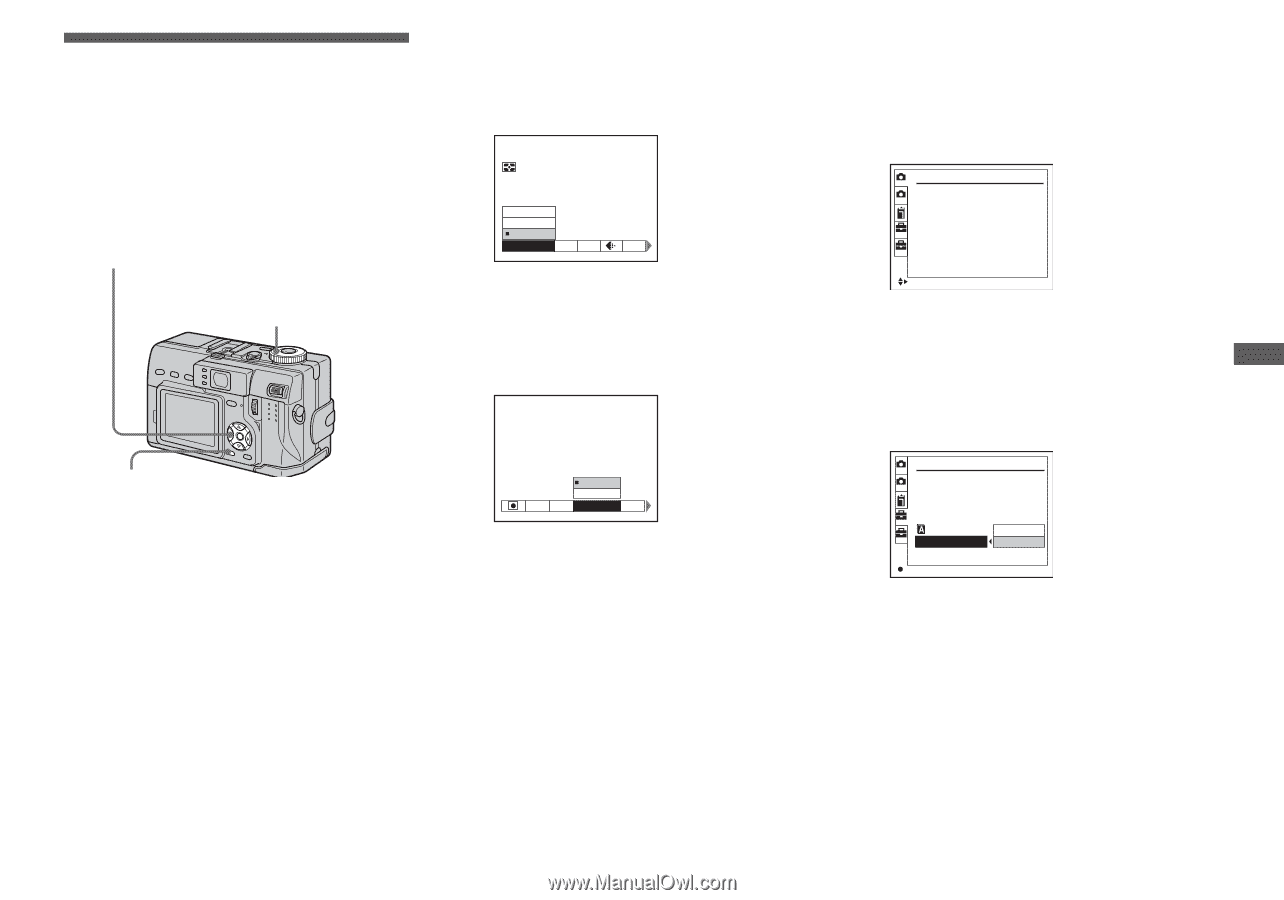
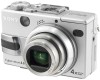
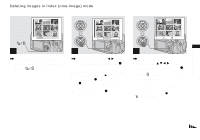
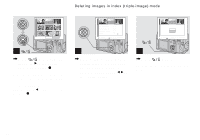
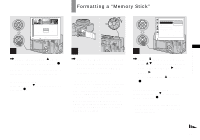
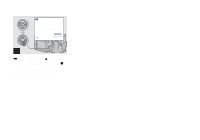
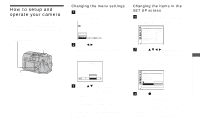
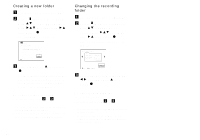
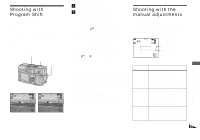
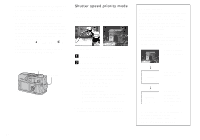
Before advanced operations Before advanced operations How to setup and operate your camera The usage of the menus and SET UP screen items that are most frequently used for "Advanced operations" is described below. Control button Mode dial MENU Changing the menu settings a Press MENU. The menu appears. Spot Center Multi Metering Mode WB ISO Mode b Press b/B on the control button to select the item you want to set. The selected item turns yellow. FINE Fine Standard WB ISO P.Quality Mode c Press v/V on the control button to select the desired setting. The frame of the selected setting turns yellow, and the setting is entered. To turn off the menu display Press MENU. Changing the items in the SET UP screen a Set the mode dial to SET UP. The SET UP screen appears. Camera 1 1 Moving Image : 2 AF Mode : MPEG Movie Single Smart Zoom : On Date/Time : Off 1 Red Eye Reduction : Off 2 Hologram AF : Auto SELECT b Press v/V/b/B on the control button to select the item you want to set. The frame of the selected item turns yellow. 1 Setup 1 Power Save: 2 LCD Brightness: LCD Backlight: 1 Beep: Language: 2 Clock Set: OK Cancel OK c Press z on the control button to enter the setting. To turn off the SET UP screen display Set the mode dial to anything other than SET UP. 39
-
 1
1 -
2
-
3
-
4
-
5
-
6
-
7
-
8
-
9
-
10
-
11
-
12
-
13
-
14
-
15
-
16
-
17
-
18
-
19
-
20
-
21
-
22
-
23
-
24
-
25
-
26
-
27
-
28
-
29
-
30
-
31
-
32
-
33
-
 34
34 -
 35
35 -
 36
36 -
 37
37 -
 38
38 -
 39
39 -
 40
40 -
 41
41 -
 42
42 -
 43
43 -
 44
44 -
45
-
46
-
47
-
48
-
49
-
50
-
51
-
52
-
53
-
54
-
55
-
56
-
57
-
58
-
59
-
60
-
61
-
62
-
63
-
64
-
65
-
66
-
67
-
68
-
69
-
70
-
71
-
72
-
73
-
74
-
75
-
76
-
77
-
78
-
79
-
80
-
81
-
82
-
83
-
84
-
85
-
86
-
87
-
88
-
89
-
90
-
91
-
92
-
93
-
94
-
95
-
96
-
97
-
98
-
99
-
100
-
101
-
102
-
103
-
104
-
105
-
106
-
107
-
108
-
109
-
110
-
111
-
112
-
113
-
114
-
115
-
116
-
117
-
118
-
119
-
120
-
121
-
122
-
123
-
124
-
125
-
126
-
127
-
128
-
129
-
130
-
131
-
132
 |
 |