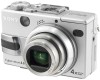
Sony DSC V1 Operating Instructions - Page 96
For Mac OS X users, Copying images, Viewing the images on your, computer
 |
UPC - 027242621459
View all Sony DSC V1 manuals
Add to My Manuals
Save this manual to your list of manuals |
Page 96 highlights
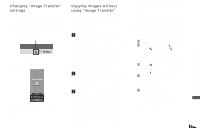
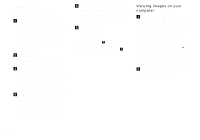
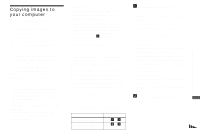
Disconnecting the USB cable from your computer, removing the "Memory Stick" from your camera or turning off the power during a USB connection Drag and drop the drive icon or the "Memory Stick" icon to the "Trash" icon, then remove the USB cable or "Memory Stick" or turn off the power. • If you are using Mac OS X v10.0, remove the USB cable, etc., after you have turned your computer off. c Copying images 1 Double-click the newly recognized icon on the desktop. The contents of the "Memory Stick" inserted in your camera appear. 2 Double-click "DCIM." 3 Double-click the folder containing the desired image file. 4 Drag and drop the image files to the hard disk icon. The image files are copied to your hard disk. • See pages 93 and 94 for details about the image file storage destinations and file names. d Viewing the images on your computer 1 Double-click the hard disk icon. 2 Double-click the desired image file in the folder containing the copied files. The image file opens. • Close down all applications running on the computer before installing the USB driver and application. • You can use the "ImageMixer Ver. 1.5 for Sony" software to copy, view and edit images, and create video CDs. See the operation manual supplied with the CD-ROM for details about the installation method, or see the software's help files for the operation method. • "ImageMixer" is not compatible with Mac OS X. • "Image Transfer" cannot be used with Macintosh. For Mac OS X users If the "There is no application available to open the document "DSC0ssss.JPE"." screen appears when you click an E-mail mode image file, make the following setting. The screen display may differ depending on the version. 1 Click [Choose Application...] at the "There is no application available to open the document "DSC0ssss.JPE"." screen. 2 Change "Show" from [Recommended Applications] to [All Applications]. 3 Select [QuickTime Player] from the displayed list of applications, and click [Open]. 96
-
 1
1 -
2
-
3
-
4
-
5
-
6
-
7
-
8
-
9
-
10
-
11
-
12
-
13
-
14
-
15
-
16
-
17
-
18
-
19
-
20
-
21
-
22
-
23
-
24
-
25
-
26
-
27
-
28
-
29
-
30
-
31
-
32
-
33
-
34
-
35
-
36
-
37
-
38
-
39
-
40
-
41
-
42
-
43
-
44
-
45
-
46
-
47
-
48
-
49
-
50
-
51
-
52
-
53
-
54
-
55
-
56
-
57
-
58
-
59
-
60
-
61
-
62
-
63
-
64
-
65
-
66
-
67
-
68
-
69
-
70
-
71
-
72
-
73
-
74
-
75
-
76
-
77
-
78
-
79
-
80
-
81
-
82
-
83
-
84
-
85
-
86
-
87
-
88
-
89
-
90
-
 91
91 -
 92
92 -
 93
93 -
 94
94 -
 95
95 -
 96
96 -
 97
97 -
 98
98 -
 99
99 -
 100
100 -
 101
101 -
102
-
103
-
104
-
105
-
106
-
107
-
108
-
109
-
110
-
111
-
112
-
113
-
114
-
115
-
116
-
117
-
118
-
119
-
120
-
121
-
122
-
123
-
124
-
125
-
126
-
127
-
128
-
129
-
130
-
131
-
132
 |
 |