Sony STR-DA4600ES Operating Instructions (Large File - 17.22 MB) - Page 106
Switching the command mode of the receiver and the remote, A.DIRECT, press
 |
View all Sony STR-DA4600ES manuals
Add to My Manuals
Save this manual to your list of manuals |
Page 106 highlights
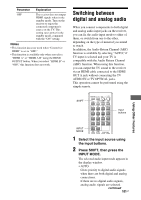
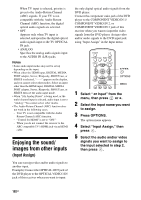
4 Prepare the recording component. Insert a blank video tape, etc., into the recording component (VIDEO 1) for recording. 5 Start recording on the recording component, then start playback on the playback component. Notes • Some sources contain copy guards to prevent recording. In this case, you may not be able to record from the sources. • Analog input signals (audio and composite video) are output from the analog output jacks. • While only composite video signals are being recorded, the auto standby function of the receiver may start up and interrupt the recording. In this case, set "Auto Standby" to "OFF" (page 127). Switching the command mode of the receiver and the remote You can switch the command mode (COMMAND MODE AV 1 or COMMAND MODE AV 2) of the receiver and the remote. Switch the command mode from the initial setting to the appropriate setting, if other Sony component is operated accidentally by the same remote, when you are operating the receiver using the remote supplied with the receiver. The command modes of both the receiver and the remote are those of the initial setting (COMMAND MODE AV 2). The receiver and the remote, on the contrary, should use the same command mode. If the command modes of the receiver and the remote are different, you cannot use the remote to operate the receiver. Switching the command mode of the receiver ?/1 2CH/A.DIRECT 1 Press ?/1 to turn off the receiver. 2 While holding down 2CH/ A.DIRECT, press ?/1 to turn on the receiver. When the command mode is set to "AV2," "C. MODE AV2" appears on the display. When the command mode is set to "AV1," "C. MODE AV1" appears on the display. Switching the command mode of the simple remote commander DISPLAY MUTING Press MUTING and at the same time while pressing DISPLAY. 106GB
-
 1
1 -
2
-
3
-
4
-
5
-
6
-
7
-
8
-
9
-
10
-
11
-
12
-
13
-
14
-
15
-
16
-
17
-
18
-
19
-
20
-
21
-
22
-
23
-
24
-
25
-
26
-
27
-
28
-
29
-
30
-
31
-
32
-
33
-
34
-
35
-
36
-
37
-
38
-
39
-
40
-
41
-
42
-
43
-
44
-
45
-
46
-
47
-
48
-
49
-
50
-
51
-
52
-
53
-
54
-
55
-
56
-
57
-
58
-
59
-
60
-
61
-
62
-
63
-
64
-
65
-
66
-
67
-
68
-
69
-
70
-
71
-
72
-
73
-
74
-
75
-
76
-
77
-
78
-
79
-
80
-
81
-
82
-
83
-
84
-
85
-
86
-
87
-
88
-
89
-
90
-
91
-
92
-
93
-
94
-
95
-
96
-
97
-
98
-
99
-
100
-
 101
101 -
 102
102 -
 103
103 -
 104
104 -
 105
105 -
 106
106 -
 107
107 -
 108
108 -
 109
109 -
 110
110 -
 111
111 -
112
-
113
-
114
-
115
-
116
-
117
-
118
-
119
-
120
-
121
-
122
-
123
-
124
-
125
-
126
-
127
-
128
-
129
-
130
-
131
-
132
-
133
-
134
-
135
-
136
-
137
-
138
-
139
-
140
-
141
-
142
-
143
-
144
-
145
-
146
-
147
-
148
-
149
-
150
-
151
-
152
-
153
-
154
-
155
-
156
-
157
-
158
-
159
-
160
-
161
-
162
-
163
-
164
-
165
-
166
-
167
-
168
-
169
-
170
 |
 |
