Sony STR-DA4600ES Operating Instructions (Large File - 17.22 MB) - Page 111
To register settings for the, listening environment, To select the registered seating, position
 |
View all Sony STR-DA4600ES manuals
Add to My Manuals
Save this manual to your list of manuals |
Page 111 highlights
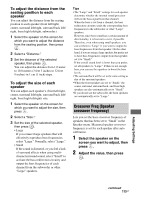
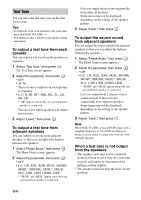
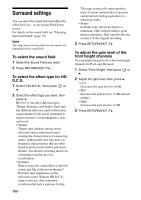
Position You can register 3 patterns as Pos. 1, 2, and 3, depending on the listening position, listening environment, and measurement conditions. To register settings for the listening environment You can select the seating position you want and register the measurement results of the auto calibration for that seating position. 1 Select the position (Pos. 1, 2, 3) for which you want to register the measurement result, then press . 2 Select "Calibration Start," then press . 3 Press V/v repeatedly and to un- check the items you do not want to measure, then press b. The confirmation screen, asking whether you are ready to start measurement, appears. 4 Press to select "Start." The measurement results is registered as the position you selected in step 1. 5 Repeat step 1 to 4 to register another seating position. To select the registered seating position Select the position (Pos. 1, 2, 3) you want, then press . The registered seating position is selected. To name the Seating Position You can rename the position name. 1 Select the the position (Pos. 1, 2, 3) you want, then press . 2 Press OPTIONS. 3 Select "Name Input," then press . 4 Press V/v to select a character, then press b. You can shift input position backward and forward by pressing B/b. 5 Repeat steps 4 to input a character one by one, then press . The name you entered is registered. Adjusting Settings 111GB
-
 1
1 -
2
-
3
-
4
-
5
-
6
-
7
-
8
-
9
-
10
-
11
-
12
-
13
-
14
-
15
-
16
-
17
-
18
-
19
-
20
-
21
-
22
-
23
-
24
-
25
-
26
-
27
-
28
-
29
-
30
-
31
-
32
-
33
-
34
-
35
-
36
-
37
-
38
-
39
-
40
-
41
-
42
-
43
-
44
-
45
-
46
-
47
-
48
-
49
-
50
-
51
-
52
-
53
-
54
-
55
-
56
-
57
-
58
-
59
-
60
-
61
-
62
-
63
-
64
-
65
-
66
-
67
-
68
-
69
-
70
-
71
-
72
-
73
-
74
-
75
-
76
-
77
-
78
-
79
-
80
-
81
-
82
-
83
-
84
-
85
-
86
-
87
-
88
-
89
-
90
-
91
-
92
-
93
-
94
-
95
-
96
-
97
-
98
-
99
-
100
-
101
-
102
-
103
-
104
-
105
-
 106
106 -
 107
107 -
 108
108 -
 109
109 -
 110
110 -
 111
111 -
 112
112 -
 113
113 -
 114
114 -
 115
115 -
 116
116 -
117
-
118
-
119
-
120
-
121
-
122
-
123
-
124
-
125
-
126
-
127
-
128
-
129
-
130
-
131
-
132
-
133
-
134
-
135
-
136
-
137
-
138
-
139
-
140
-
141
-
142
-
143
-
144
-
145
-
146
-
147
-
148
-
149
-
150
-
151
-
152
-
153
-
154
-
155
-
156
-
157
-
158
-
159
-
160
-
161
-
162
-
163
-
164
-
165
-
166
-
167
-
168
-
169
-
170
 |
 |
