Sony TCD-D100 Operating Instructions primary manual - Page 14
eject, cassette, protect, recording, prevent, accidental, operations, function
 |
View all Sony TCD-D100 manuals
Add to My Manuals
Save this manual to your list of manuals |
Page 14 highlights
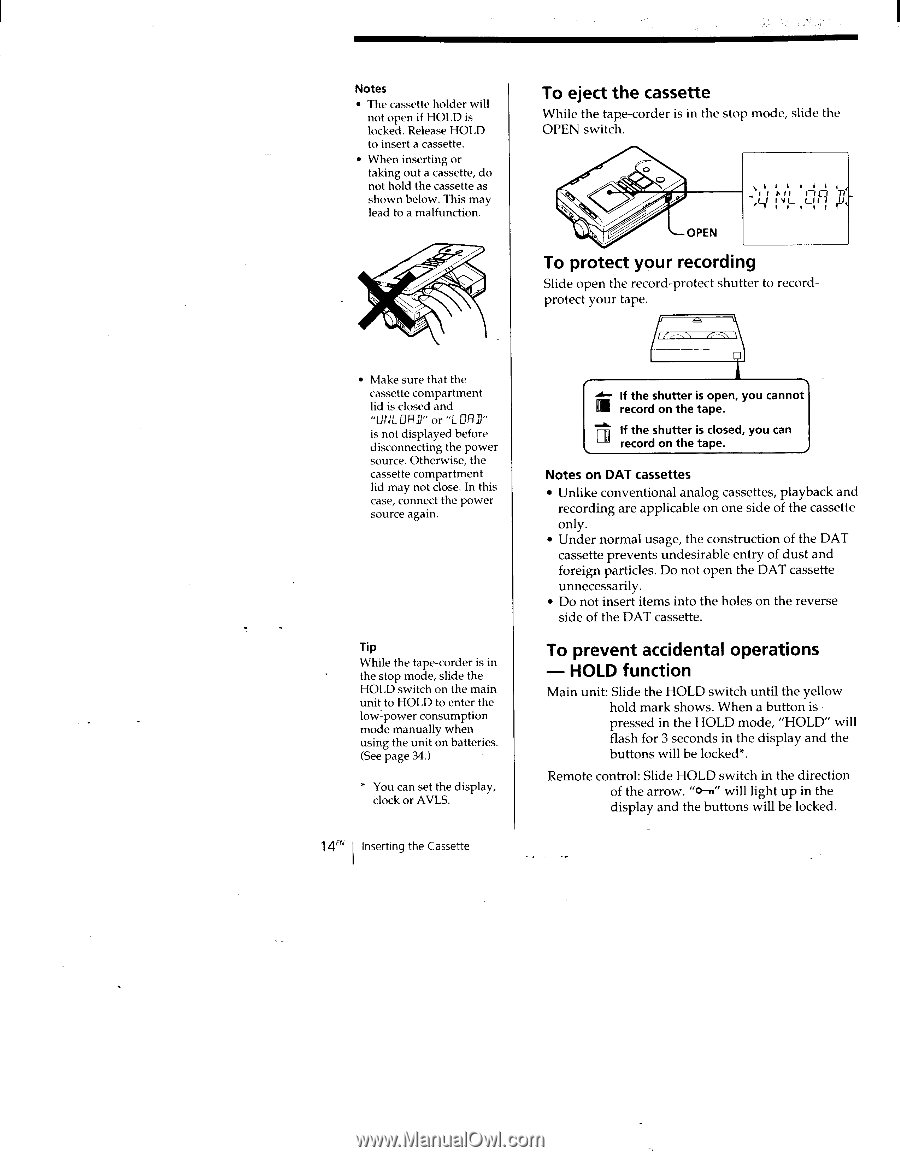
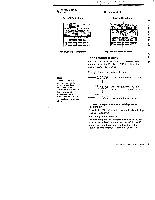
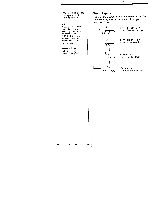
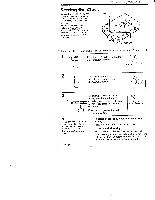
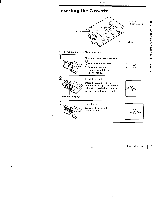
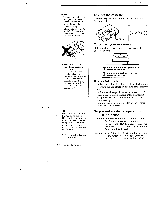
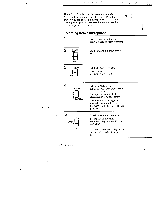
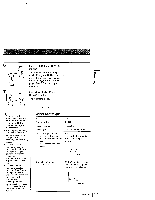
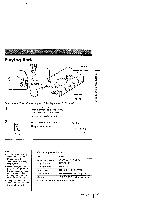
Notes • The cassette holder will not open if HOLD is locked. Release HOLD to insert a cassette. • When inserting or taking out a cassette, do not hold the cassette as shown below. This may lead to a malfunction. To eject the cassette While the tape-corder is in the stop mode, slide the OPEN switch. 0 O OPEN p I I t ' 1-11 i 'IF I I- I I 1 r i To protect your recording Slide open the record-protect shutter to recordprotect your tape. • Make sure that the cassette compartment lid is closed and urk URI'," or "L ORD" is not displayed before disconnecting the power source. Otherwise, the cassette compartment lid may not close. In this case, connect the power source again. Tip While the tape-corder is in the stop mode, slide the HOLD switch on the main unit to HOLD to enter the low-power consumption mode manually when using the unit on batteries. (See page 34.) " You can set the display, clock or AVLS. 14° Inserting the Cassette AI-. If the shutter is open, you cannot L. record on the tape. nil If the shutter is closed, you can record on the tape. Notes on DAT cassettes • Unlike conventional analog cassettes, playback and recording are applicable on one side of the cassette only. • Under normal usage, the construction of the DAT cassette prevents undesirable entry of dust and foreign particles. Do not open the DAT cassette unnecessarily. • Do not insert items into the holes on the reverse side of the DAT cassette. To prevent accidental operations - HOLD function Main unit: Slide the HOLD switch until the yellow hold mark shows. When a button is pressed in the HOLD mode, "HOLD" will flash for 3 seconds in the display and the buttons will be locked*. Remote control: Slide HOLD switch in the direction of the arrow. "O-n" will light up in the display and the buttons will be locked.
-
 1
1 -
2
-
3
-
4
-
5
-
6
-
7
-
8
-
 9
9 -
 10
10 -
 11
11 -
 12
12 -
 13
13 -
 14
14 -
 15
15 -
 16
16 -
 17
17 -
 18
18 -
 19
19 -
20
-
21
-
22
-
23
-
24
-
25
-
26
-
27
-
28
-
29
-
30
-
31
-
32
-
33
-
34
-
35
-
36
-
37
-
38
-
39
-
40
-
41
-
42
-
43
-
44
-
45
-
46
-
47
 |
 |